When the work for a payment schedule is done, you raise an invoice from it, send it to the customer, and record the payment when it arrives.
Who can do this: owners, admins and office staff. Only owners and admins can remove an invoice.
Before you start: the job needs a payment schedule. See Set Up a Payment Schedule.
Raise the invoice
- Open the job, click the Finance tab, then Invoicing.
- On the payment schedule, click Raise Invoice.
- For a schedule made from job items, tick Show material list on invoice to list the materials on the invoice, and Show material prices to show their prices too.
- Click Convert to Invoice.
The invoice number appears on the schedule, and the PDF is created. It carries your company branding - see How to Add Your Company Branding to PDFs.
Once a schedule has been invoiced, you cannot change or delete it.
Send it to the customer
- On the schedule, click the envelope icon.
- Check the To address, which is filled in from the customer's email, and add any CC addresses.
- Change the Subject and Message if you need to.
- Click Send.
The invoice PDF is attached to the email. To send it yourself instead, click the download icon to save the PDF.
You can change the materials settings on the job's Invoices list, using the arrow beside the invoice, until the invoice has been sent or paid.
Record a payment
- On the schedule, click Add Transaction.
- Check the Amount. It starts at the amount still owed on that schedule. Change it if the customer paid a different amount.
- Set the Payment Date and choose the Payment Method: Cash, Credit Card, Bank Transfer or Cheque.
- Add a Reference, such as the bank reference, if you have one.
- Click Add Transaction.
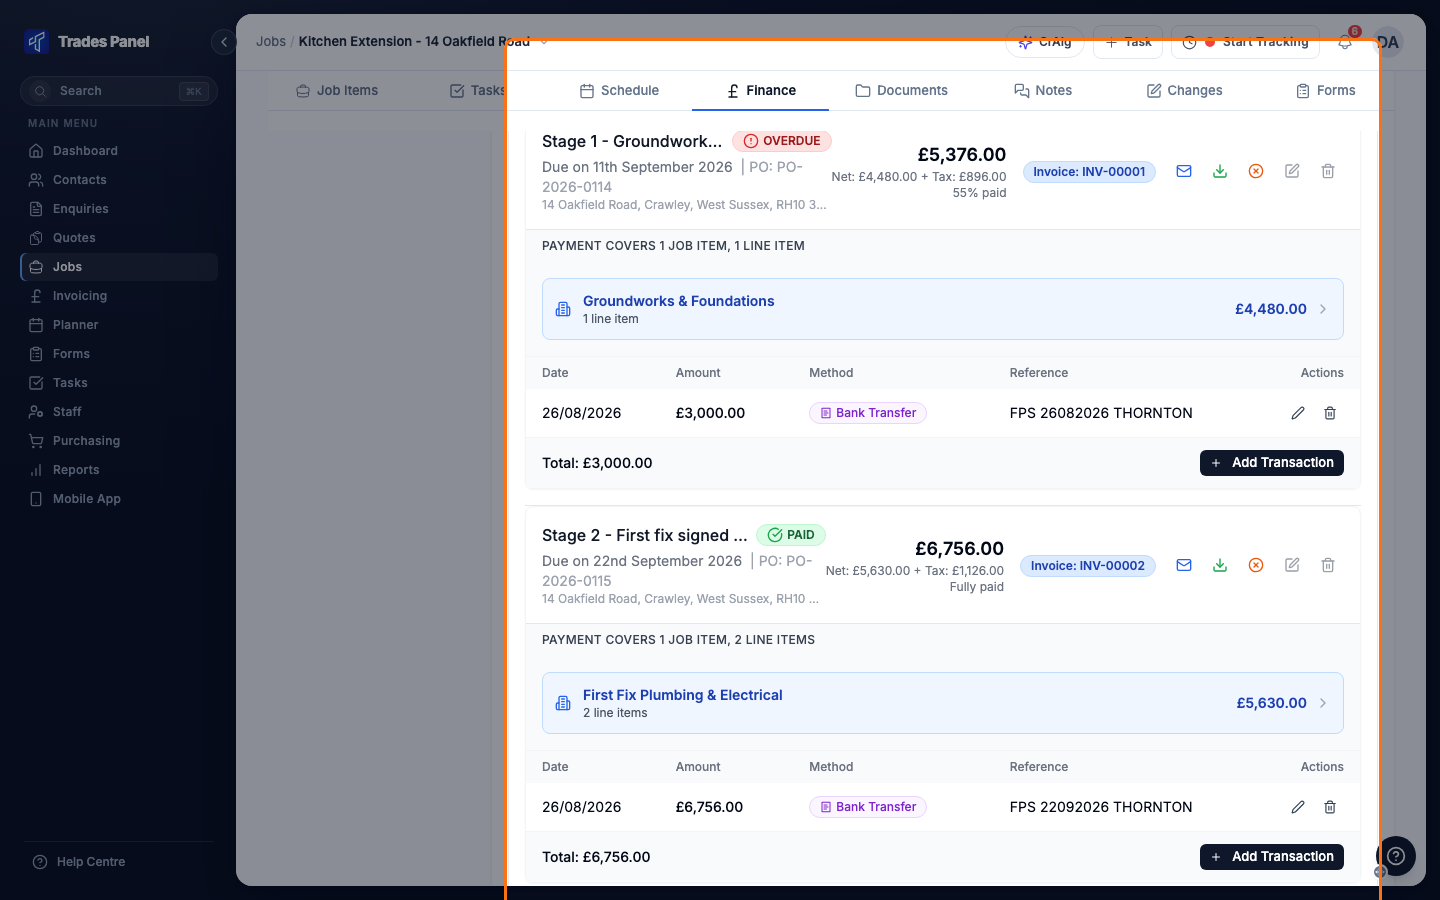
The payment is listed under the schedule. To correct or remove one, use the icons on its row.
You can only record a payment against a schedule that has been invoiced.
Payment schedule statuses
Each schedule shows a status, worked out from its due date and the payments recorded:
- UPCOMING - not yet due, nothing paid
- DUE - due today
- PARTIALLY PAID - part paid and not yet due. The amount shows the percentage paid
- OVERDUE - past its due date and not fully paid
- PAID - paid in full
Record payments from the Invoicing page
Invoicing in the main menu shows every job at once, in three columns: Unscheduled Jobs, Uninvoiced Schedules and Invoices. Invoices are grouped by when they are due, from Overdue to Paid.
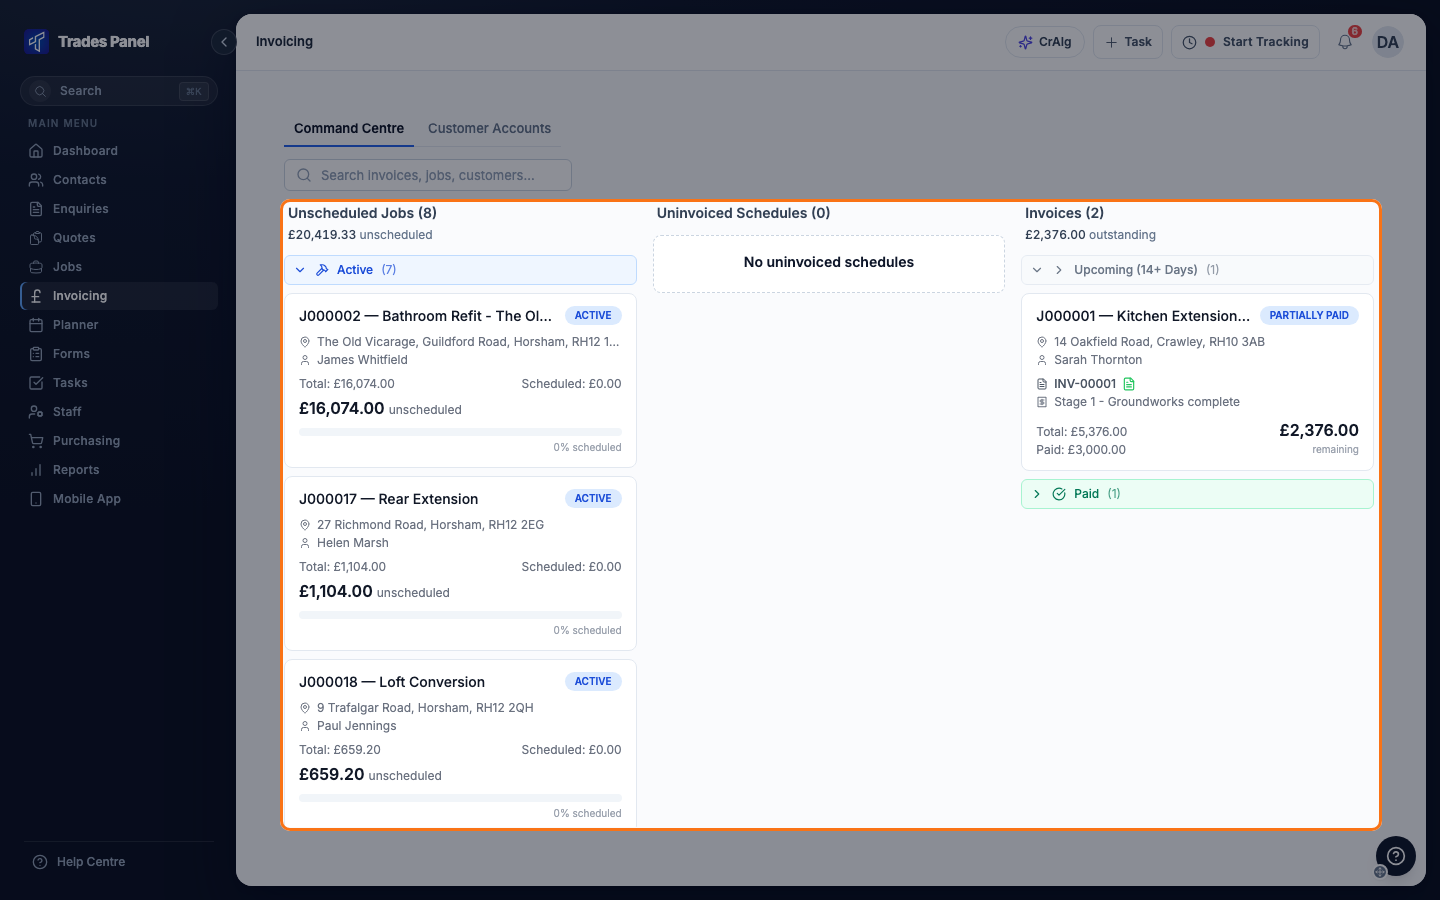
Click an invoice to open it. Record Payment adds a payment in the same way as Add Transaction on the job. Send Invoice, Download PDF and View Job are there too. Click a schedule in Uninvoiced Schedules to raise its invoice with Convert to Invoice.
Remove an invoice
If an invoice was raised by mistake or needs changing, you can remove it and return the schedule to how it was before it was invoiced. This is for invoices that have not been paid.
- On the schedule, click the orange Un-invoice icon.
- Click Remove Invoice.
You can then change the schedule and raise the invoice again.
If your account is connected to Xero and the invoice has been sent to Xero, void it in Xero first. Trades Panel checks Xero before it removes the invoice.
Related articles
- Set Up a Payment Schedule - plan the payments before you invoice them
- VAT and CIS on a Job - VAT and CIS on the invoice
- Send a Customer a Statement - a PDF of a customer's invoices and payments
- How to Add Your Company Branding to PDFs
- your logo and details on the invoice
- The Job Finance Tab - the job's income and costs together
- Add and Manage Contacts - the customer email address the invoice is sent to