What It Does
The Materials section in TradesPanel allows you to plan, manage, and track materials across all of your jobs.
It provides a forward view of what materials are needed and when, keeps quote requests and purchase orders organised, and ensures stock levels remain accurate as materials move in and out of jobs.
Accessing the Materials Section
What It Does
Gives you access to material planning, procurement, and stock management tools.
Steps
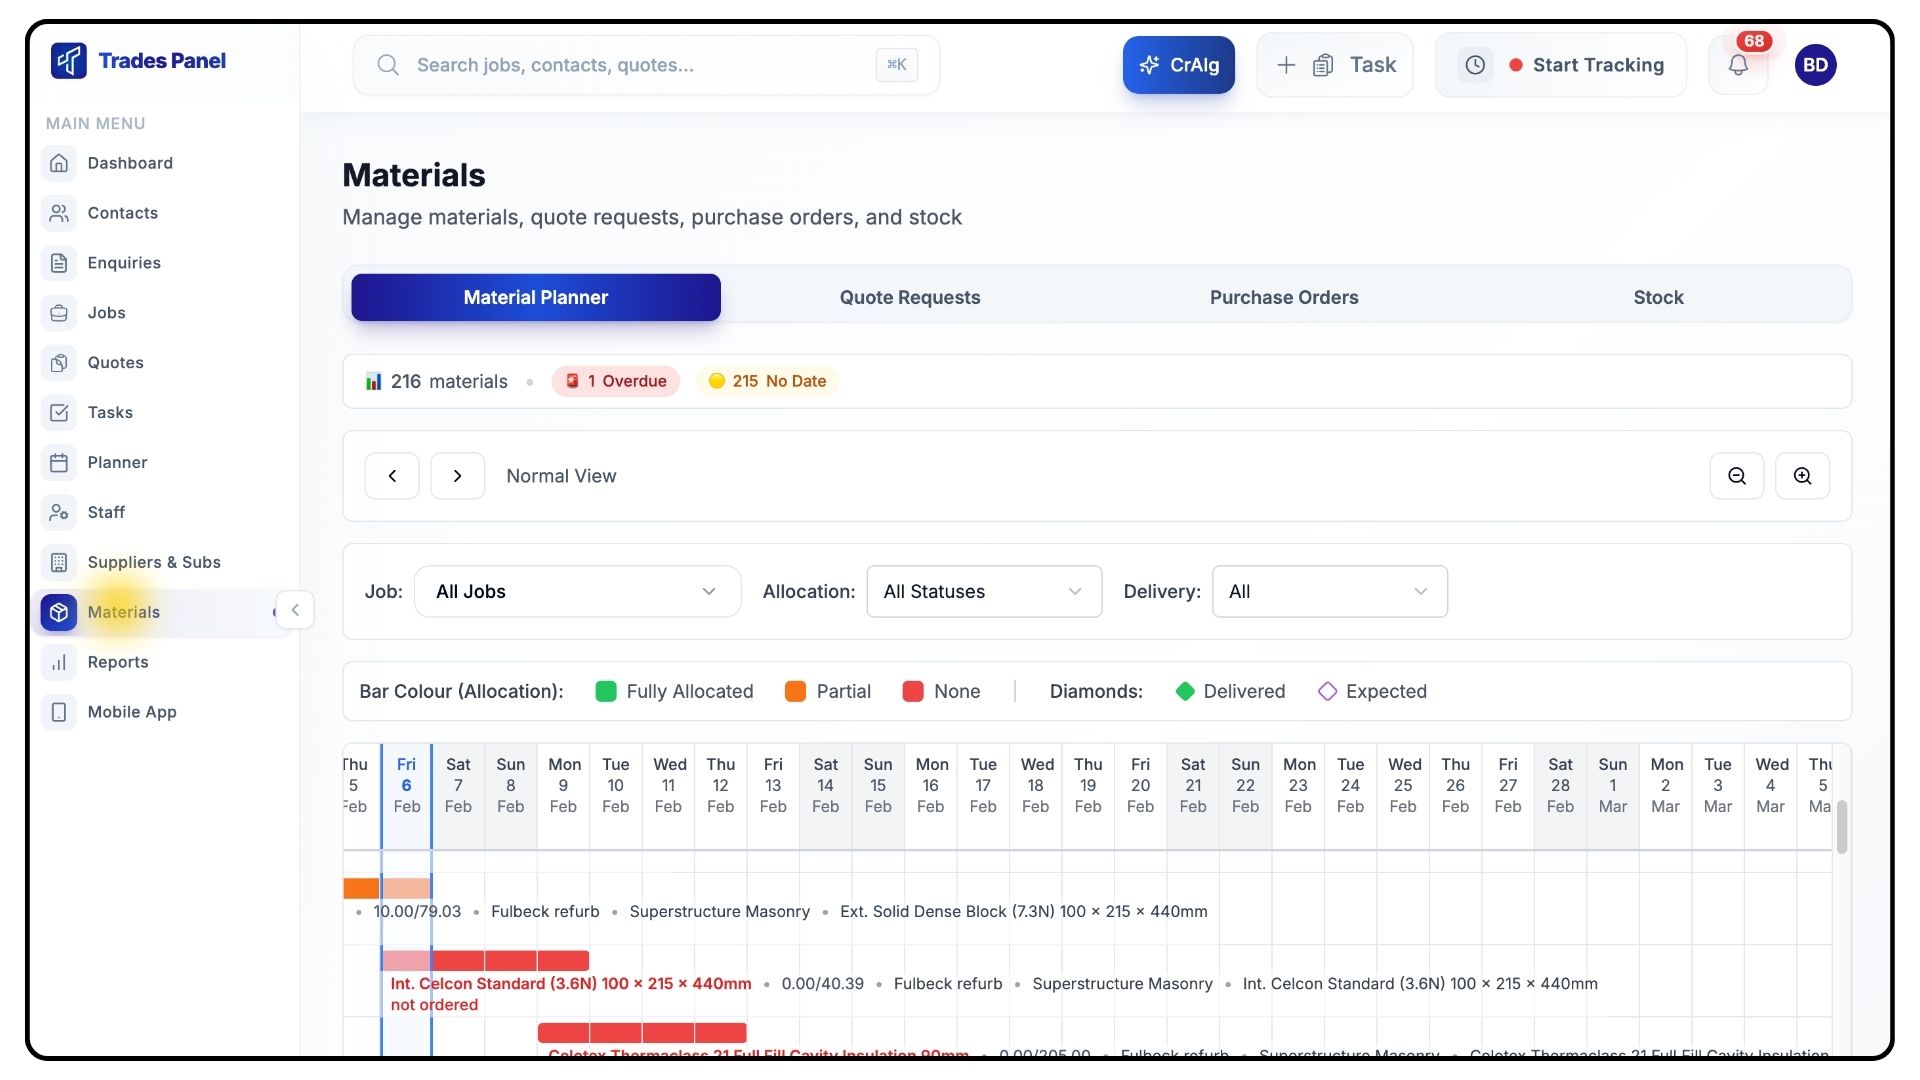
Click Materials from the main menu.
The Materials section is split into four areas:
Material Planner
Quote Requests
Purchase Orders
Stock
The Quote Requests and Purchase Orders tabs store all related documents in one place for easy review.
Using the Material Planner
What It Does
Shows a forward-looking view of all materials required across all jobs, helping you plan ahead and avoid delays.
Steps
From the default planner view, you’ll see all required materials across all jobs, displayed against the dates they’re needed.
Scroll along the planner timeline to view future requirements.
If you scroll to a point where no materials are shown, an arrow will appear on the left-hand side. Click this to return to the present date.
At the top of the planner, you’ll see:
Total quantity of materials required for the visible date range
Totals for Overdue, No Date, On Track, and Delivered
Clicking any of these totals filters the planner to show only matching materials.
Use the magnify icons on the right-hand side to zoom the date range in or out. Totals update automatically as the range changes.
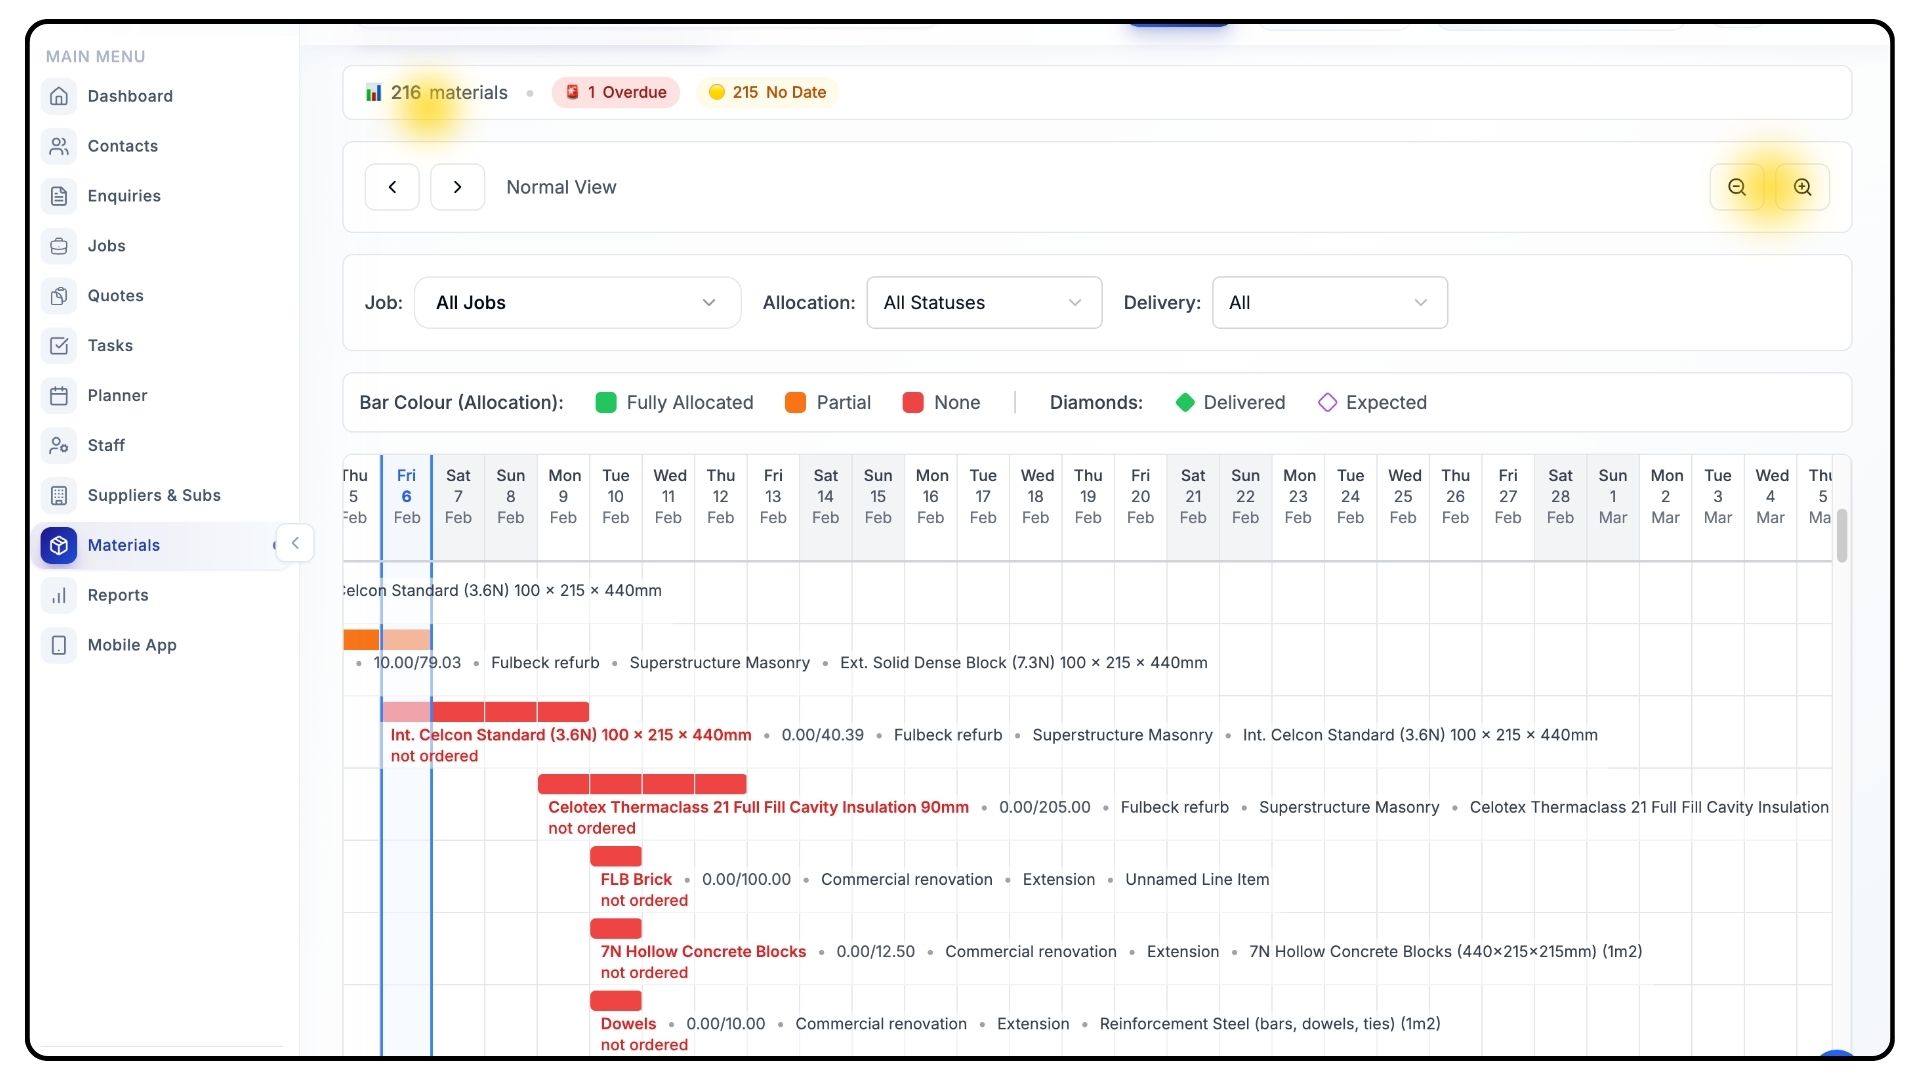
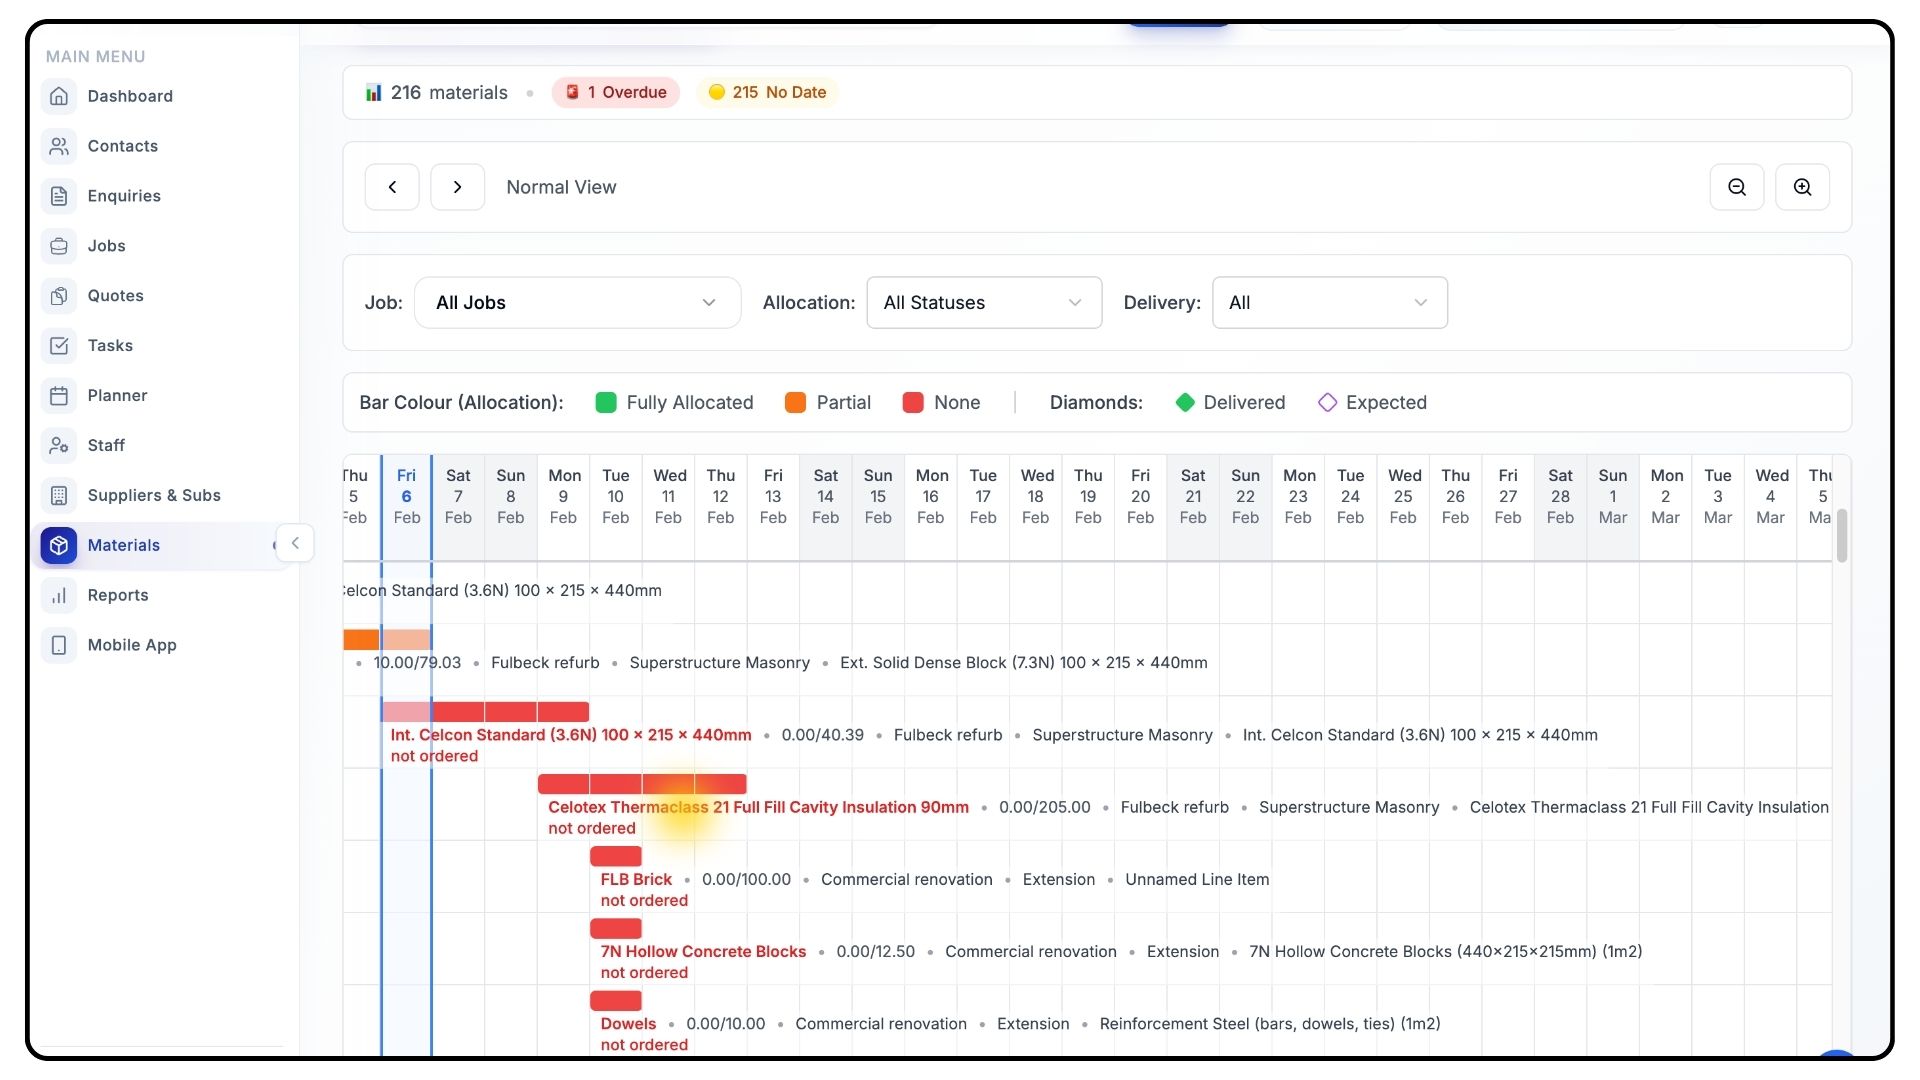
Filtering and Reading Planner Indicators
What It Does
Helps you quickly identify delayed, missing, or upcoming materials.
Steps
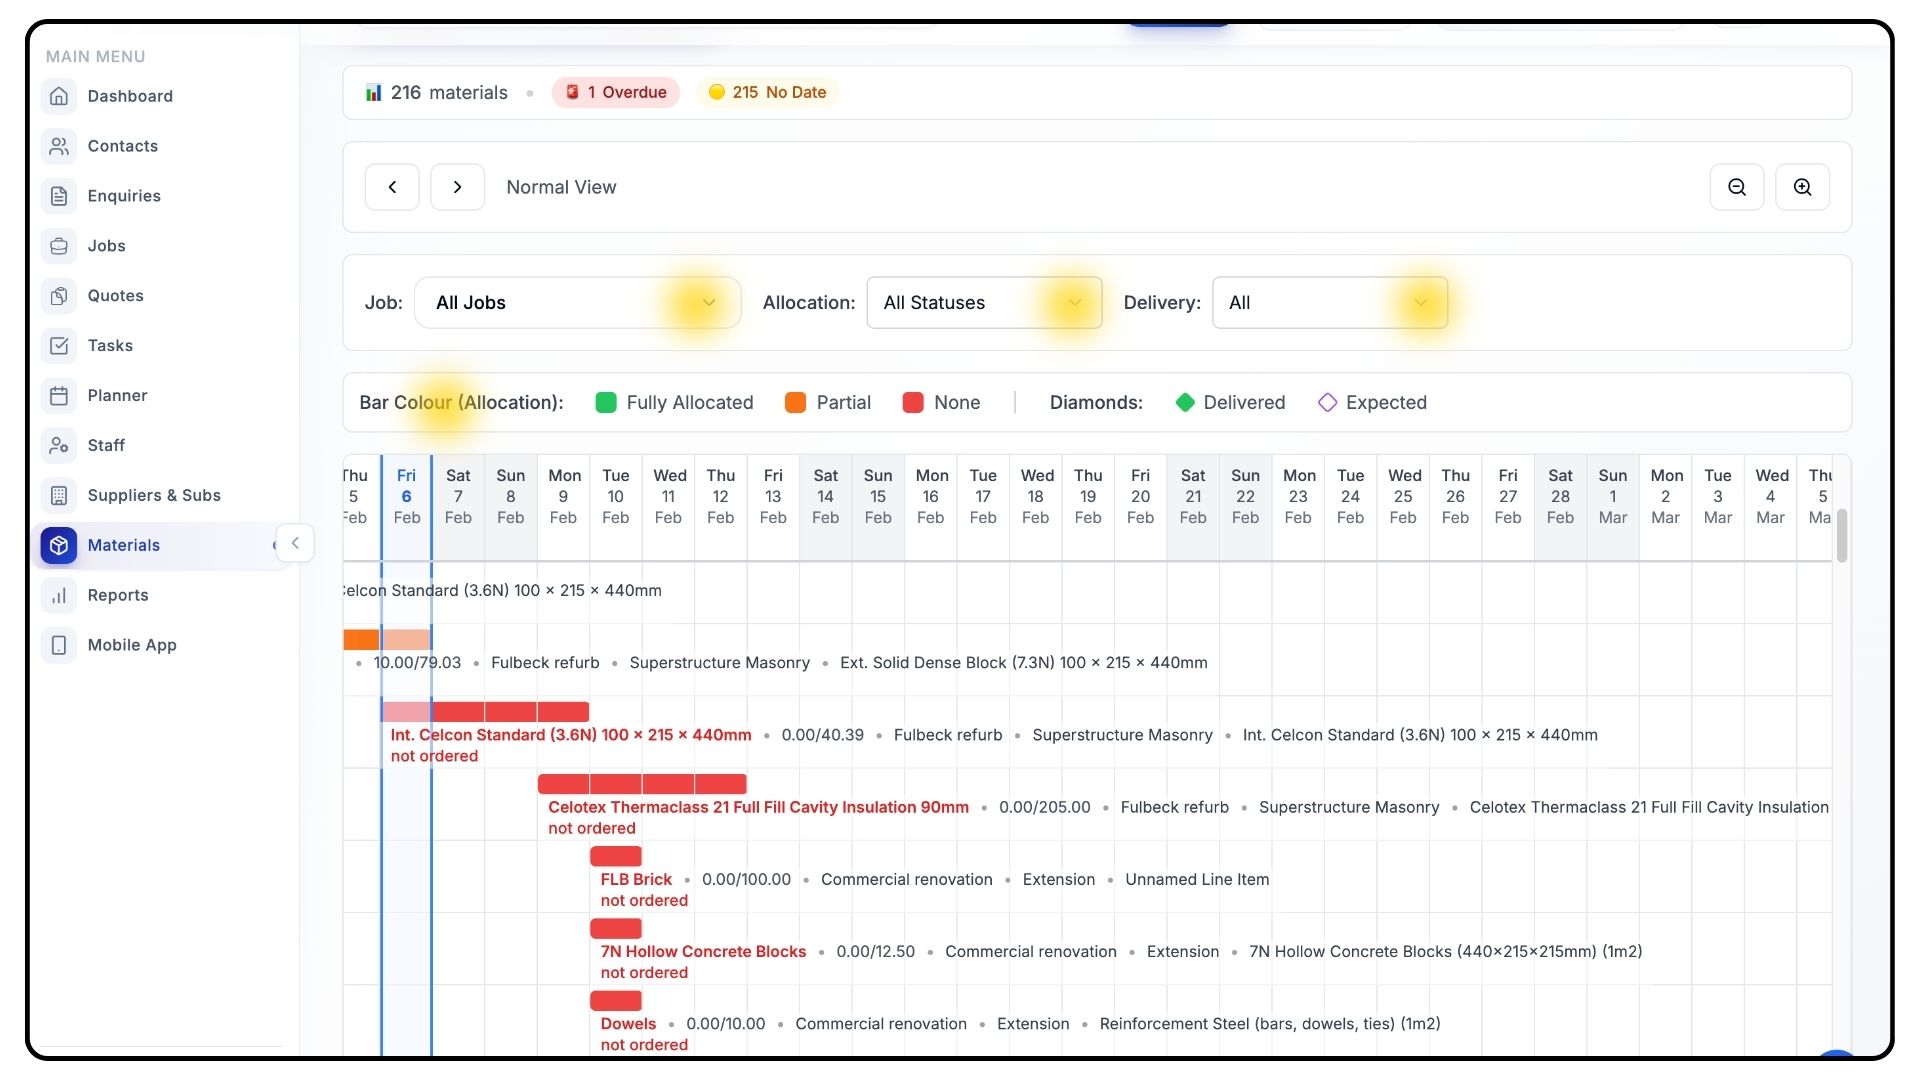
Use the filters below the planner to:
Filter by Job
Filter by Allocation Status
Filter by Delivery Status
Below the filters, you’ll see a colour guide.
The Material Planner uses:
Colour-coded text
Alert icons
Timeline diamond markers
These indicators show whether materials are overdue, unscheduled, already delivered, or required imminently.
Diamond markers display expected and actual delivery dates, including split deliveries, without cluttering the timeline.
Managing Materials Within a Job
What It Does
Allows you to manage materials at a job and job item level.
Steps
Click on a material name to open a list showing all materials used across the job’s items.
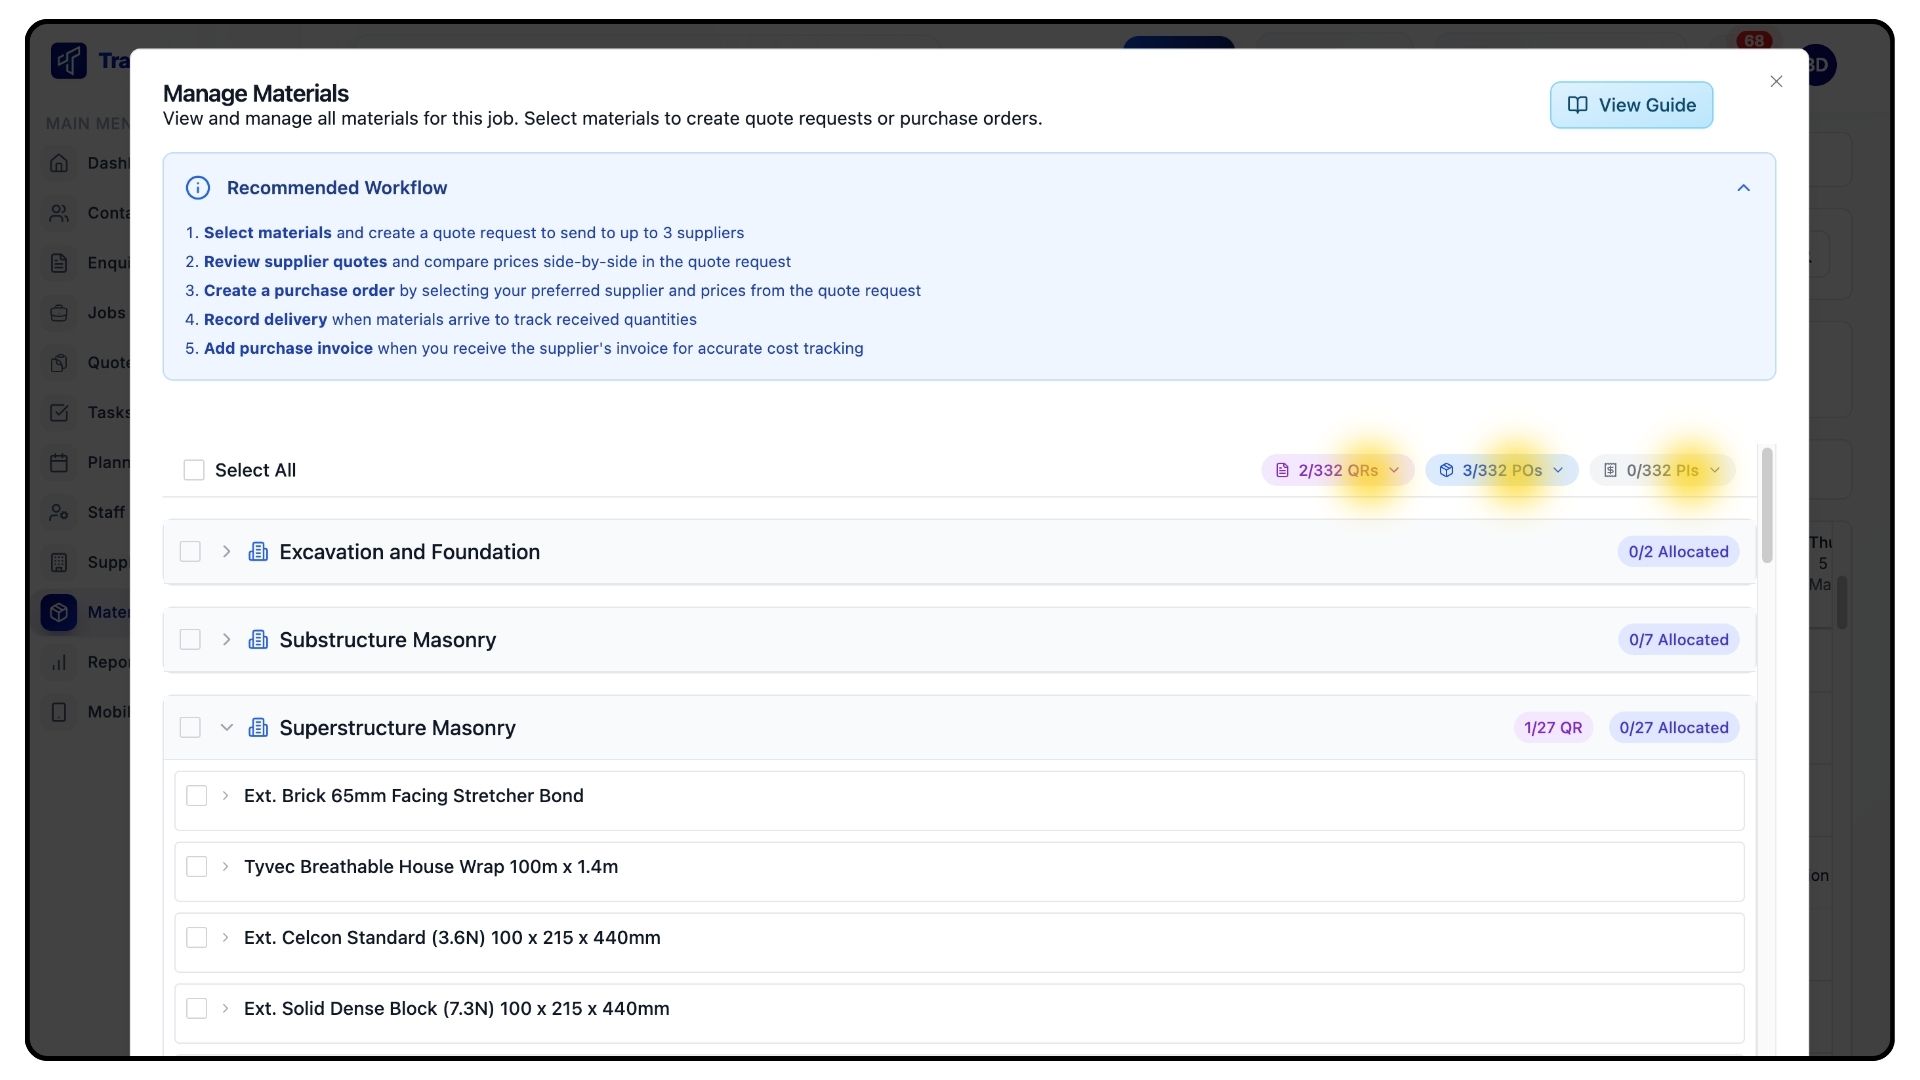
At the top of this page, you’ll see three buttons:
Quote Requests
Purchase Orders
Purchase Invoices
Each button displays two totals:
How many materials are already included
The total number of materials required for the job
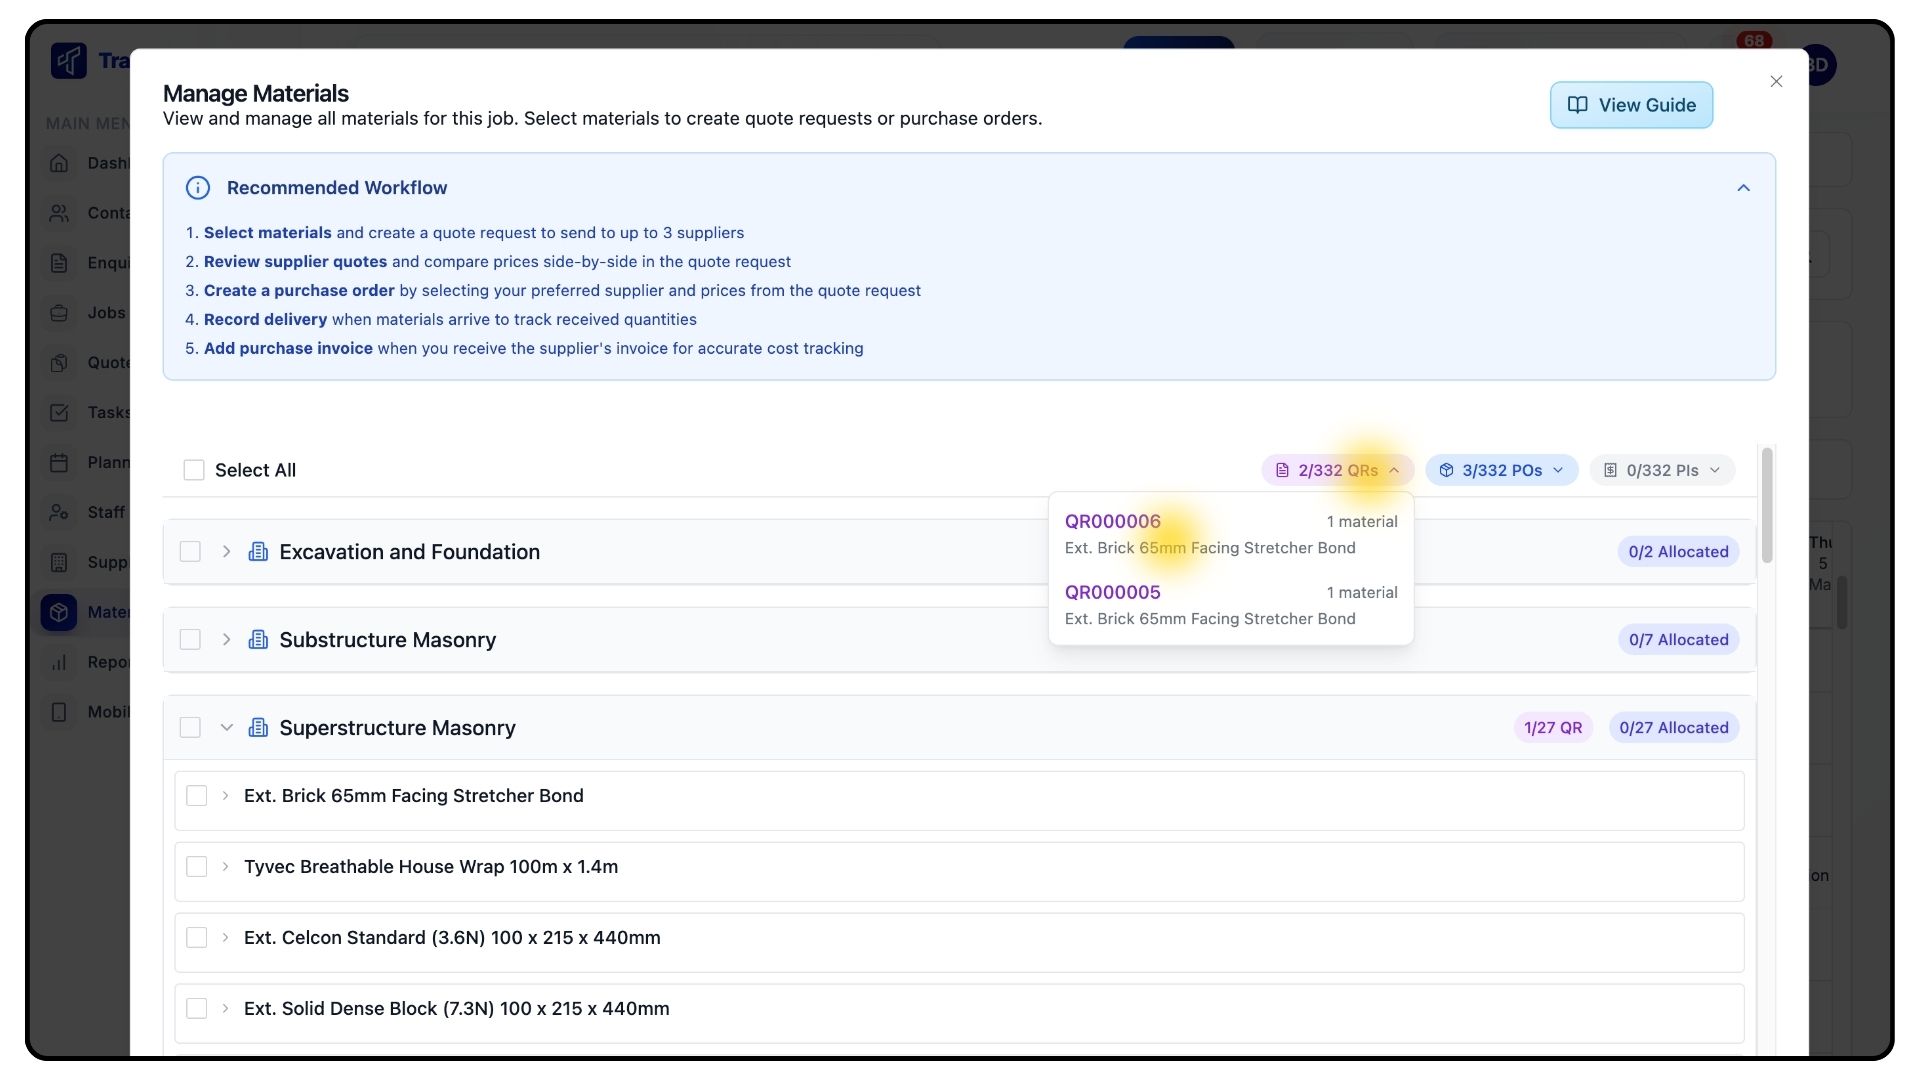
Clicking a button opens a dropdown listing all related documents. Selecting one takes you directly to that record.

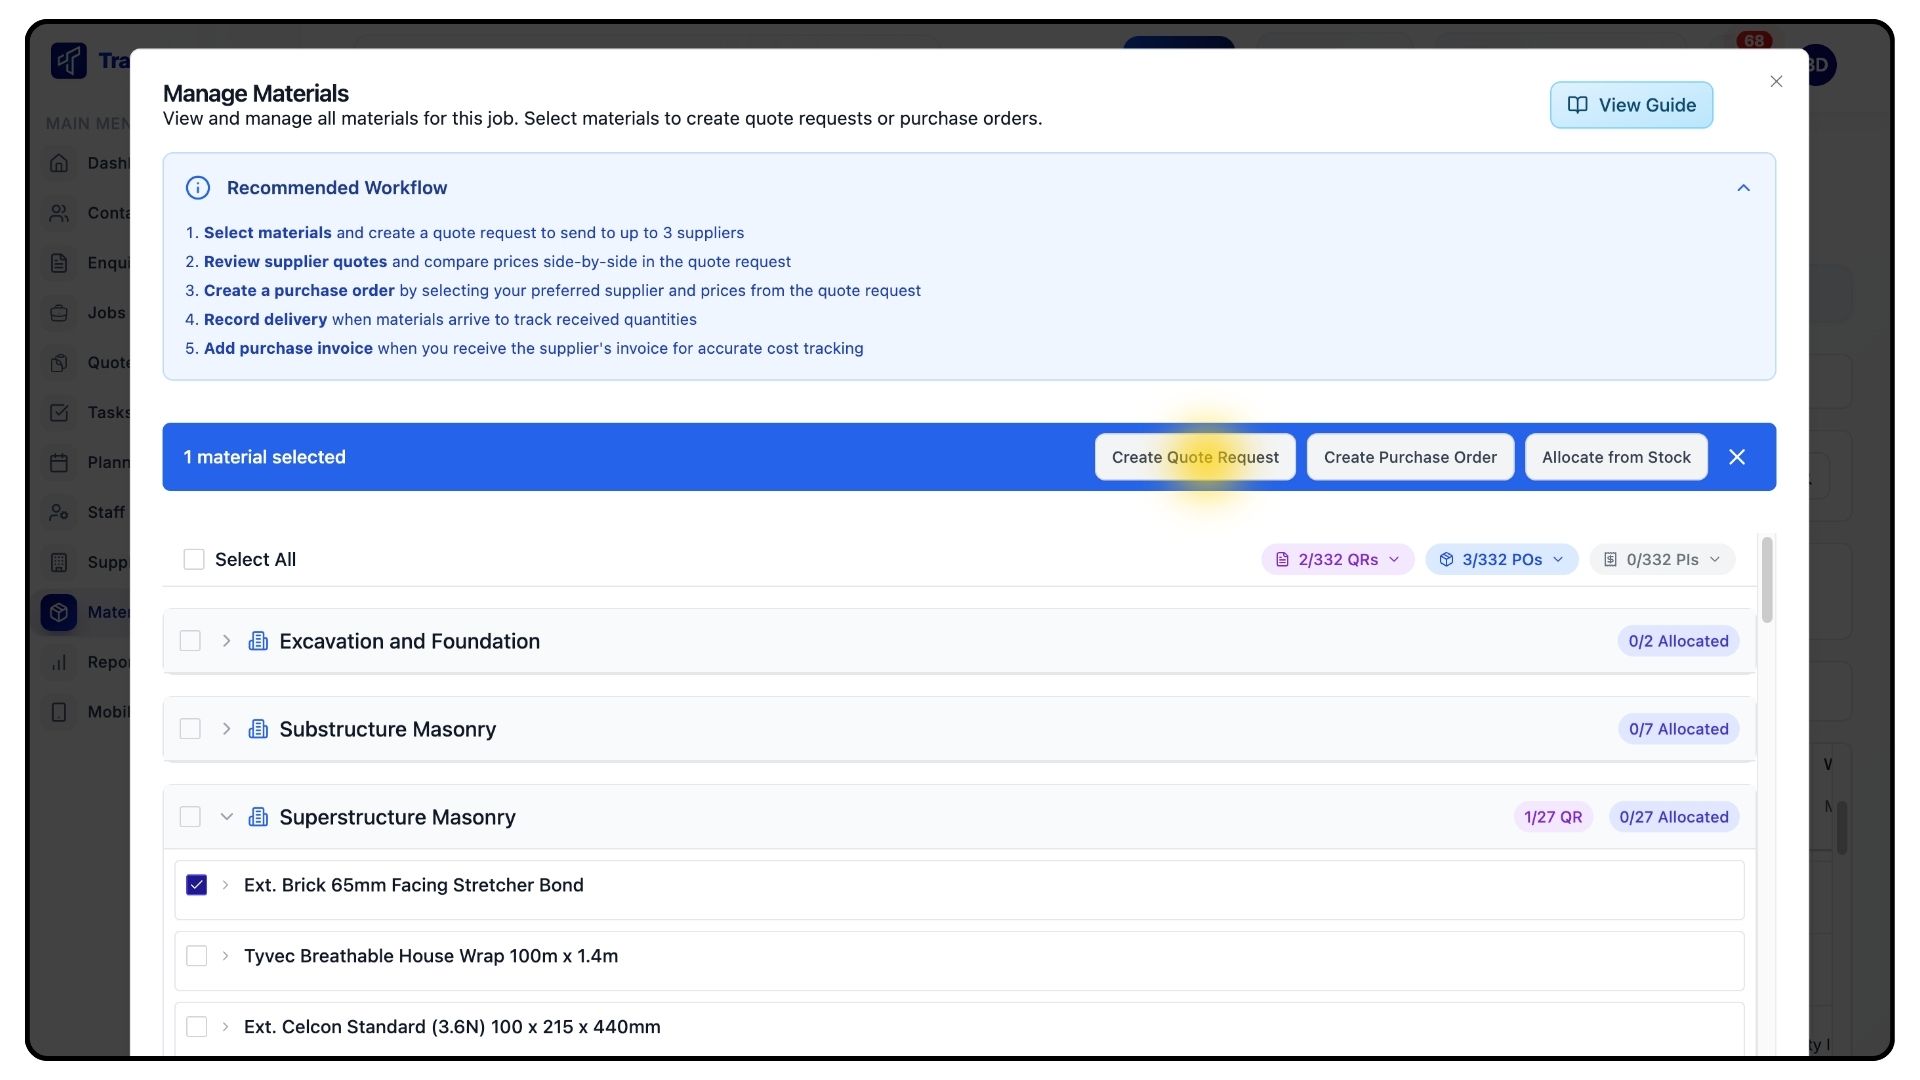
Expand the relevant job item using the arrow, then tick one or more materials.
Once selected, three options appear:
Create Quote Request
Create Purchase Order
Allocate from Stock
Creating Quote Requests
What It Does
Allows you to request and compare supplier pricing.
Steps
Select Create Quote Request.
Choose the supplier or suppliers you want to send the request to.
Click Create.

The quote request opens, where you can download the PDF and send it to suppliers.
If multiple suppliers are selected, you can compare their prices side by side.
Once prices are received, enter them into the quote request and click Save.
You can then:
Select a supplier and convert the quote into a purchase order, or
Return to the material management view and create a purchase order from there
Creating and Managing Purchase Orders
What It Does
Allows you to order materials and track delivery progress.
Steps
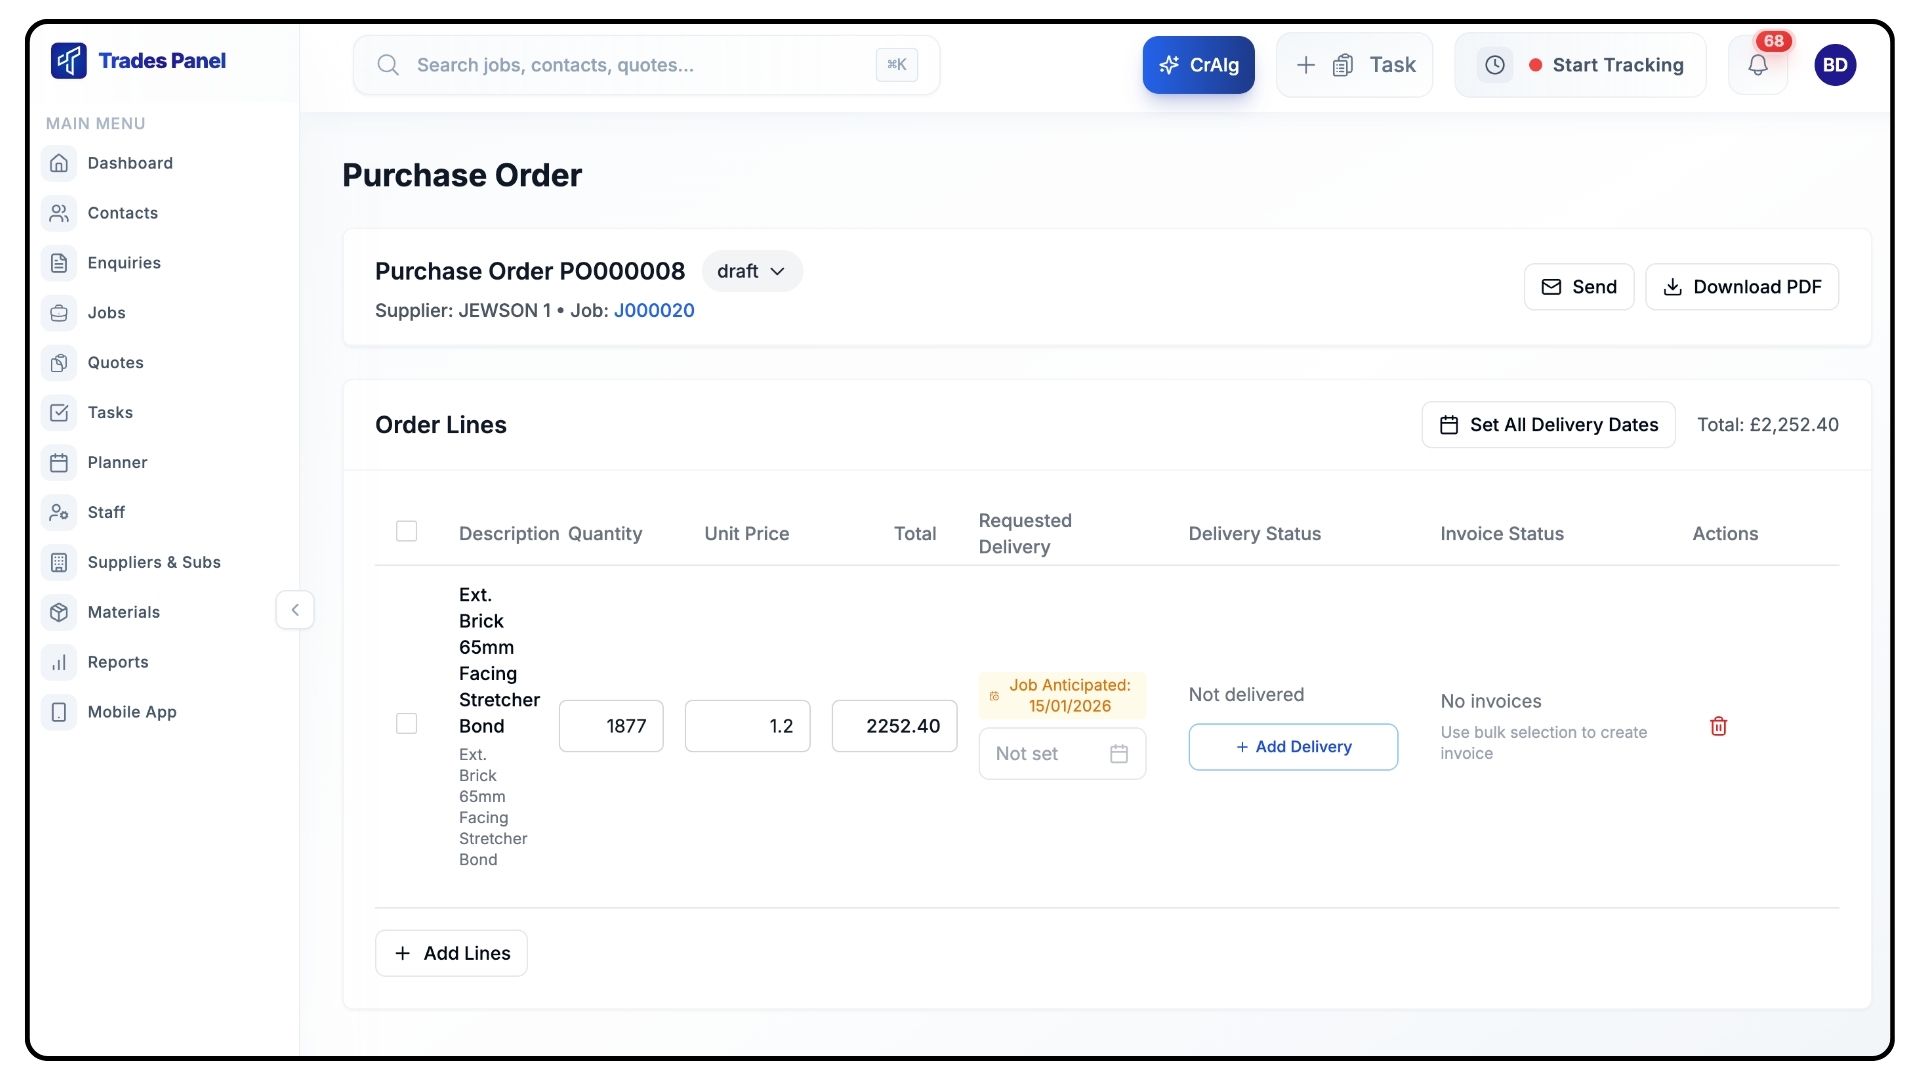
Within a purchase order:
Review material quantities
Enter unit prices if required
Set a requested delivery date
If the material already has an anticipated or scheduled due date, click it to prefill the delivery date.
You can download the purchase order as a PDF and send it to your supplier.
Once materials arrive, return to the purchase order and update the delivery status.
This automatically updates the delivery marker in the Material Planner overview.
Allocating Materials from Stock
What It Does
Deducts materials from stock instead of ordering new ones.
Steps
Return to the material management view.

Select the materials you want to allocate and click Allocate from Stock.
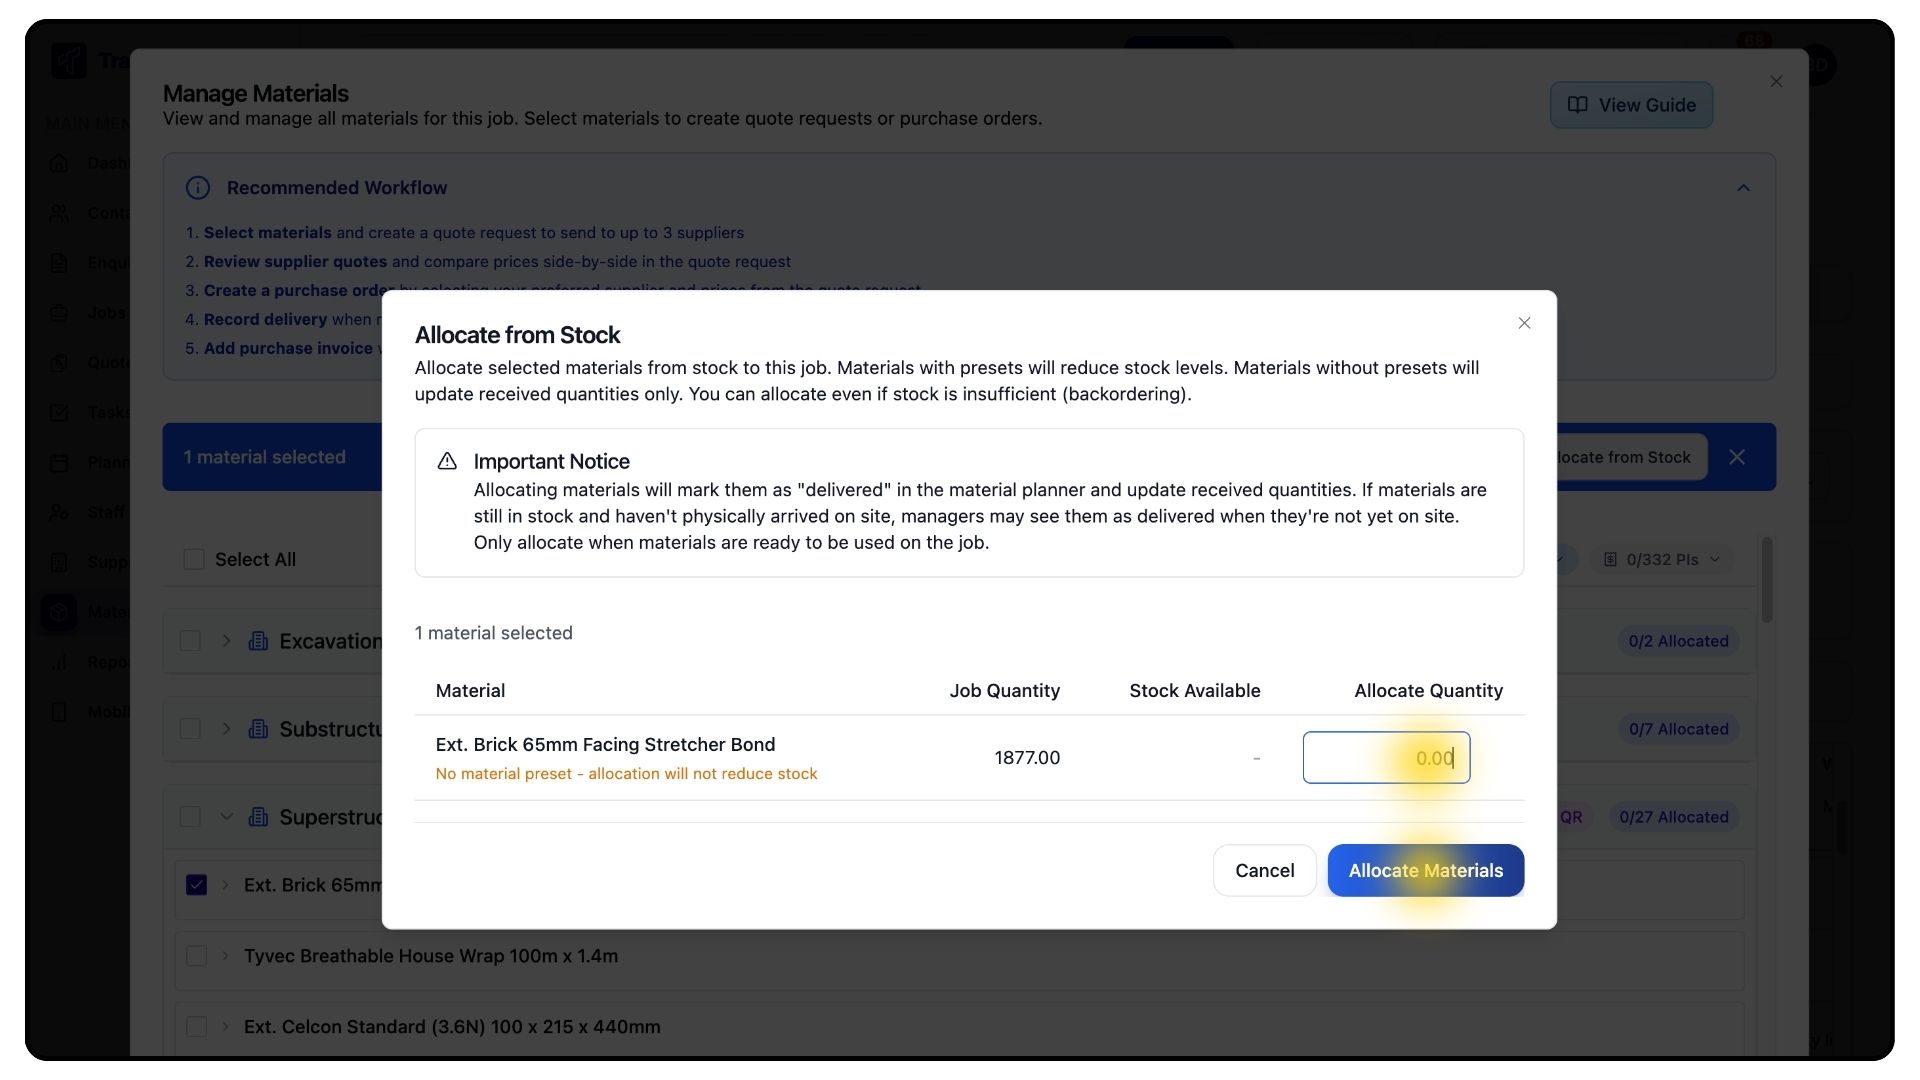
Enter the quantity to allocate and confirm.
Stock levels update automatically.
If materials were over-ordered for a job, they can be allocated back into stock from the Add Delivery dialog.
Managing Stock
What It Does
Provides full visibility of your material stock levels and movements.
Steps
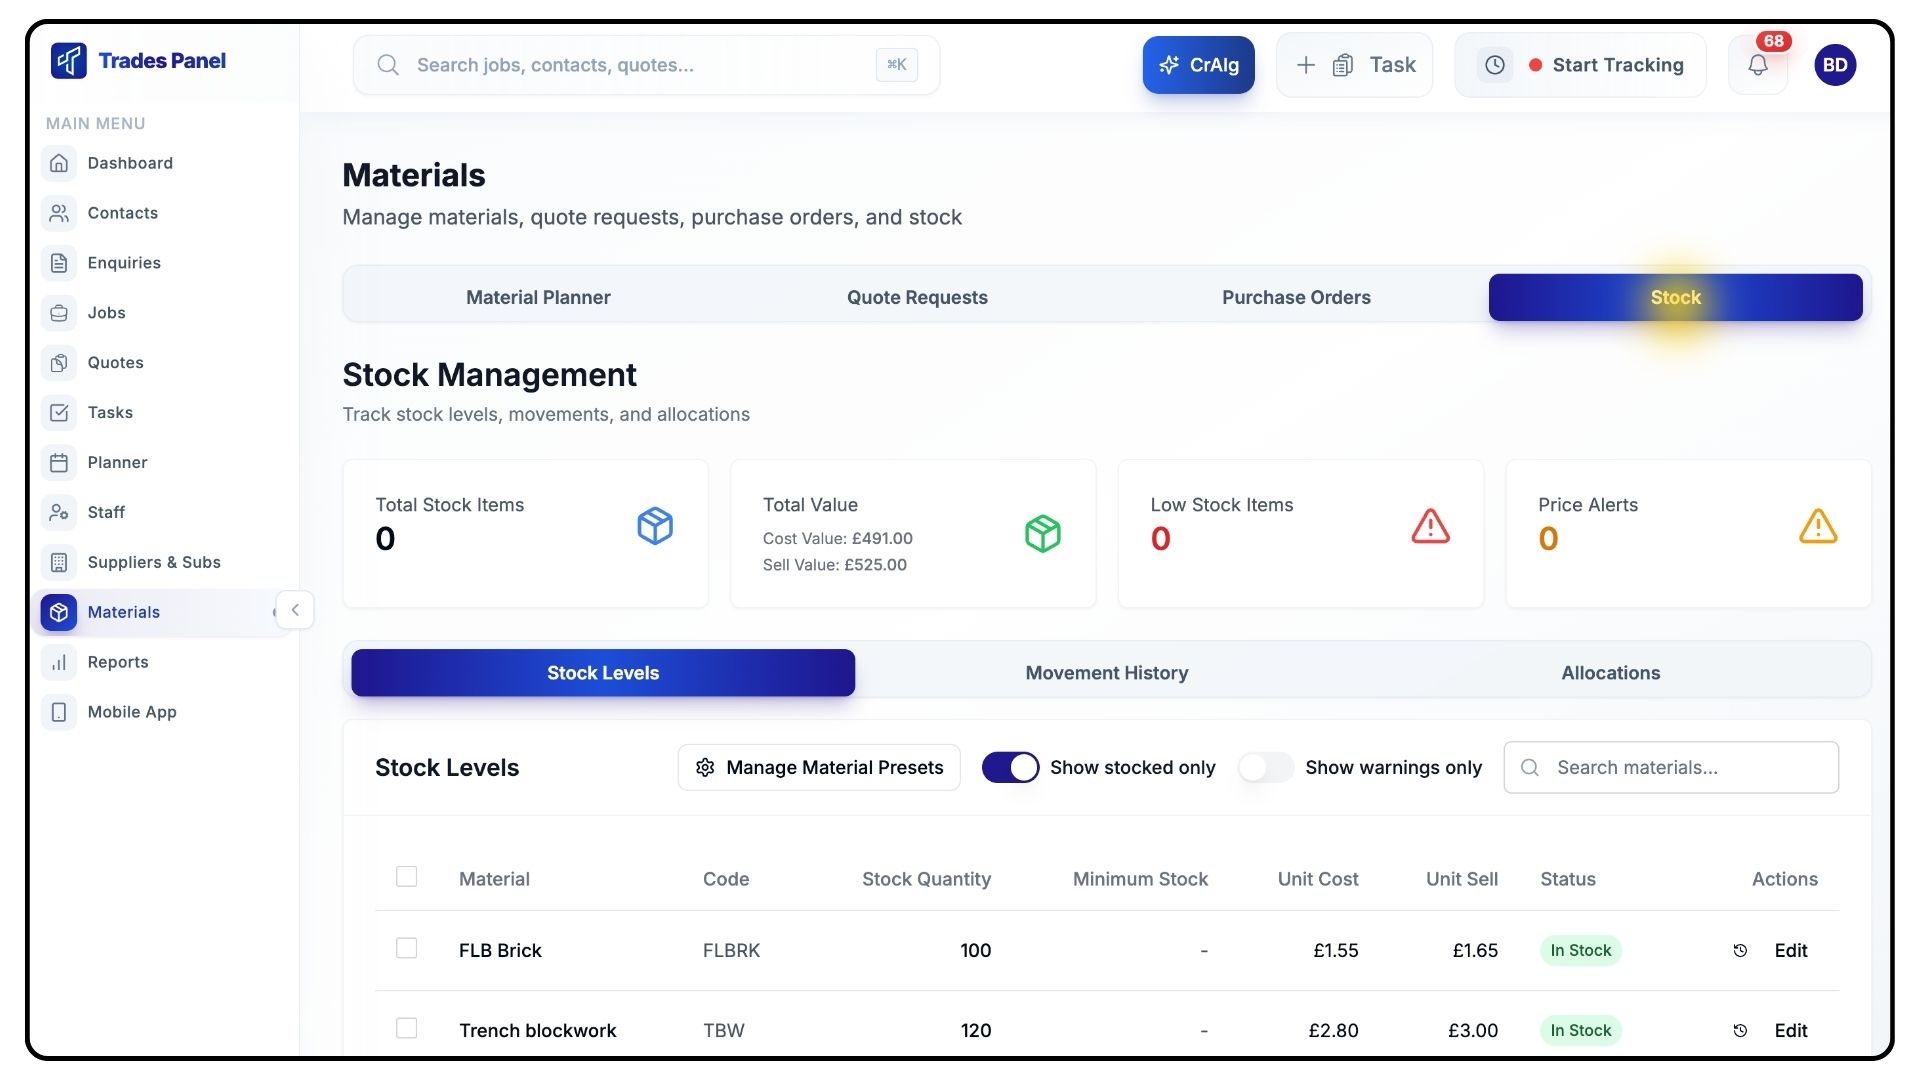
Open the Stock tab.
At the top, you’ll see a summary showing:
Total stock quantity
Total stock value
Low stock items
Price alerts
Stock Levels
What It Does
Shows current quantities and alerts for stocked materials.
Steps
Open Stock Levels.
Each material shows:
Quantity held
Minimum stock level
Unit cost
Sell price
Status
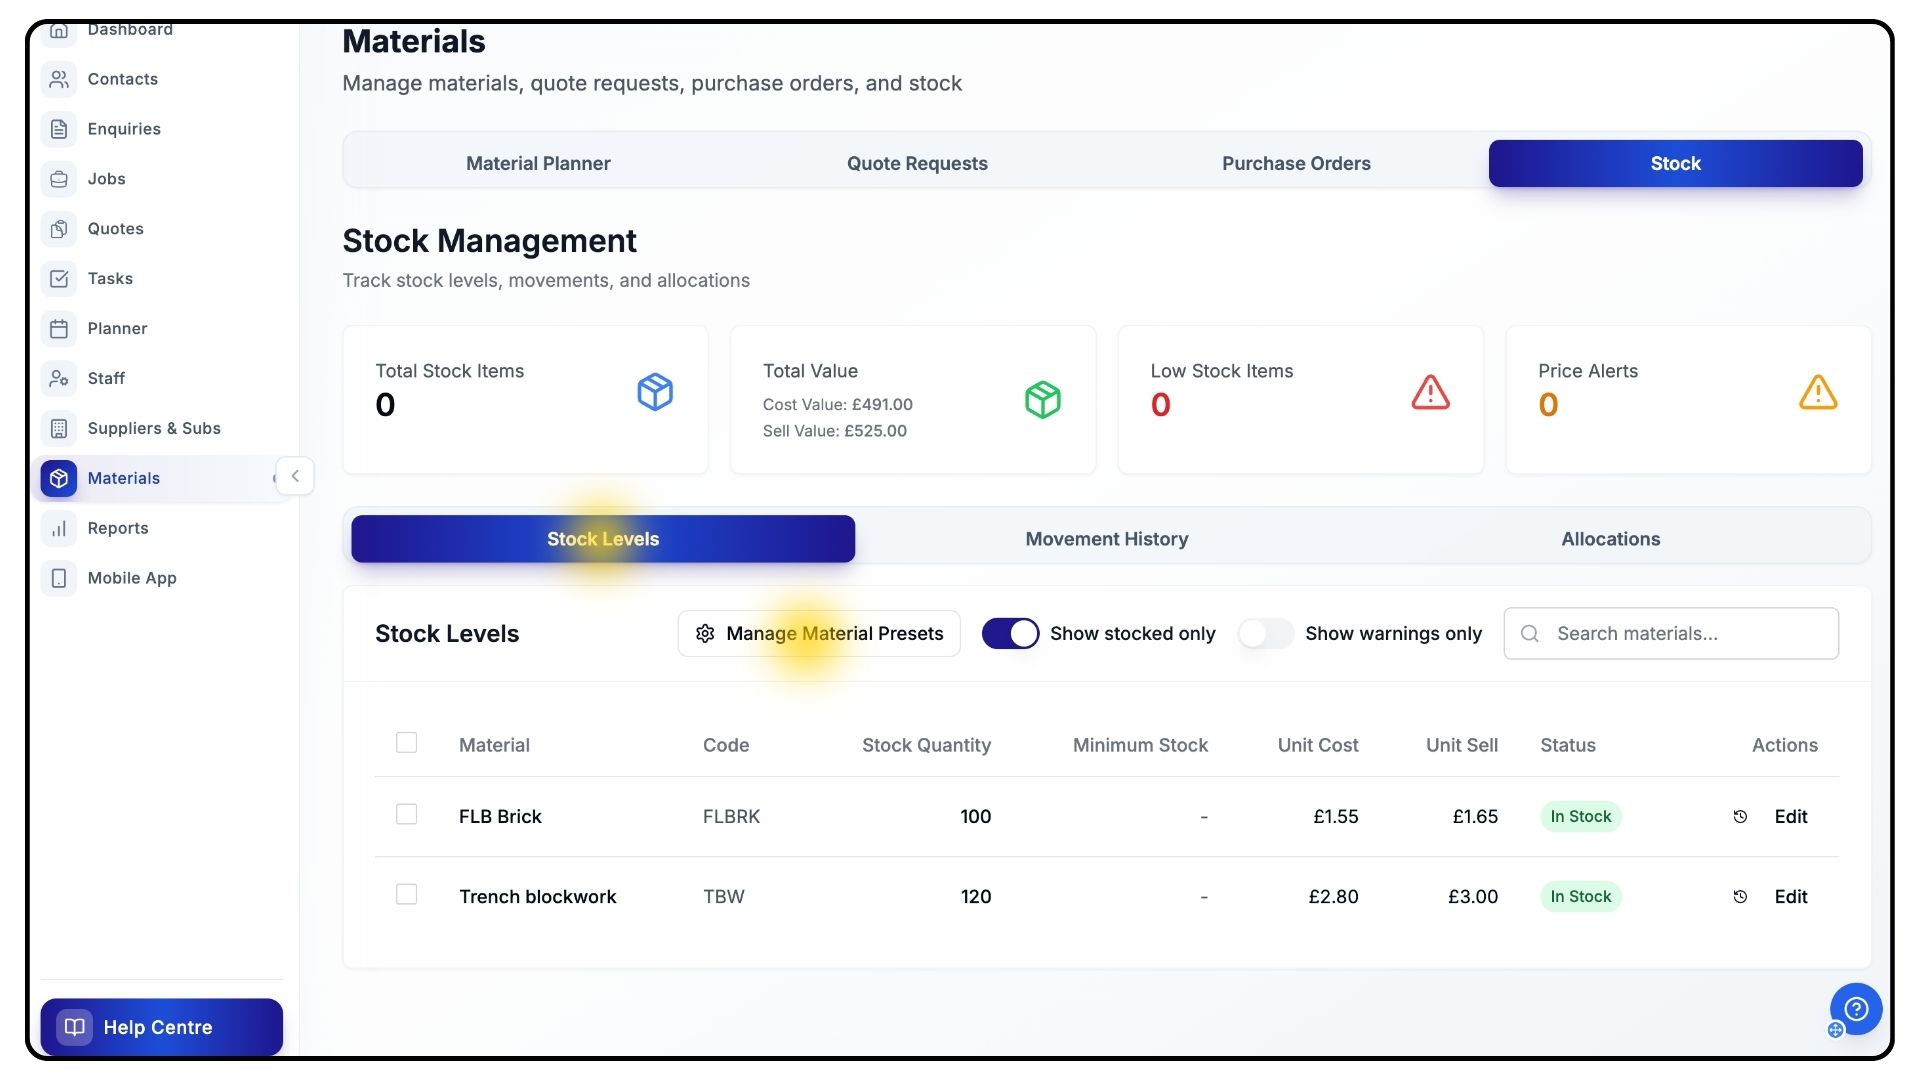
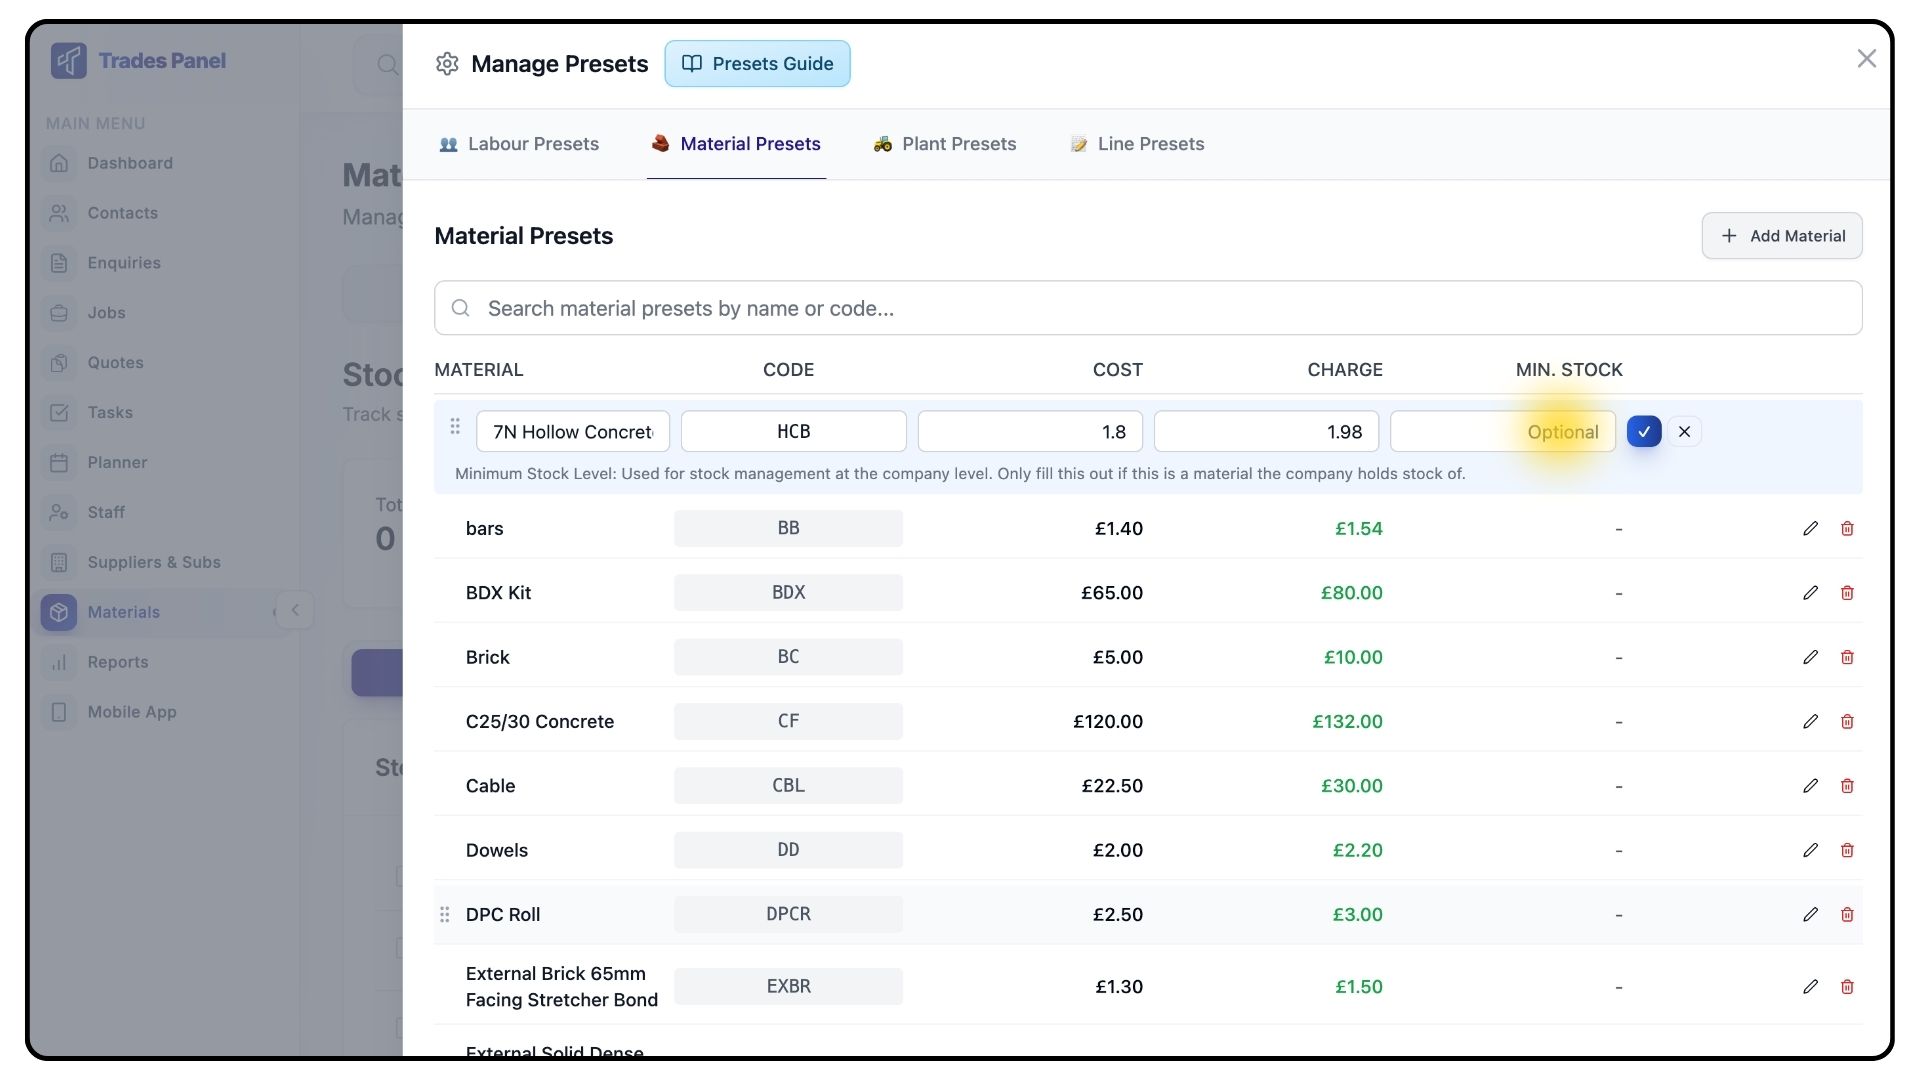
To set a minimum stock level, click Manage Material Preset and adjust the minimum value.
You can filter to show:
Stocked items only
Warnings only
Use the search bar to find specific materials.
Click Edit to make changes.
Movement History
What It Does
Provides a full audit trail of stock movements.
Steps
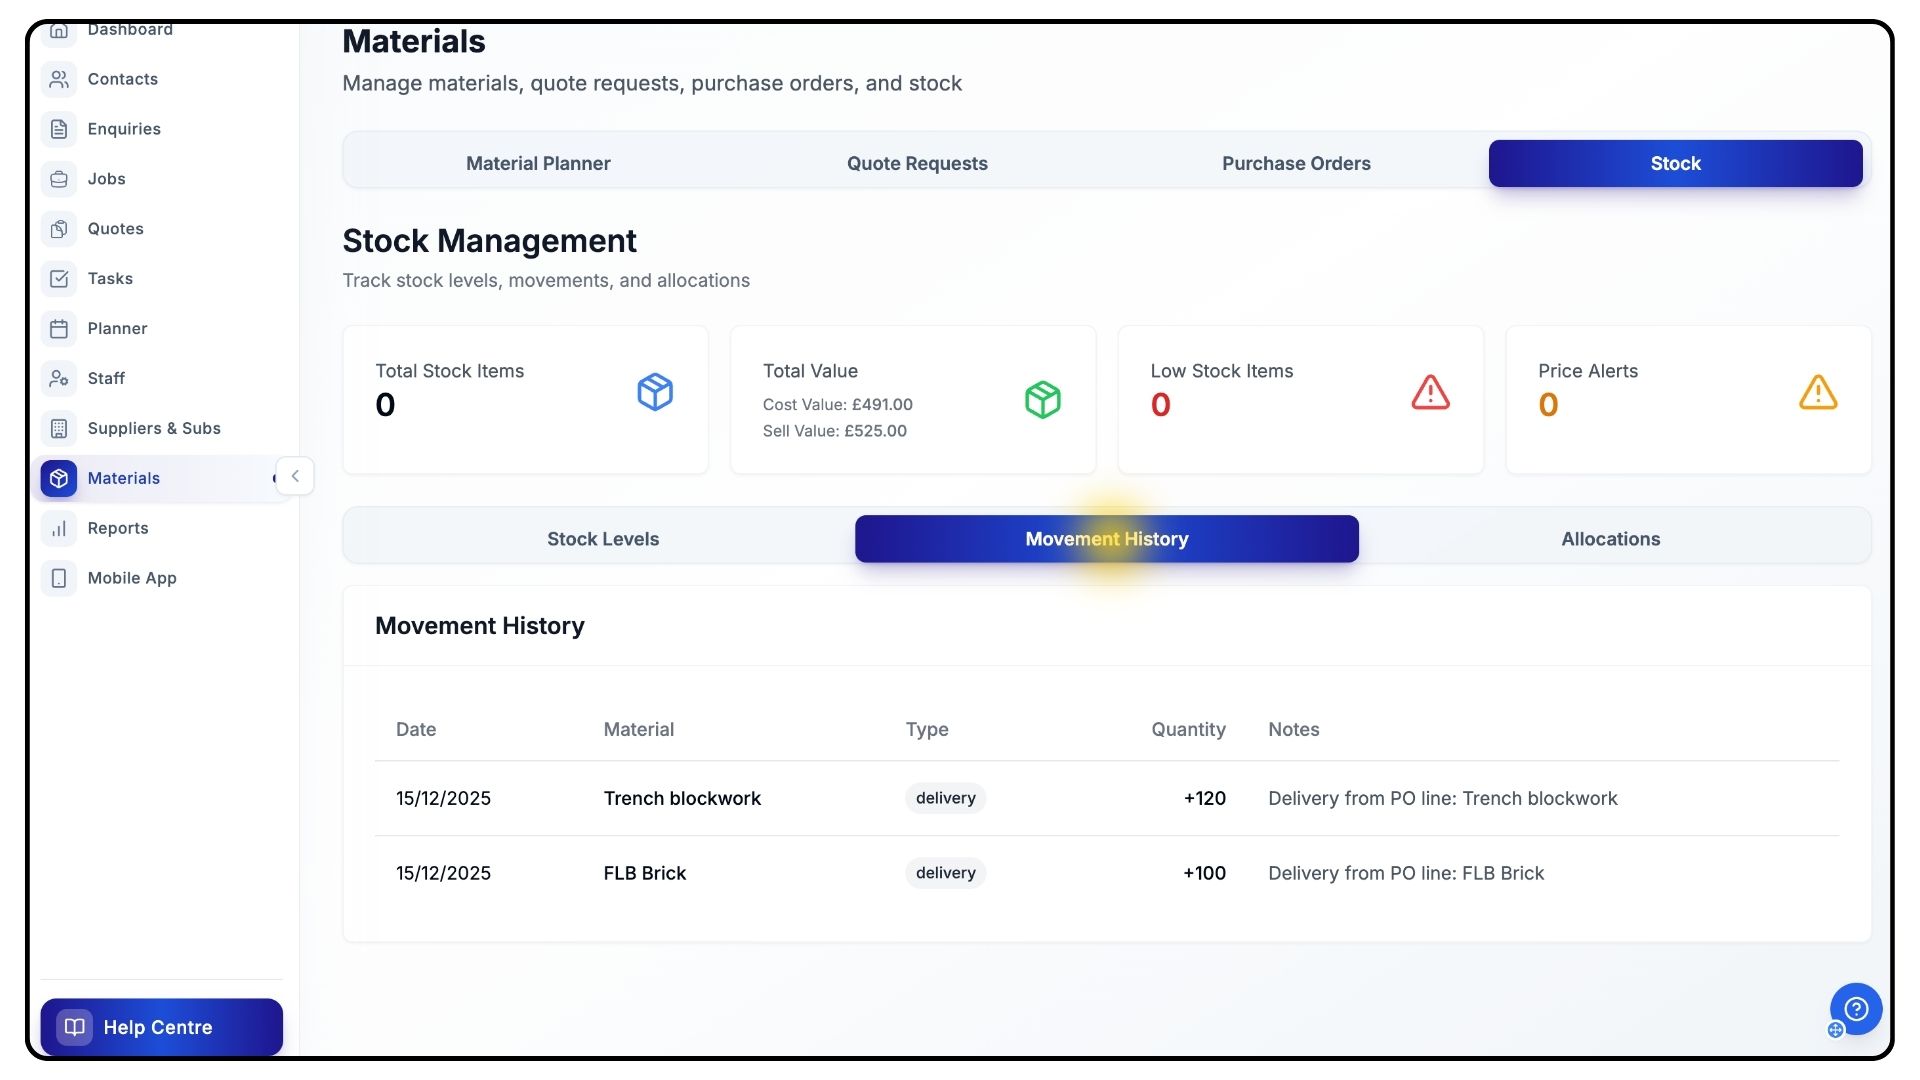
Open the Movement History tab.
Here you’ll see:
Dates
Materials involved
Movement type
Quantities
This shows when materials were delivered, allocated, or moved in or out of stock.
Allocations
What It Does
Shows where stock has been used.
Steps
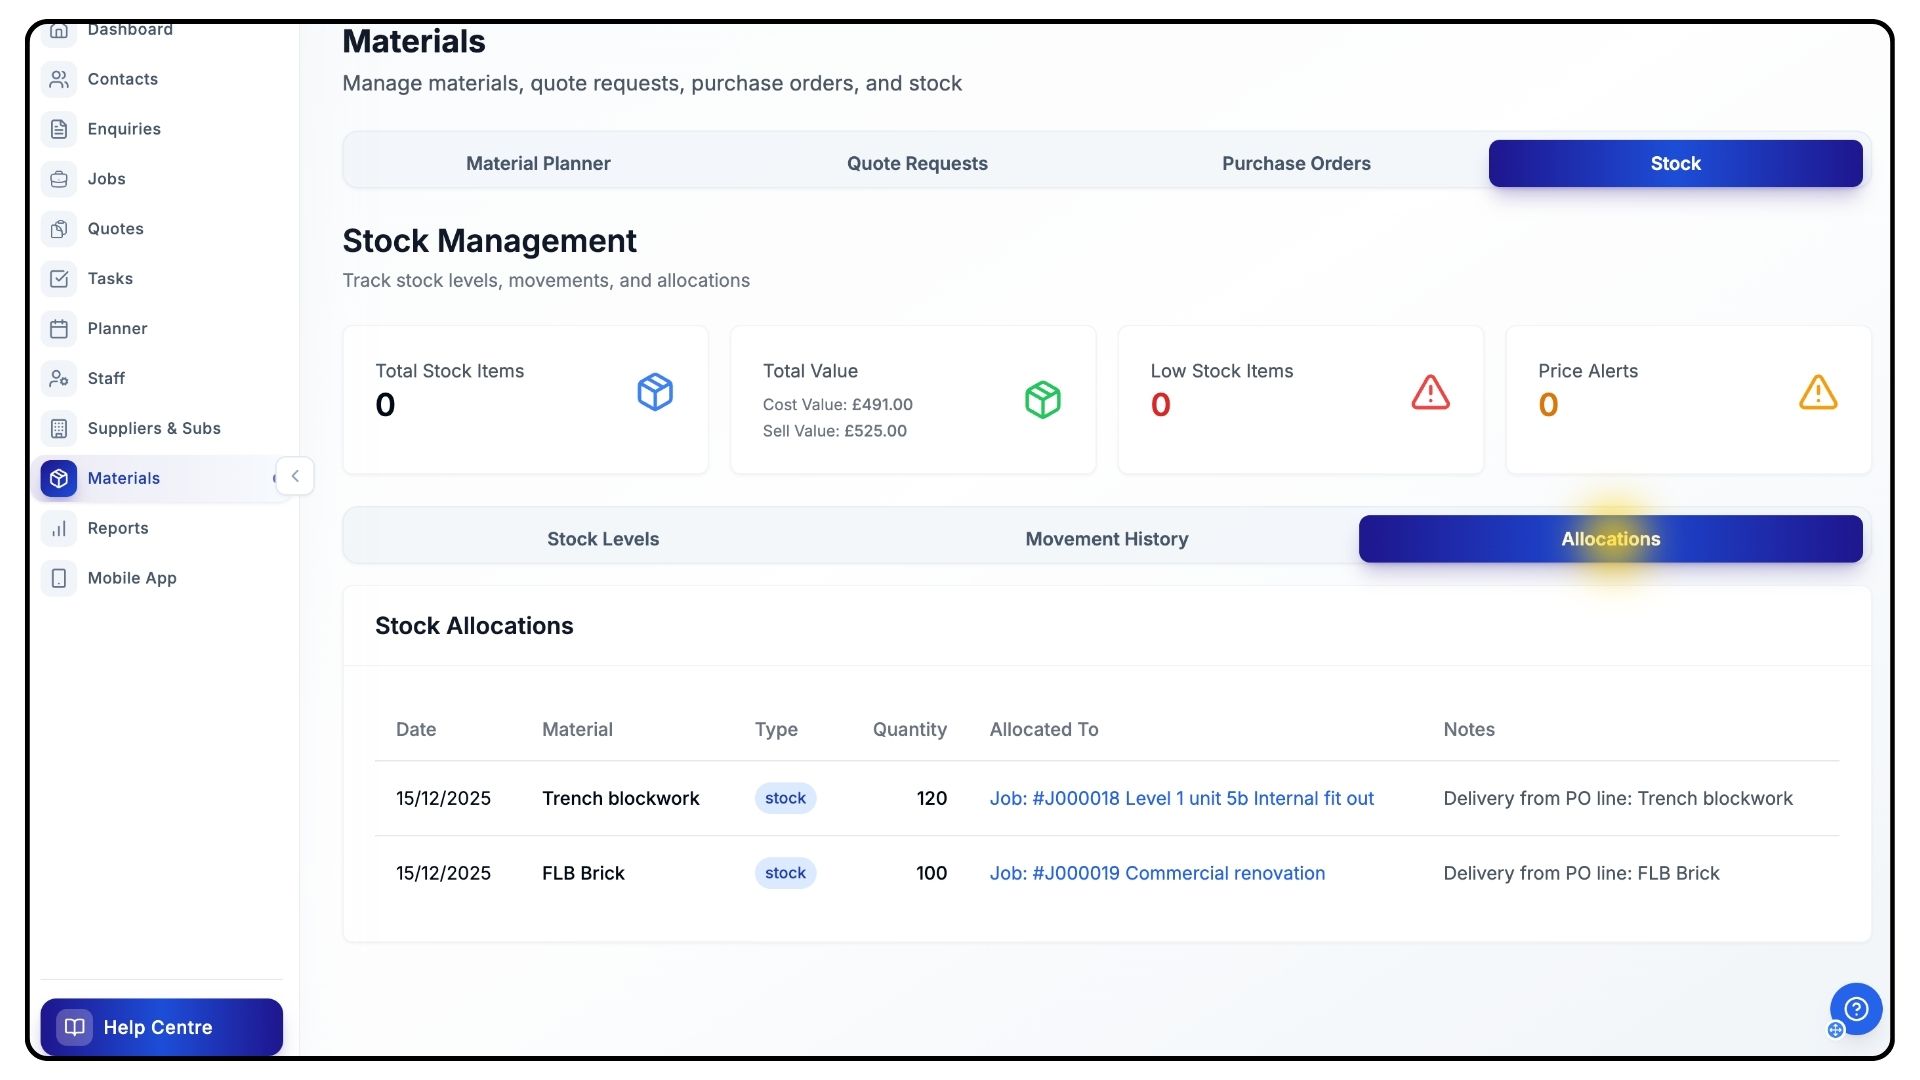
Open the Allocations tab.
This lists:
Allocation date
Quantity
Allocation type
Destination
Helping you understand exactly where stock has gone.
Final Notes
Keeps material planning, procurement, and stock control aligned across all jobs.
And that’s how to plan, manage, and track materials using the Materials section in TradesPanel.
For more tutorials and step-by-step walkthroughs, head to the Quick Start Guides section in the navigation bar.