What It Does
The Suppliers & Subs section in Trades Panel allows you to add and manage your suppliers and subcontractors, store purchase invoices, and track your overall spending with each one.
It’s designed to centralise communication and financial management - keeping everything organised in one place.
Accessing the Suppliers & Subs Section
What It Does
This is where you’ll find all supplier, subcontractor, and purchase invoice records linked to your projects.
Steps
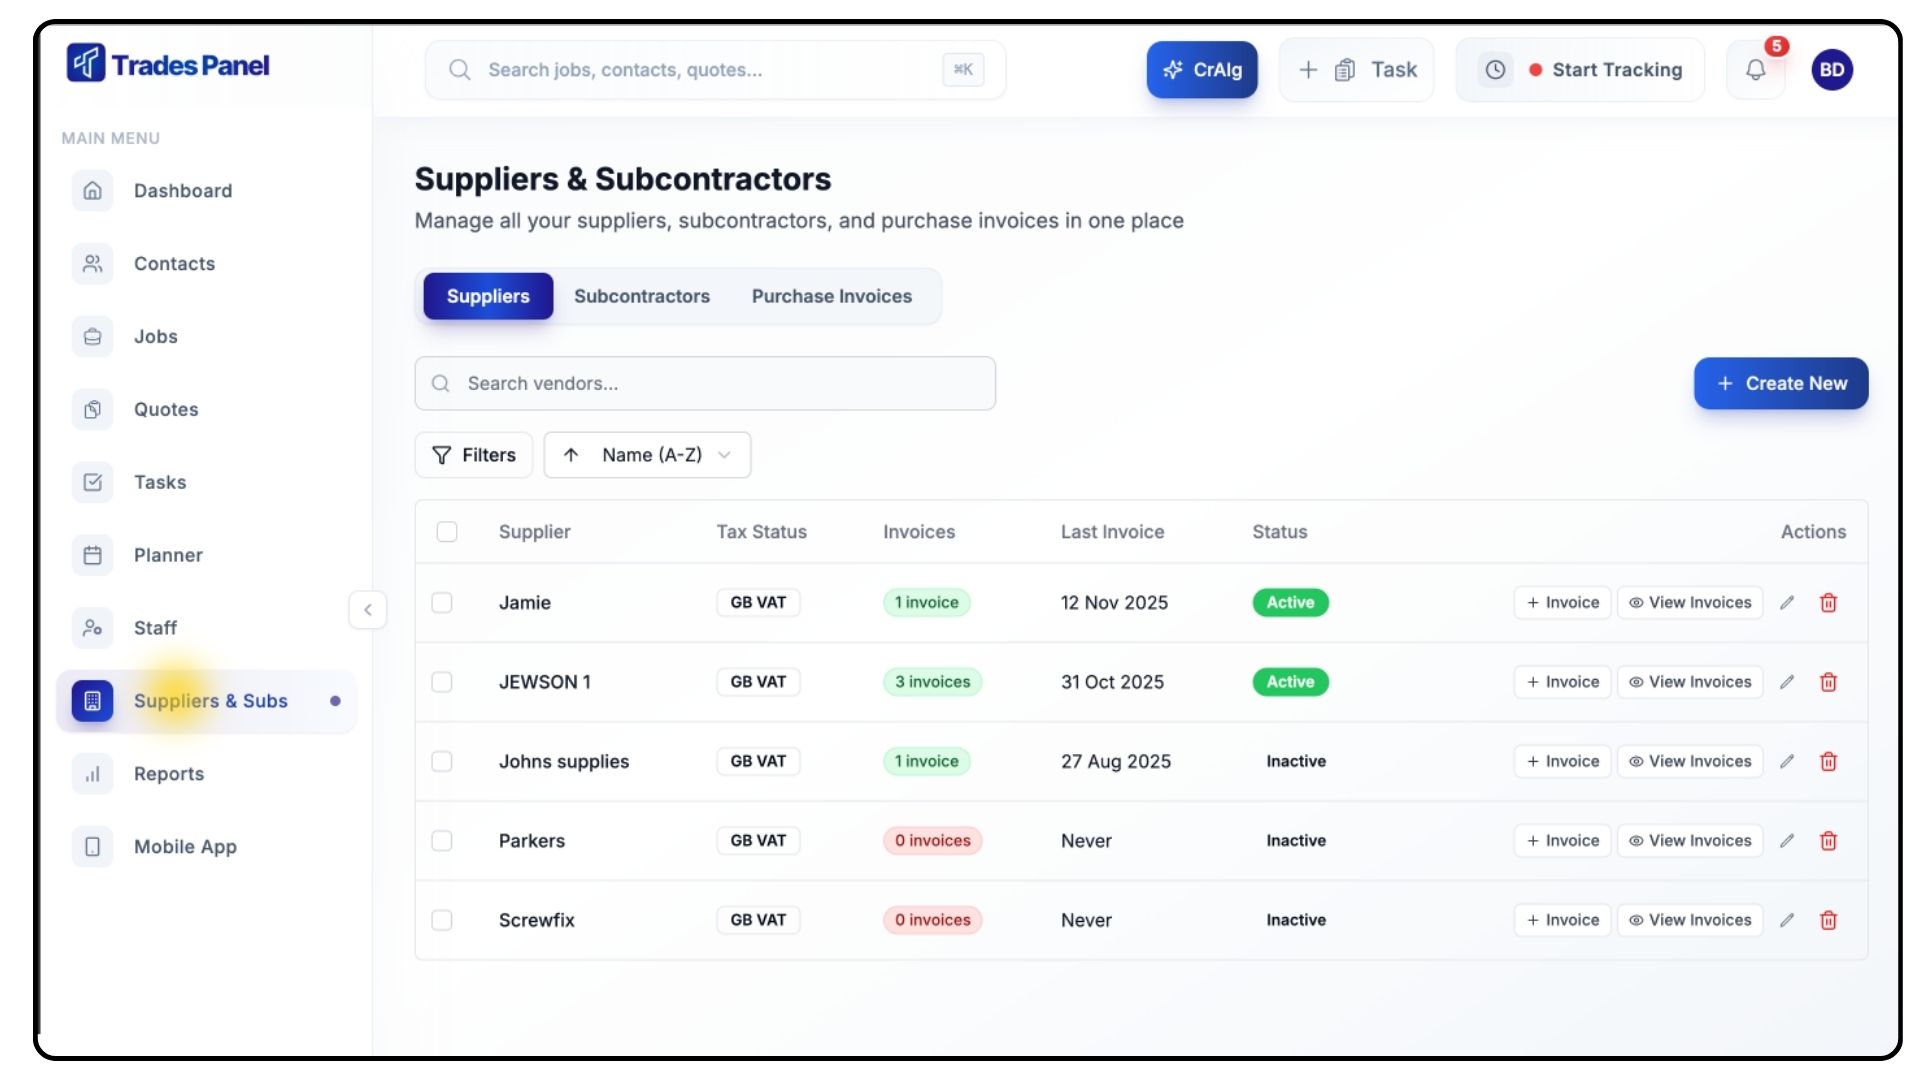
Go to the Suppliers & Subs section from the main menu.
This area is divided into three tabs:
Suppliers
Subcontractors
Purchase Invoices
Adding a New Supplier
What It Does
Suppliers represent your product vendors and material providers. Adding them allows you to manage invoices, track spend, and maintain accurate supplier details.
Steps
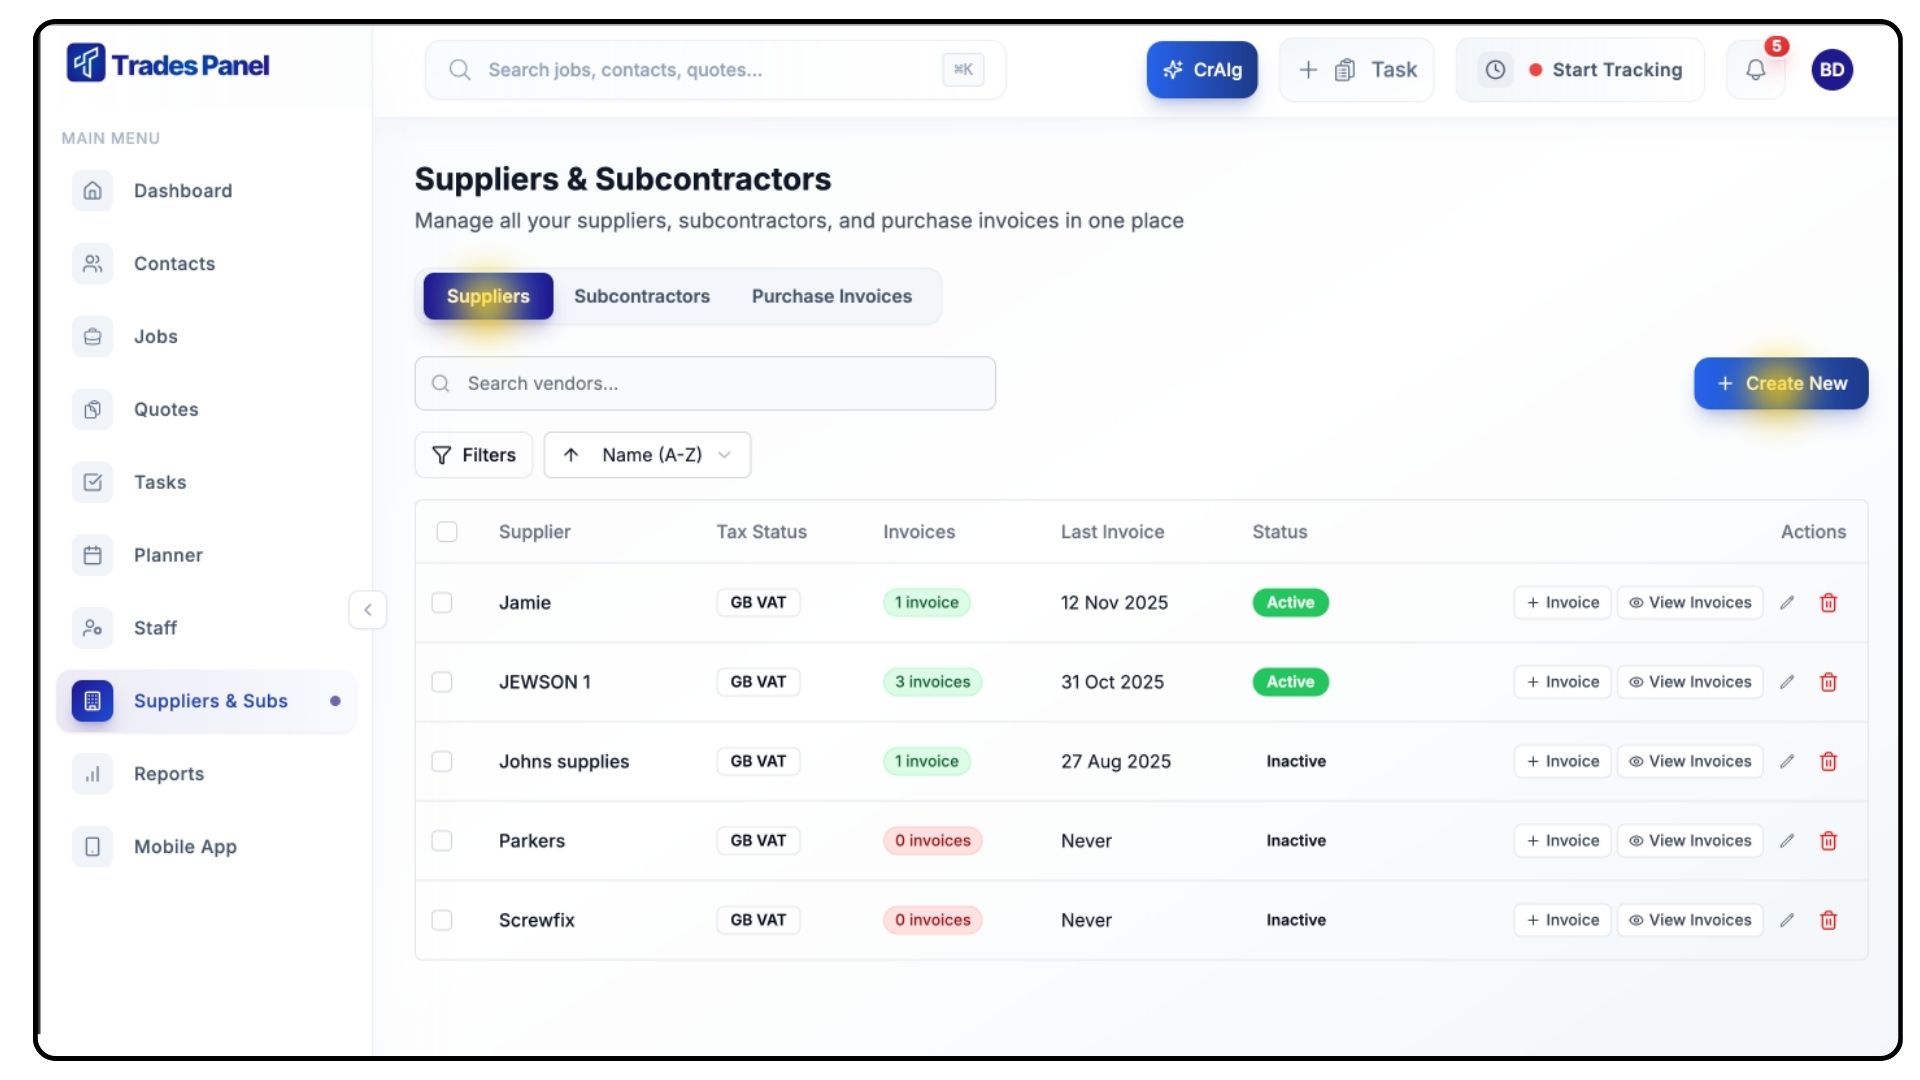
Make sure you’re on the Suppliers tab using the bar at the top.
Click + Create New, then select New Supplier.
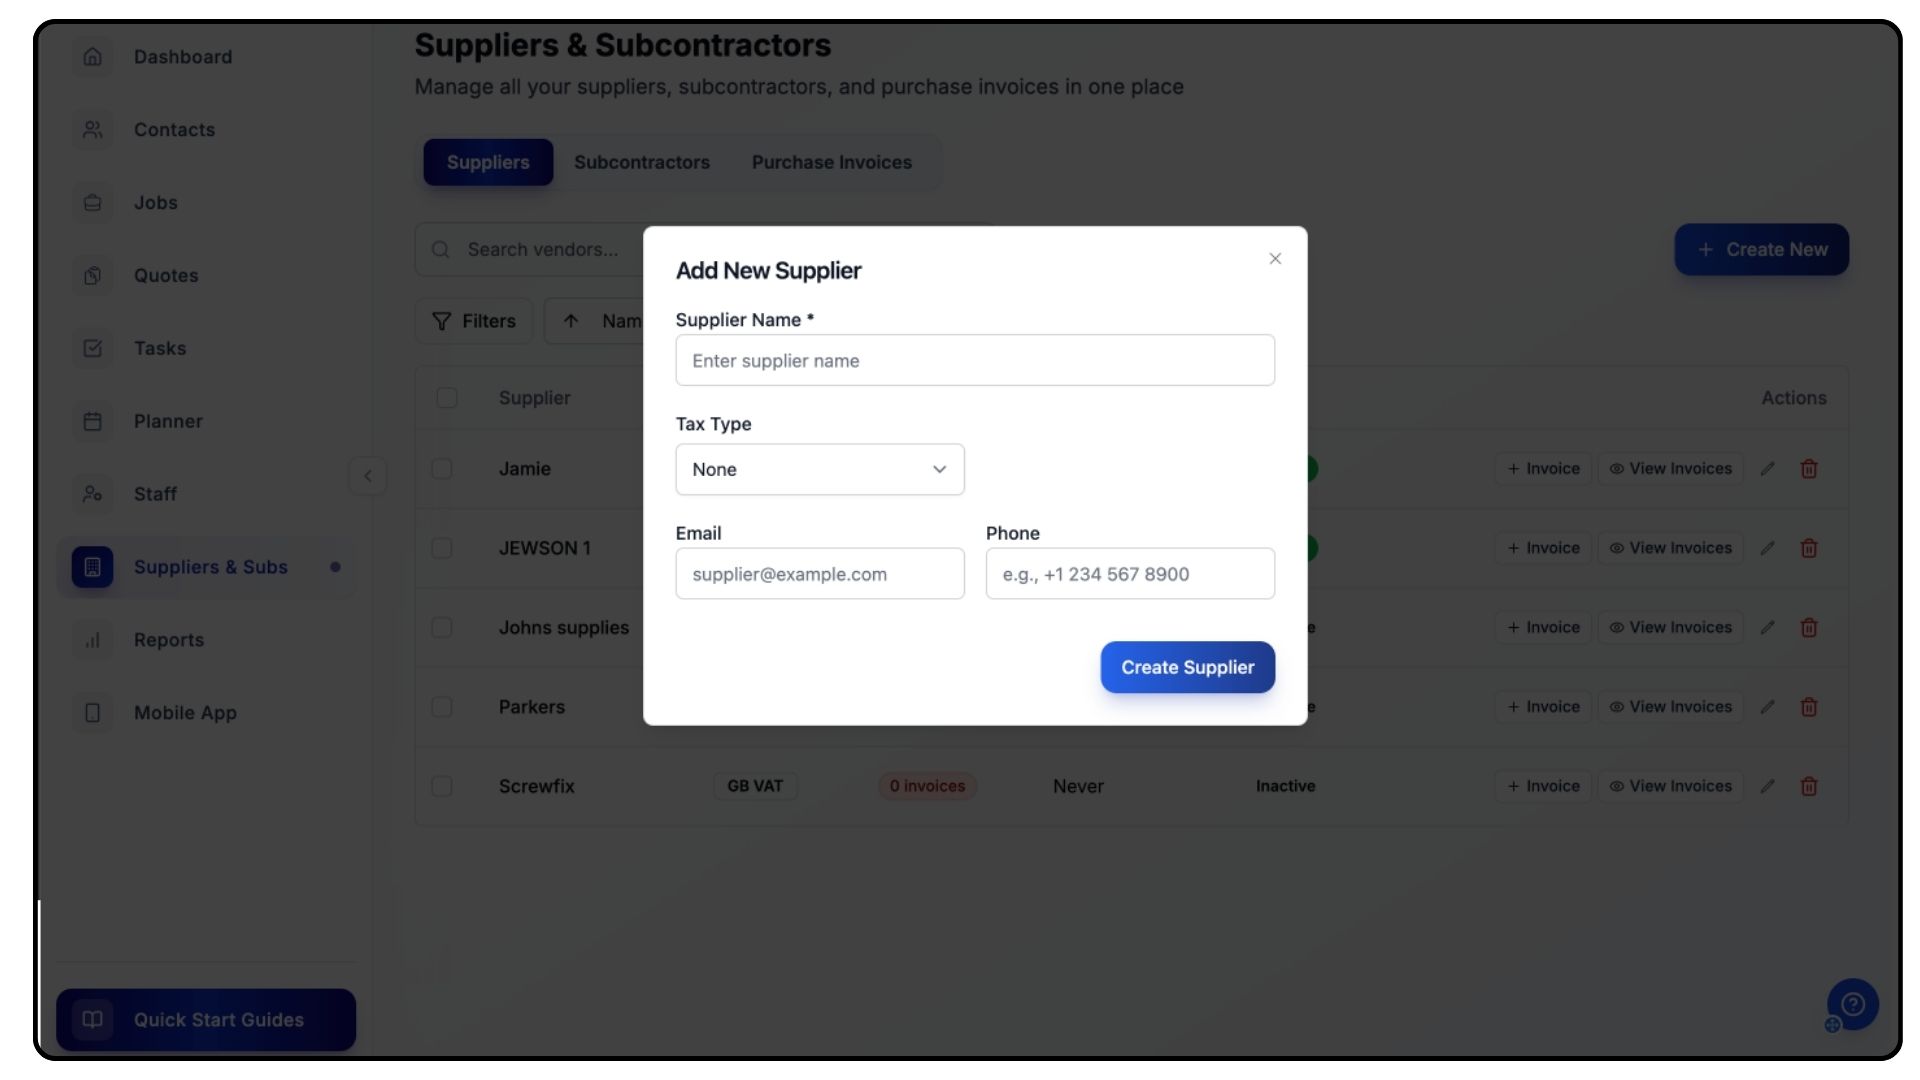
Fill in the required details, including:
Supplier Name
Tax Type
Email Address
Phone Number
Once complete, click Create Supplier.
Your new supplier will now appear in your list.
You can view any invoices linked to them by clicking the View Invoices button next to their name.
Adding a New Subcontractor
What It Does
Subcontractors can be added to collaborate on projects, record invoices, and track payments directly within Trades Panel.
Steps
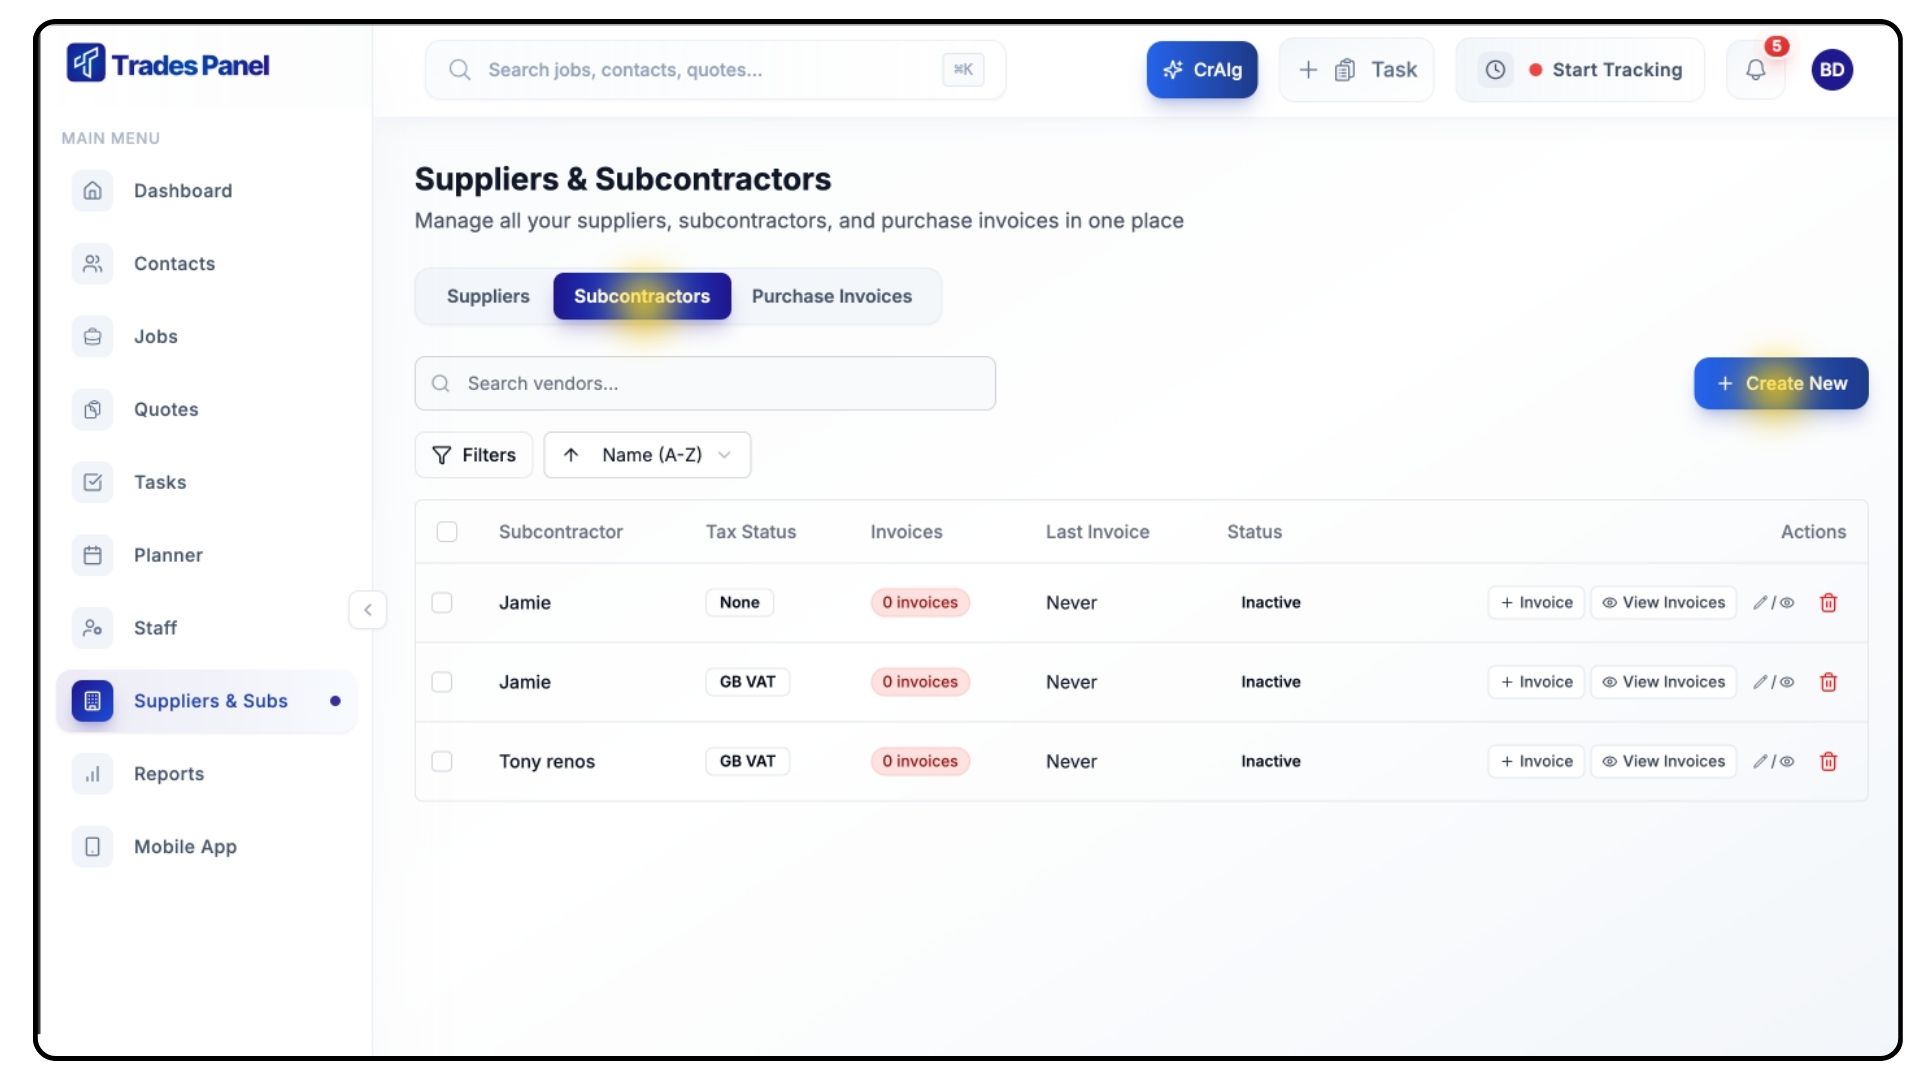
Click + Create New, then select New Subcontractor.
You can do this from either the Suppliers or Subcontractors tab.
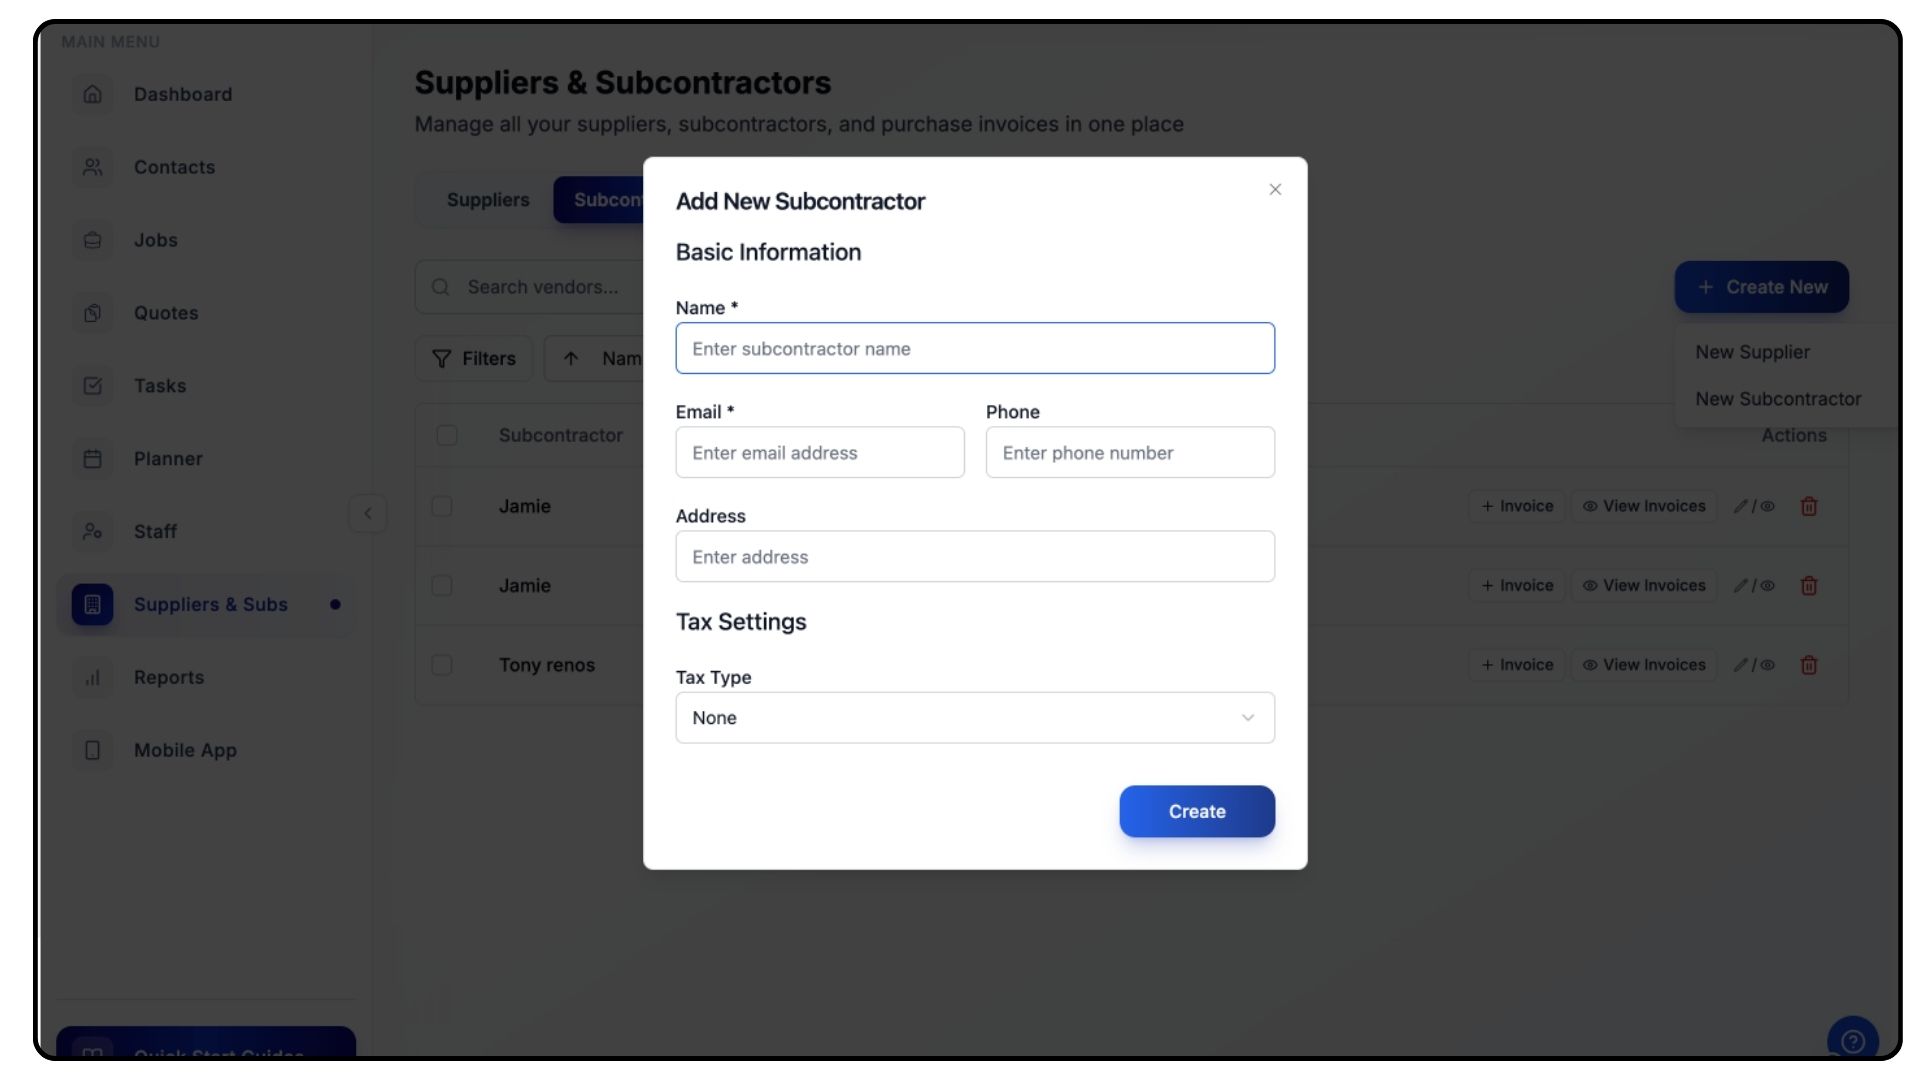
Enter the following details:
Subcontractor Name
Tax Type
Email Address
Phone Number
Click Create Subcontractor to confirm.
Your subcontractor will now appear under the Subcontractors tab.
If invited to create a free Trades Panel account, subcontractors can collaborate on shared projects — making communication and financial tracking easier for both parties.
Adding Purchase Invoices
What It Does
Purchase invoices record your project expenses and can be uploaded automatically using CrAIg or entered manually.
Steps
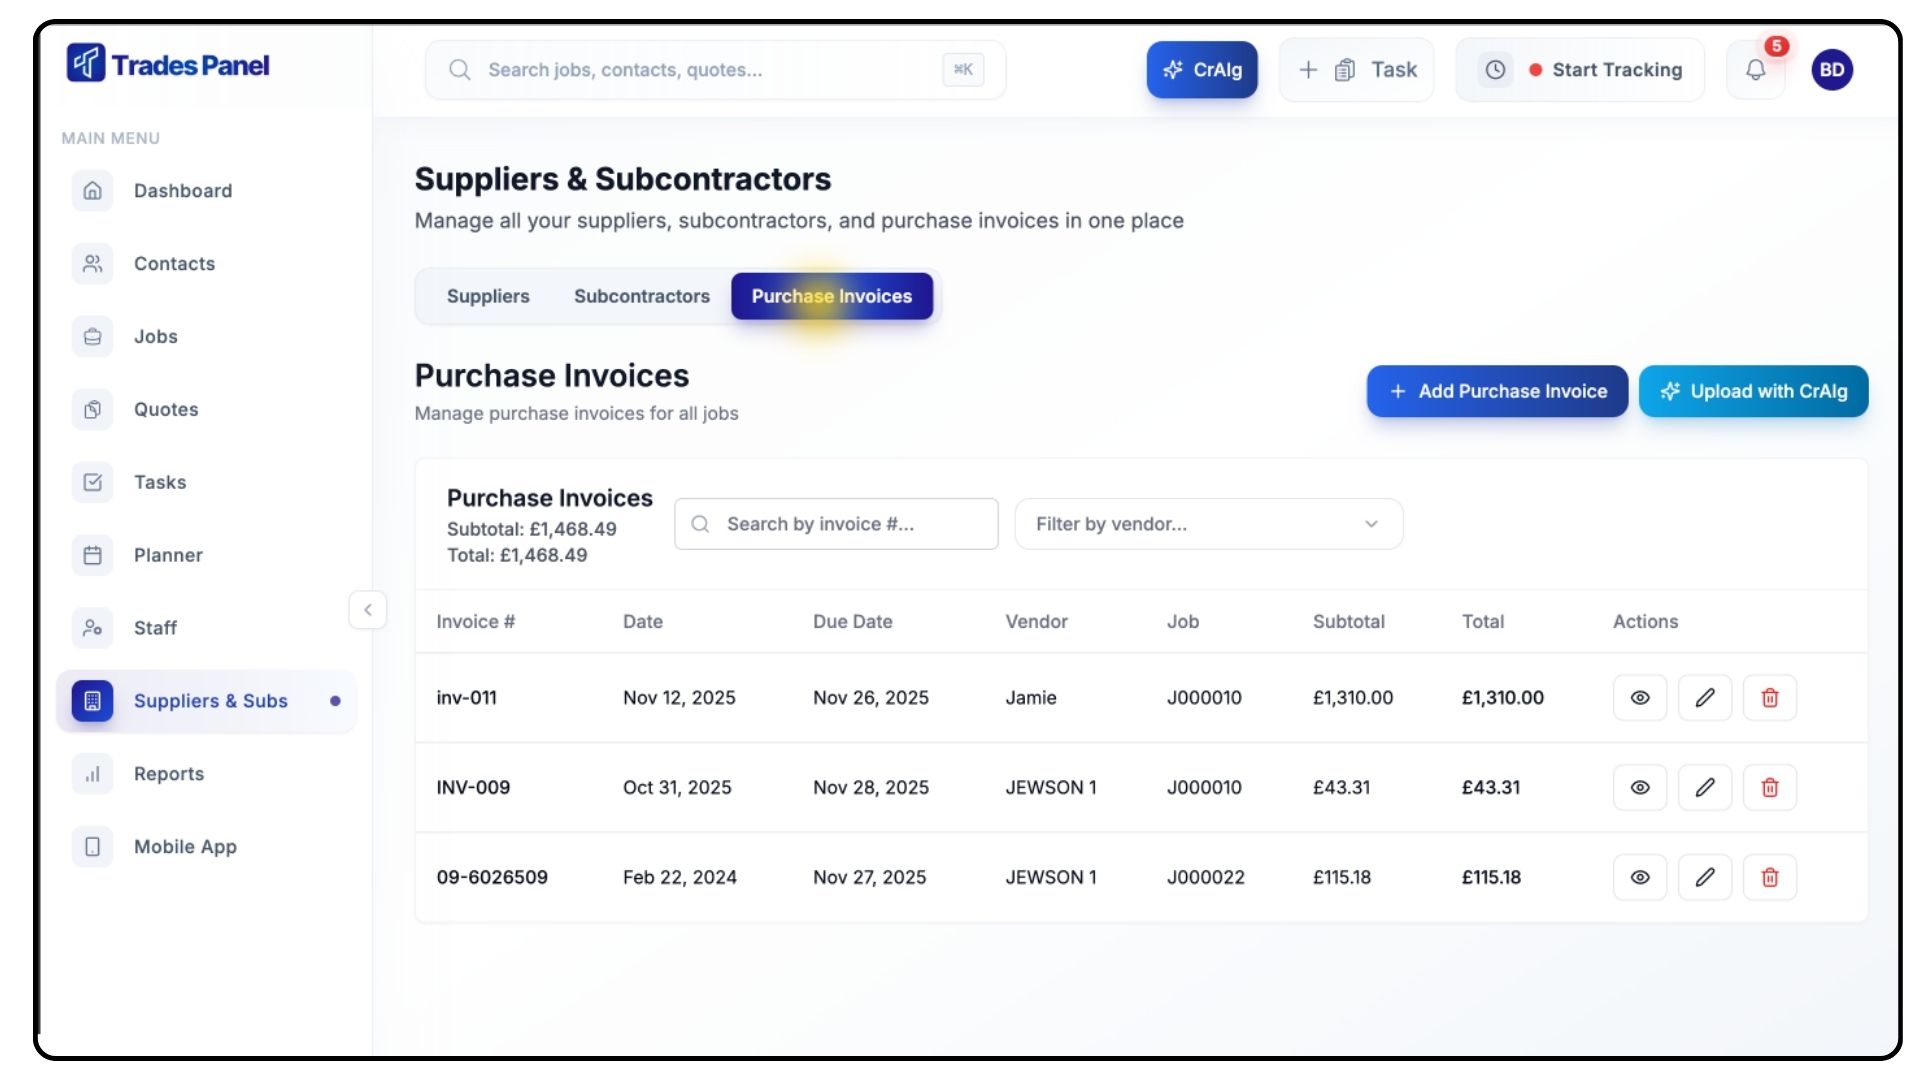
Switch to the Purchase Invoices tab using the top bar.
You have two ways to upload invoices:
Add Manually
Uploading Invoices Using CrAIg
What It Does
CrAIg automatically extracts invoice data from PDFs, saving time and reducing manual input.
Steps
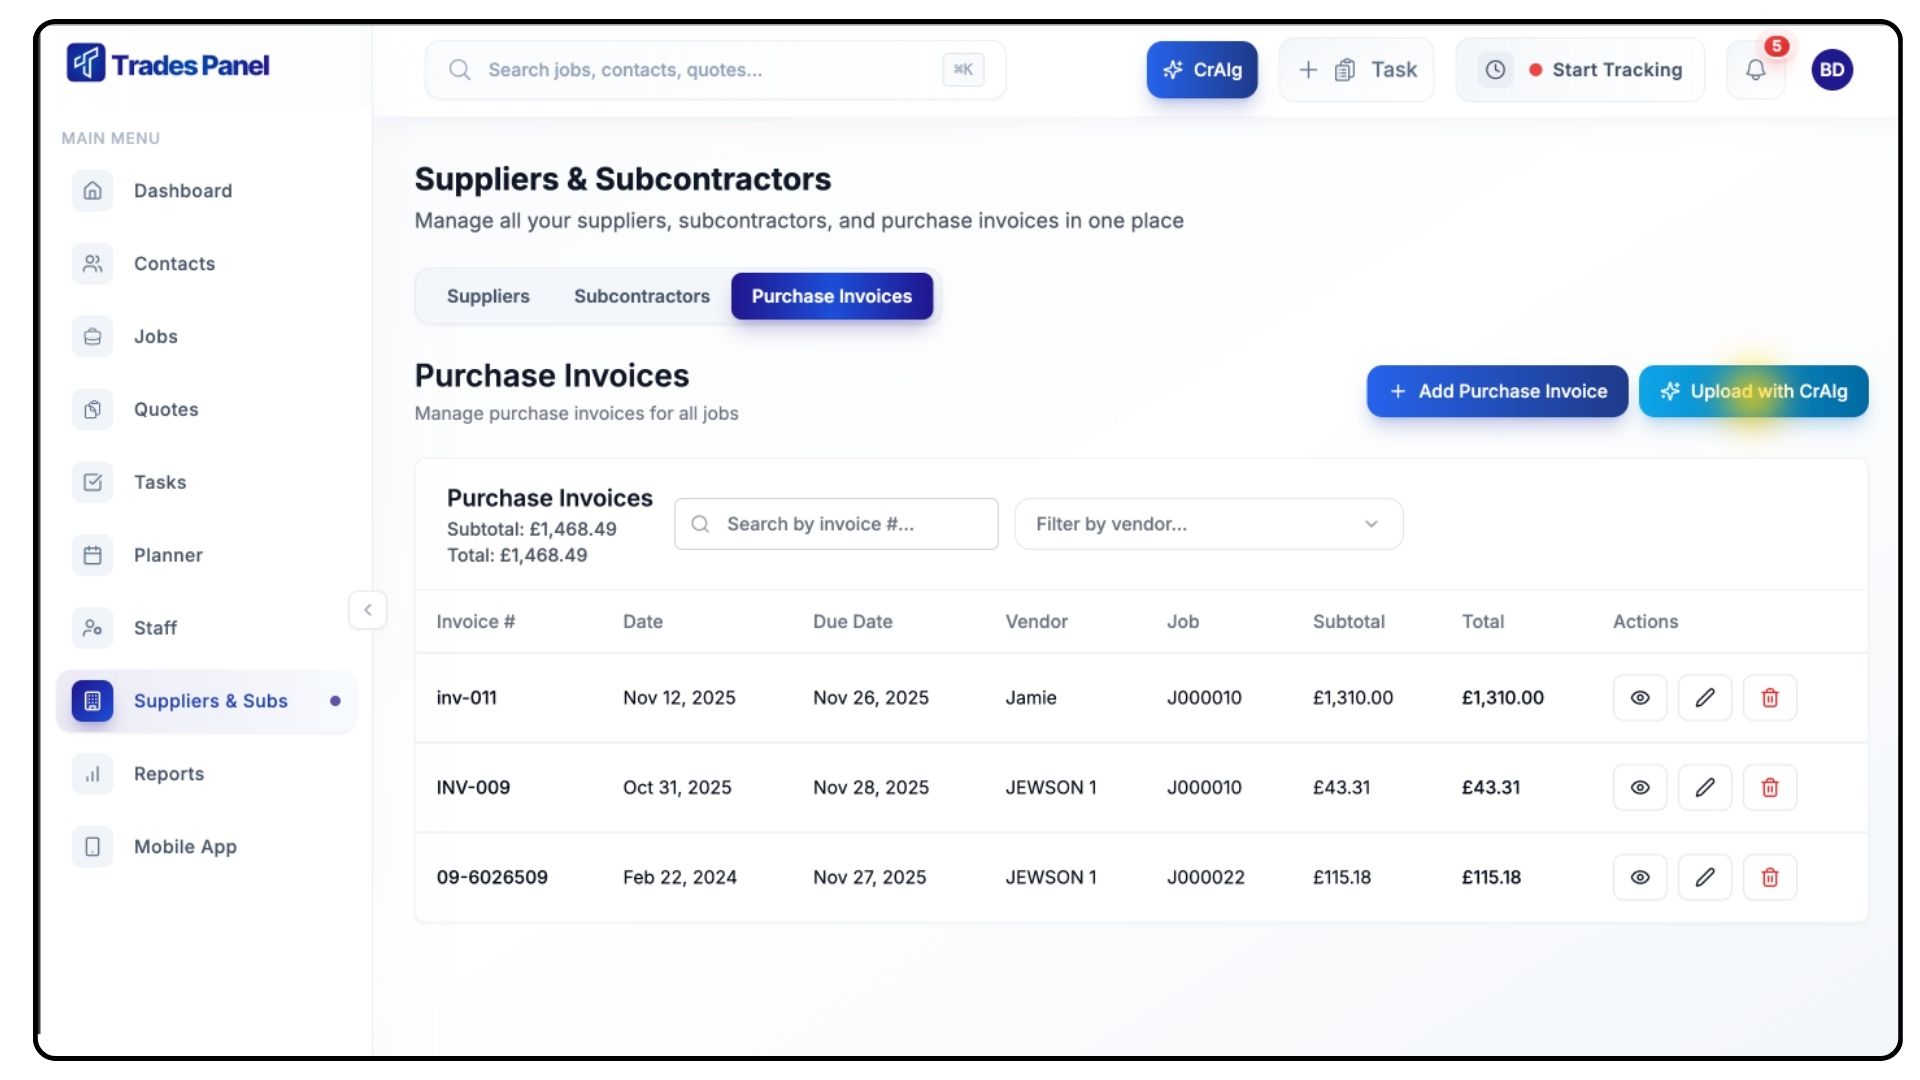
Click Upload with CrAIg.
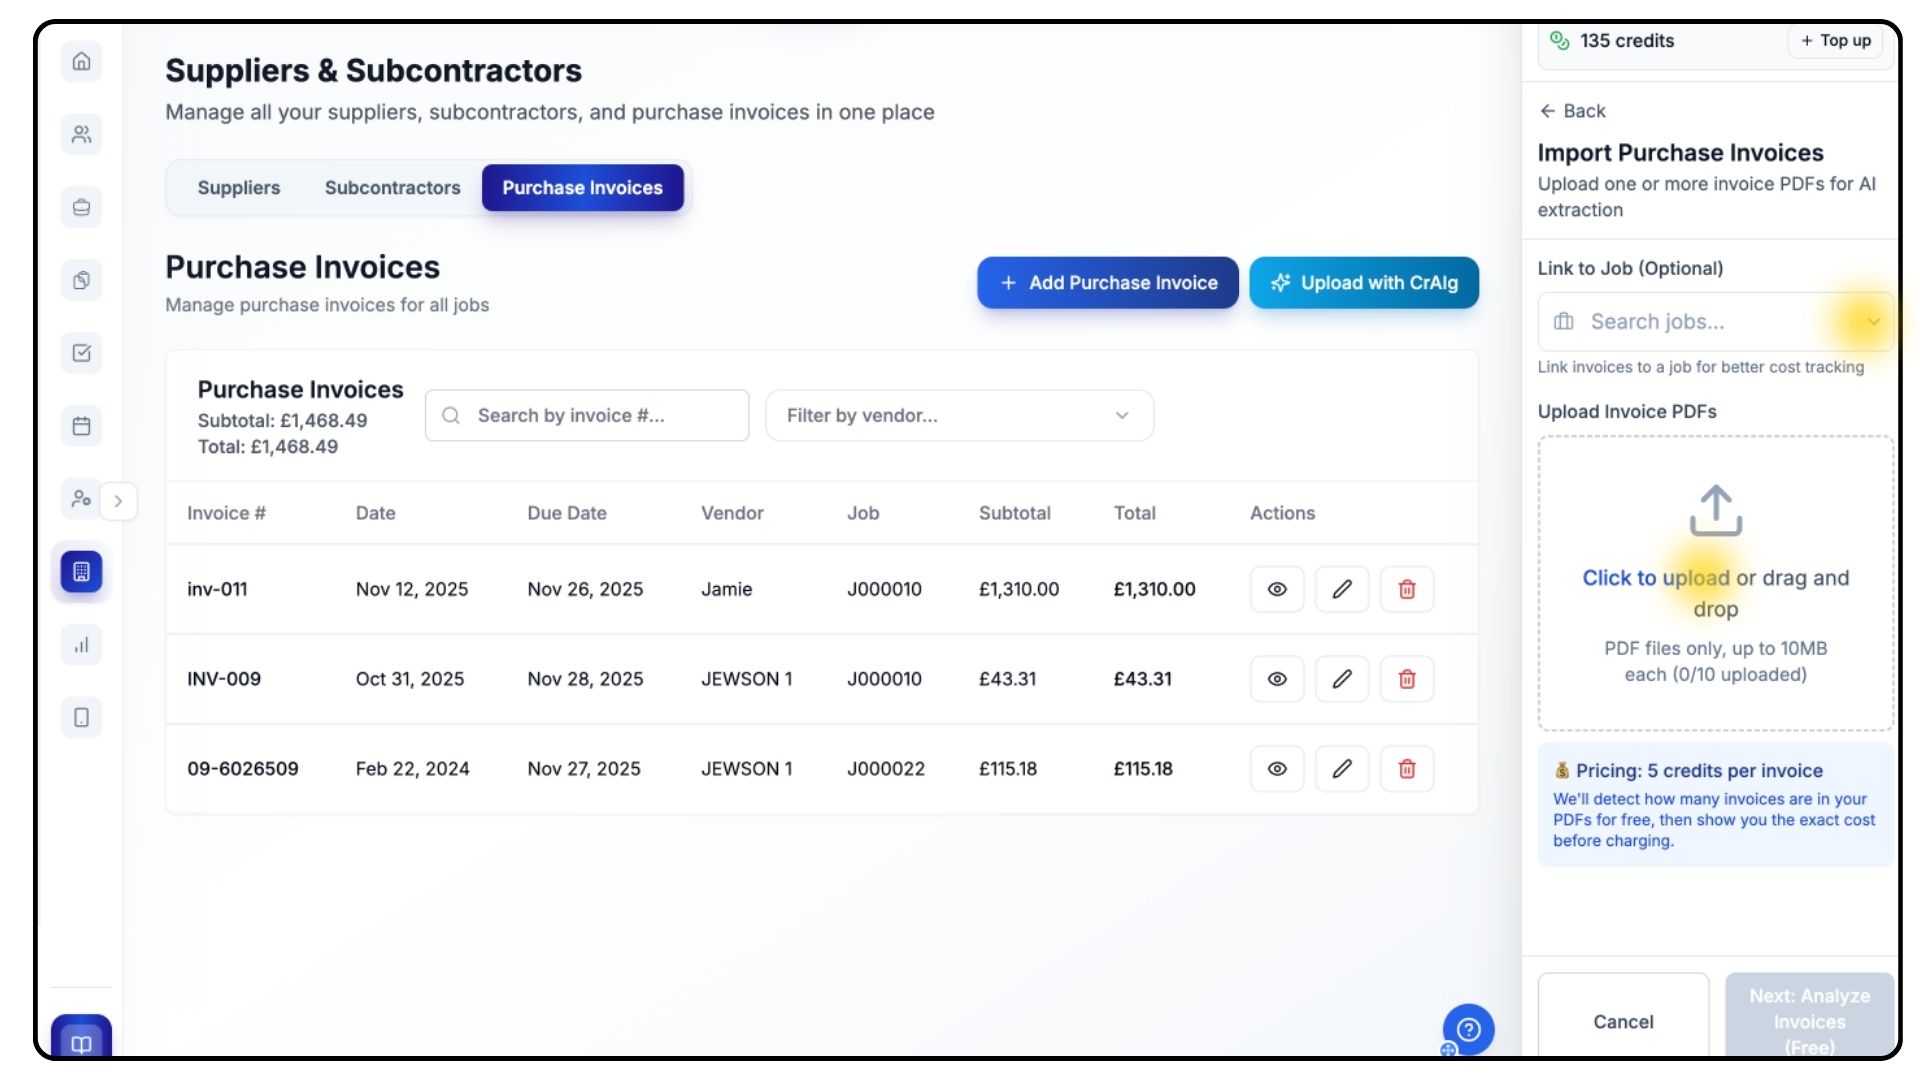
From the dropdown list, select the Job the invoice relates to.
Upload your PDF invoice file.
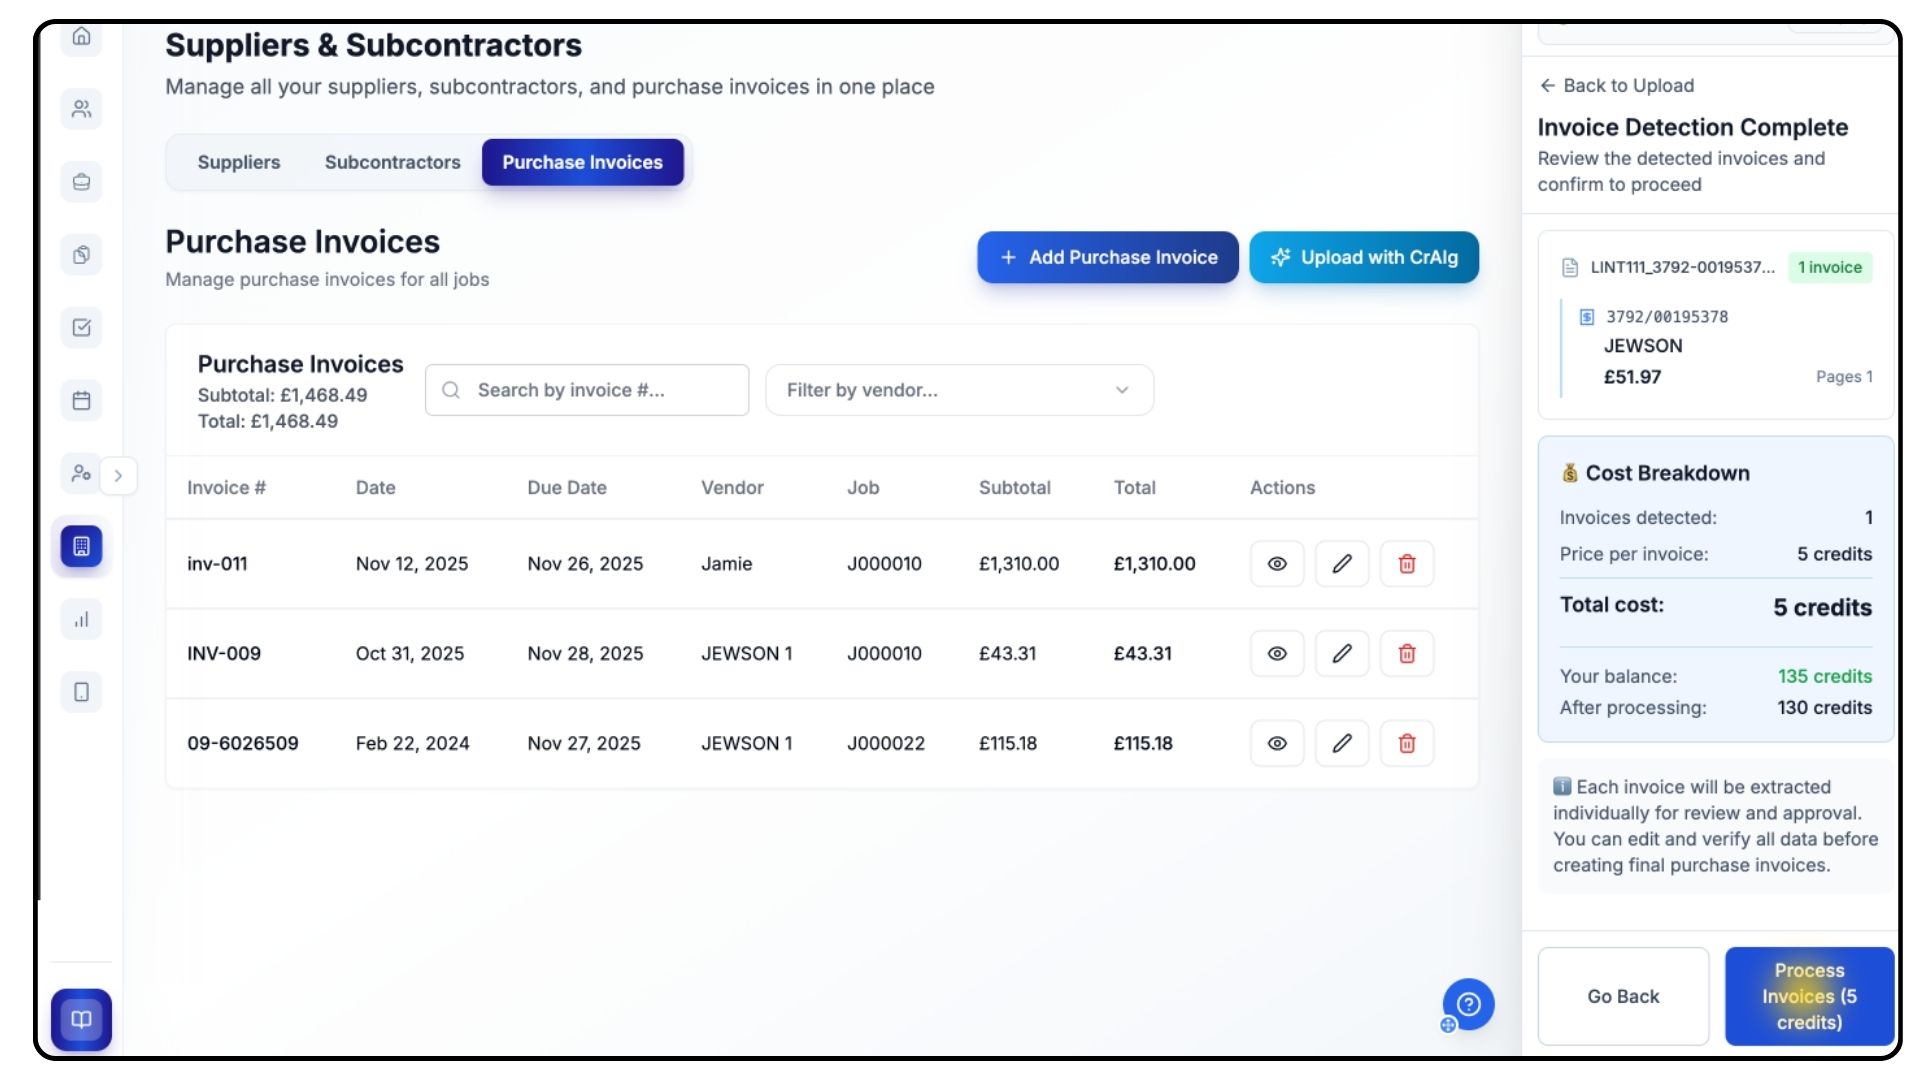
Once uploaded, click Analyse Invoices, and when the analysis is complete, click Process Invoices.
CrAIg will extract and populate all invoice data for you.
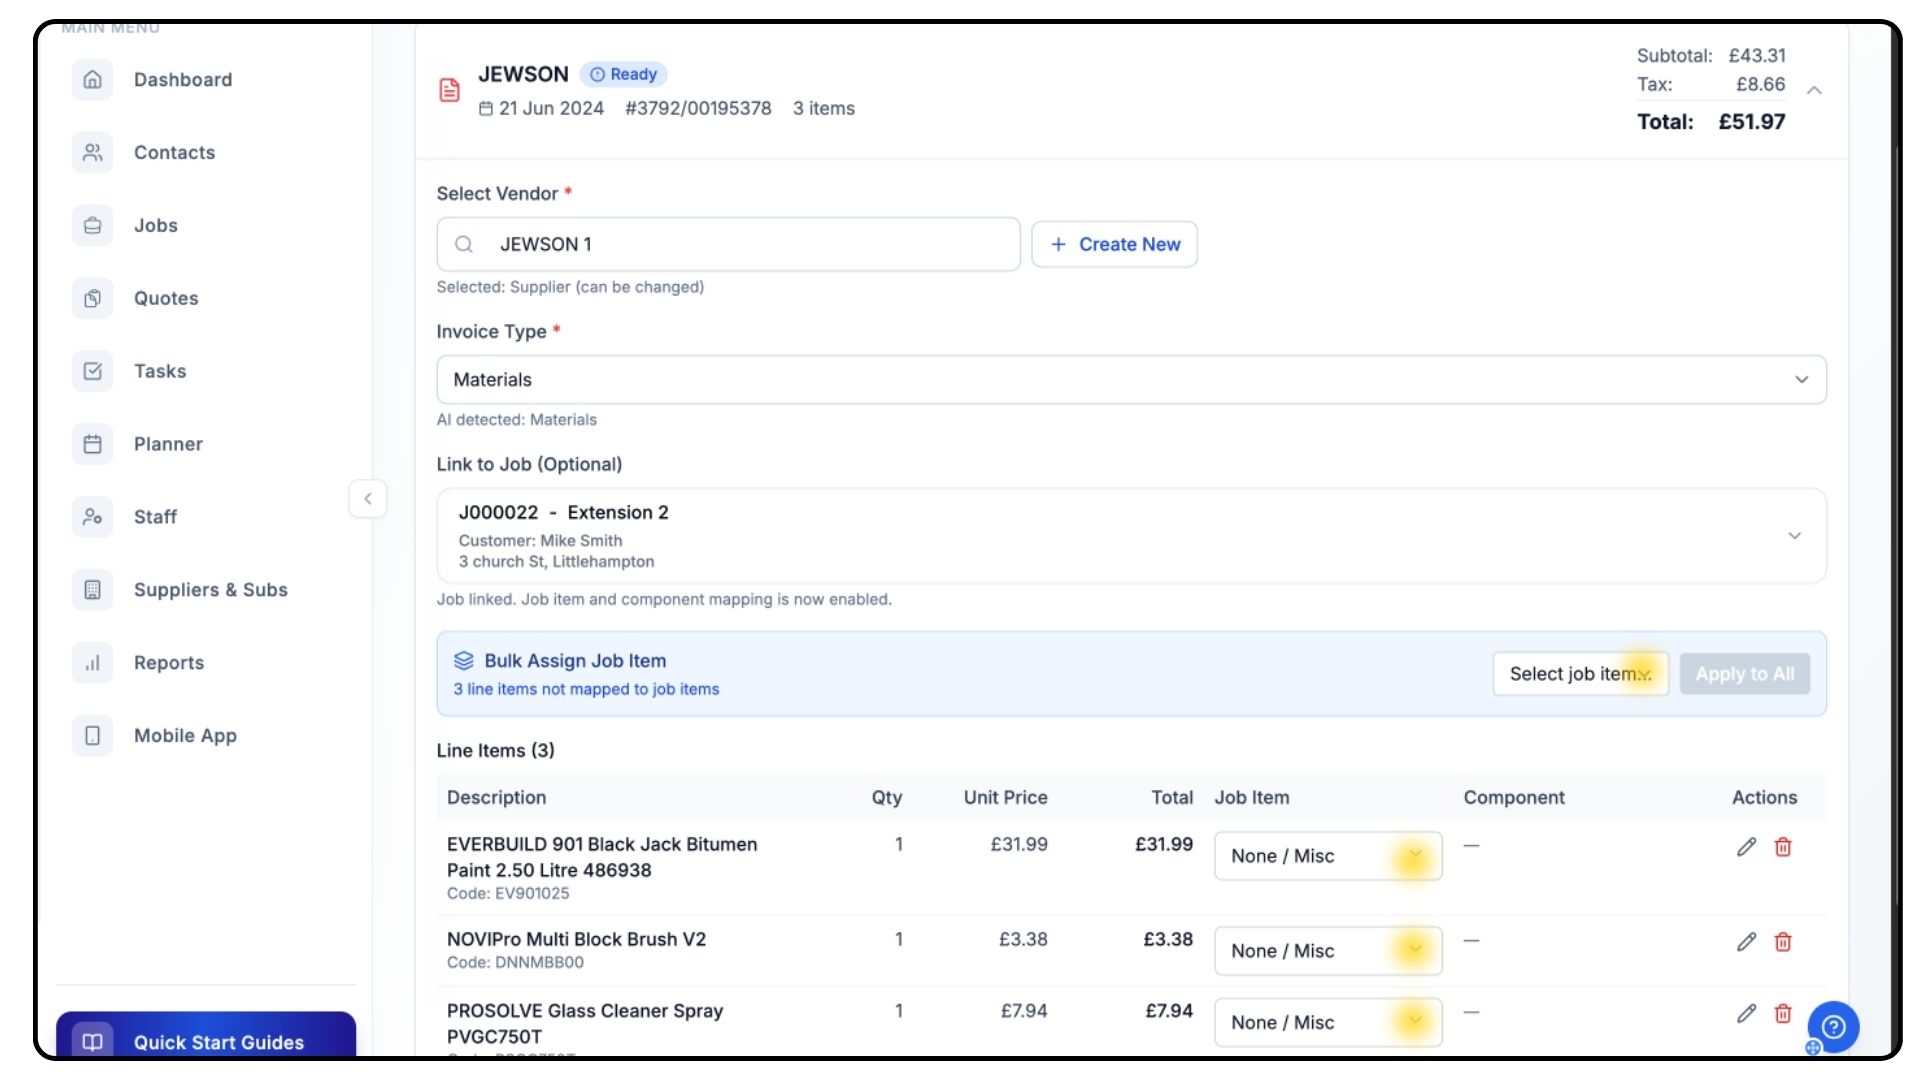
Review the generated invoice carefully to ensure accuracy.
Use Bulk Assign to allocate all invoice line items to a single Job Item.
This is ideal when the entire invoice relates to one stage of the project, ensuring all costs are recorded in the correct place.
If the invoice covers multiple Job Items, assign each line individually using the Job Item dropdown beside it.
This splits the costs accurately across the relevant stages of the project, keeping your financial tracking precise.
Click Save to confirm.
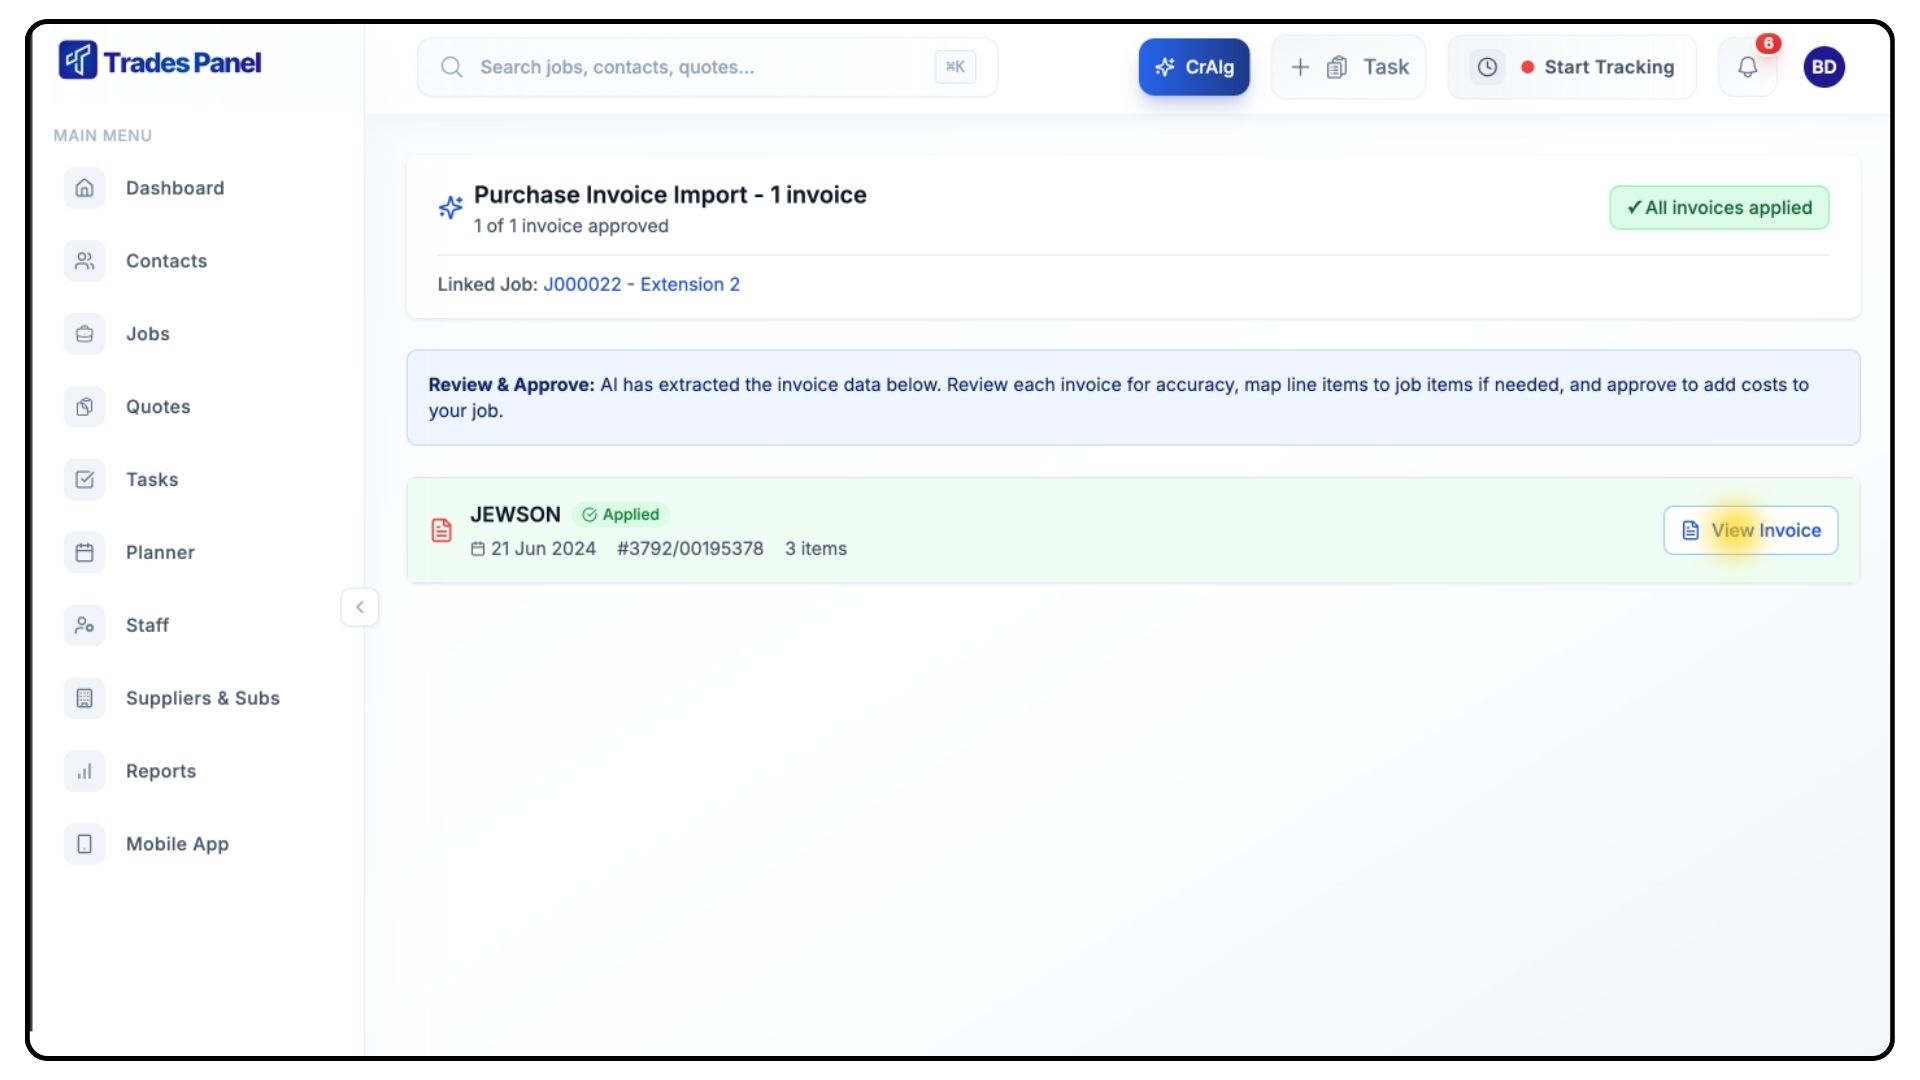
Your invoice will now appear in the Purchase Invoices list for that project.
You can click the View Invoice button to view immediately after applying.
Uploading Invoices Manually
What It Does
Manual uploads allow you to enter invoice information yourself, providing full control over every detail.
Steps
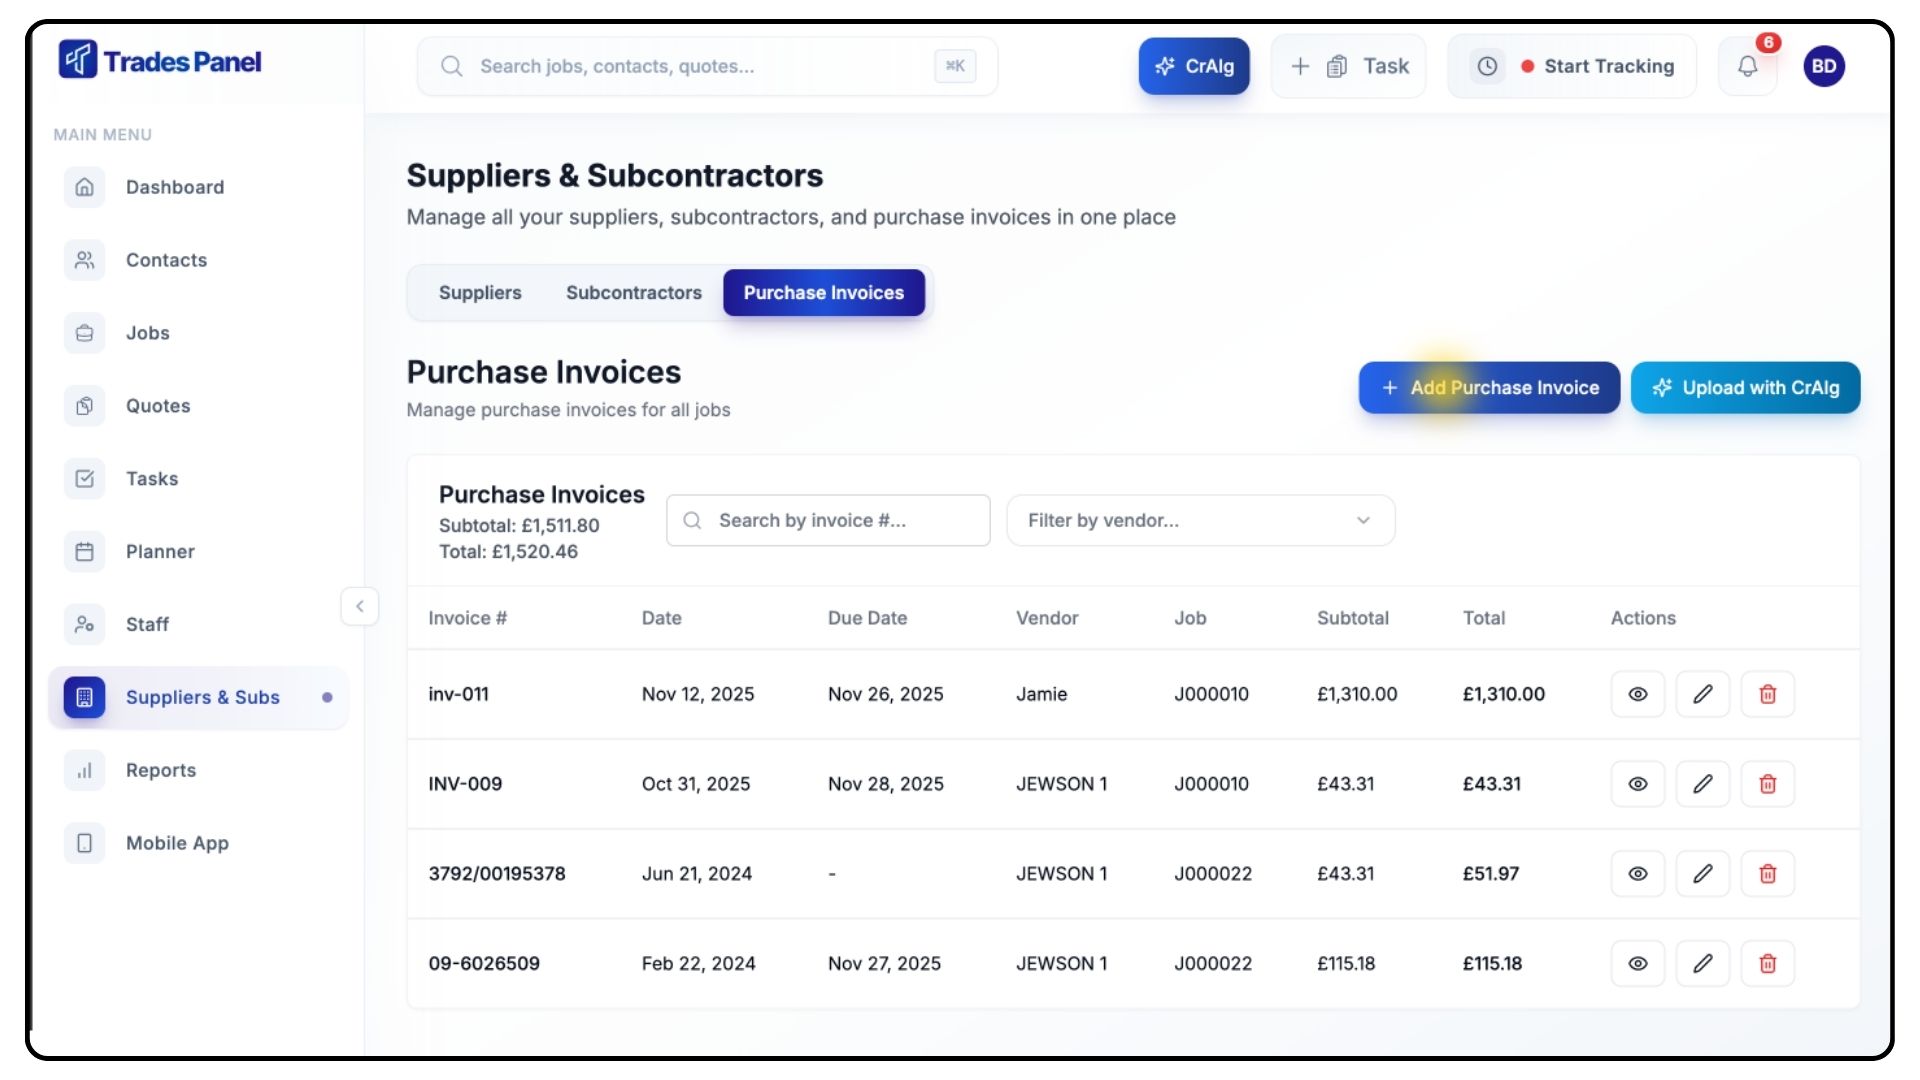
Go back to the Purchase Invoices tab.
Click Add Purchase Invoice.
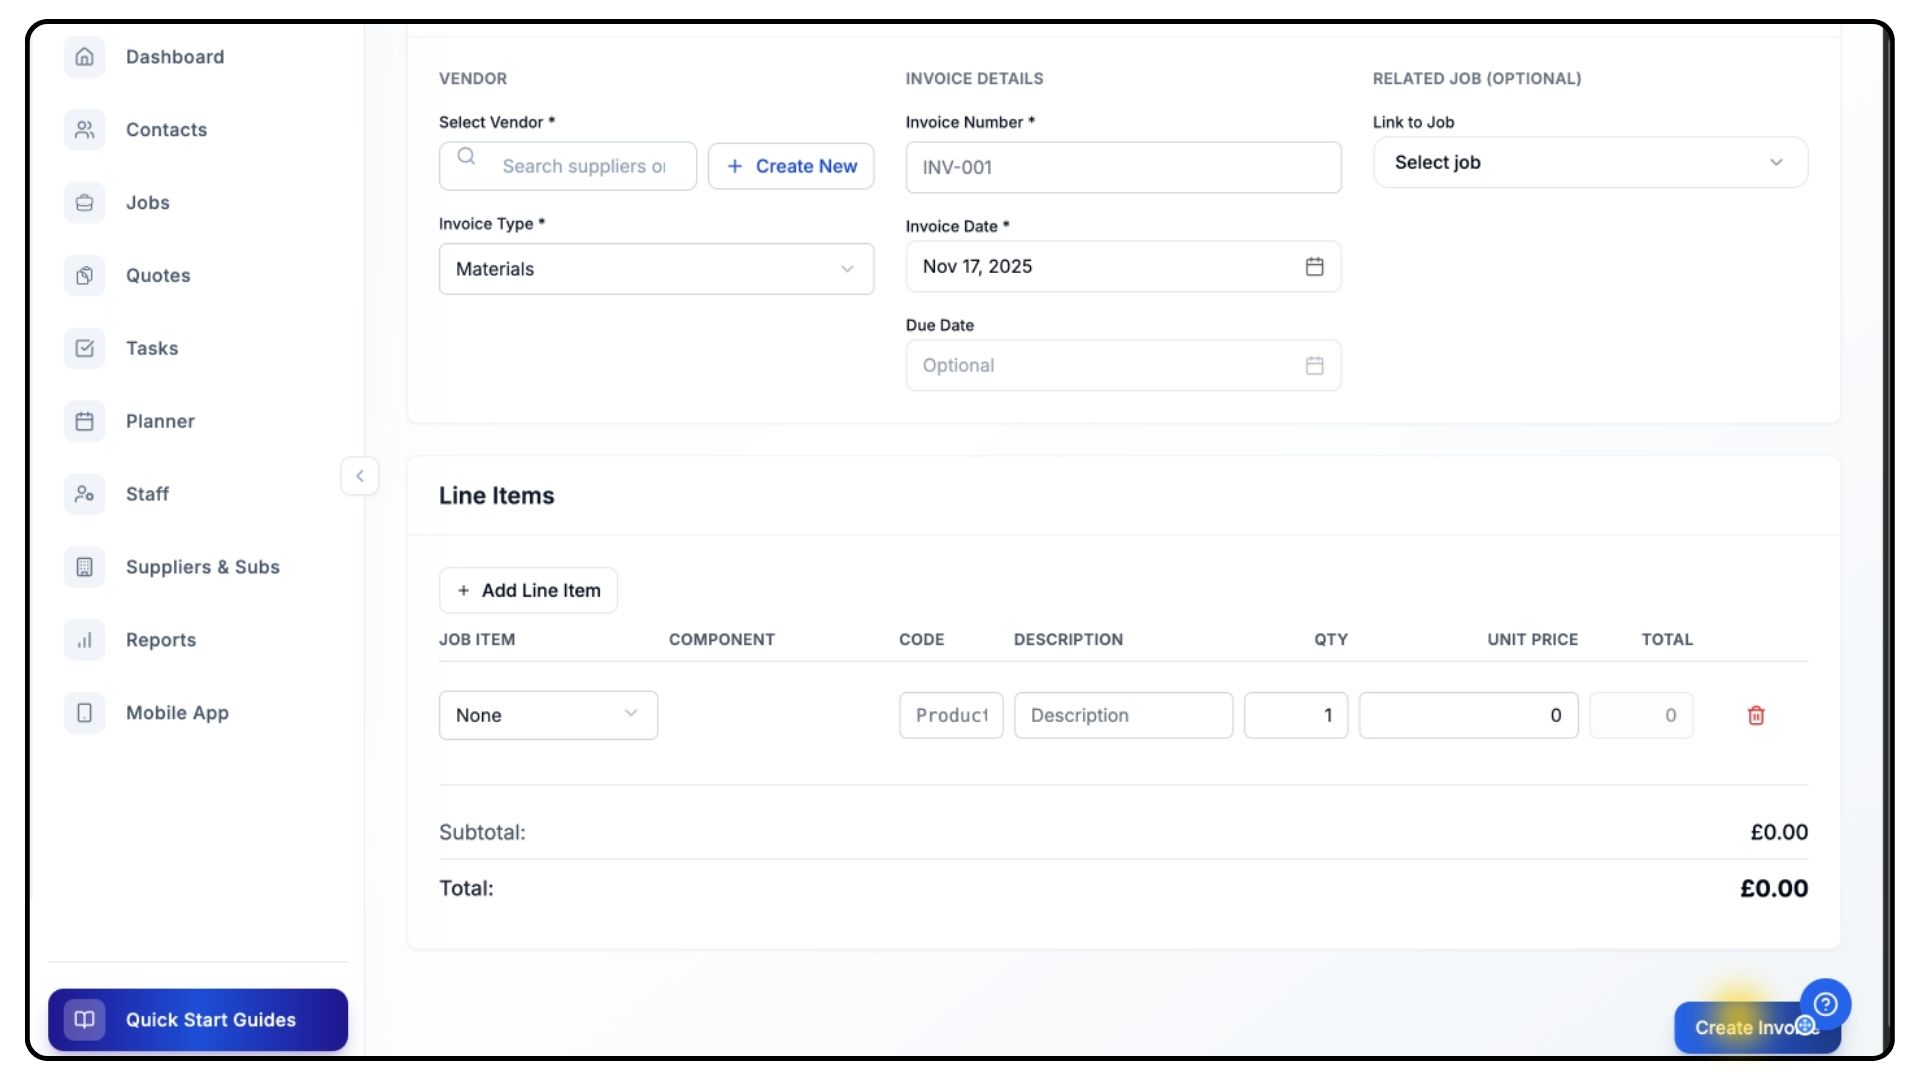
Choose a Vendor from the dropdown list, or create a new one if this is their first invoice.
Select the Invoice Type and fill in all required details, including:
Invoice Number
Date and Due Date
Linked Job
Next, add your Line Items:
For each line:
Select the Job Item it belongs to.
Enter the Product Code, Description, Quantity, and Unit Price.
Use Add Line Item if you need to include more entries.
Double-check that everything is correct, then click Create Invoice.
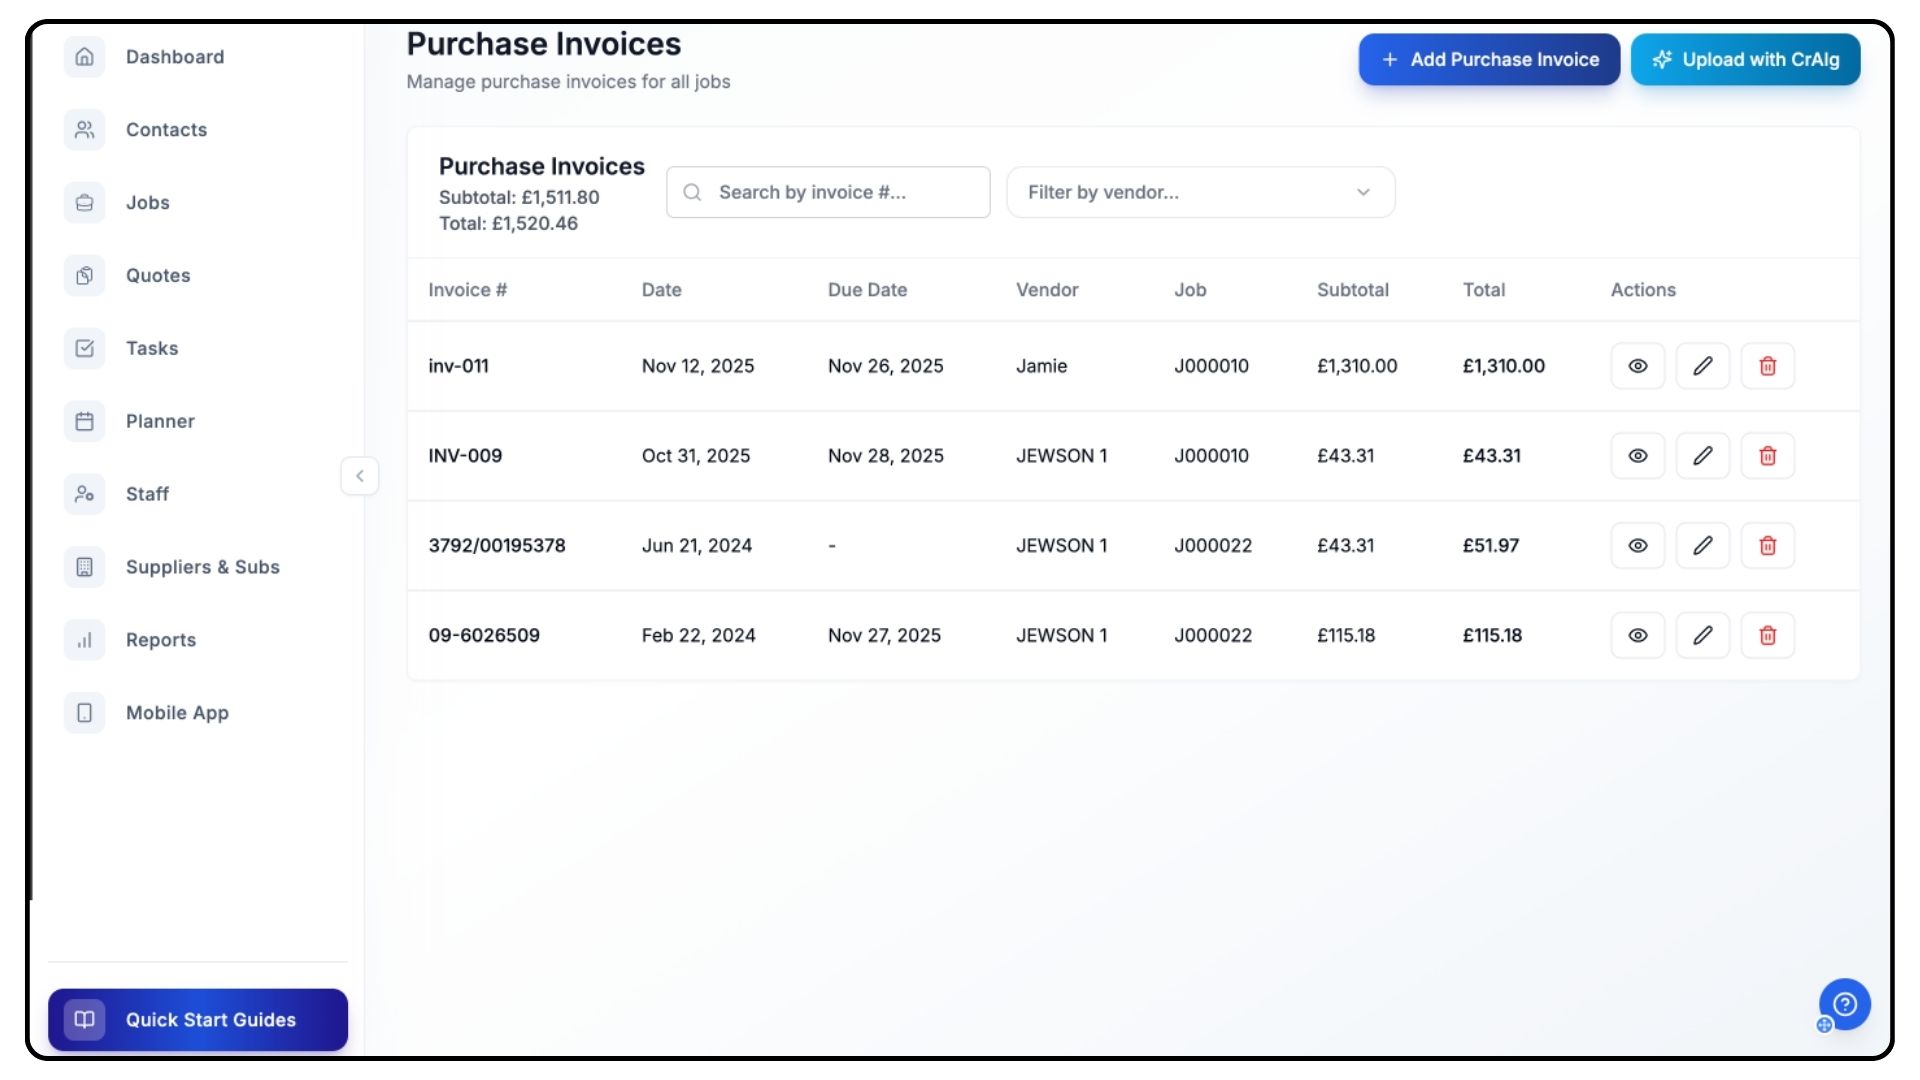
Your invoice will now be saved and appear in your Purchase Invoices list.
Managing Suppliers, Subcontractors & Invoices
What It Does
Trades Panel gives you tools to organise, filter, and edit your supplier and subcontractor data for better visibility and reporting.
Steps
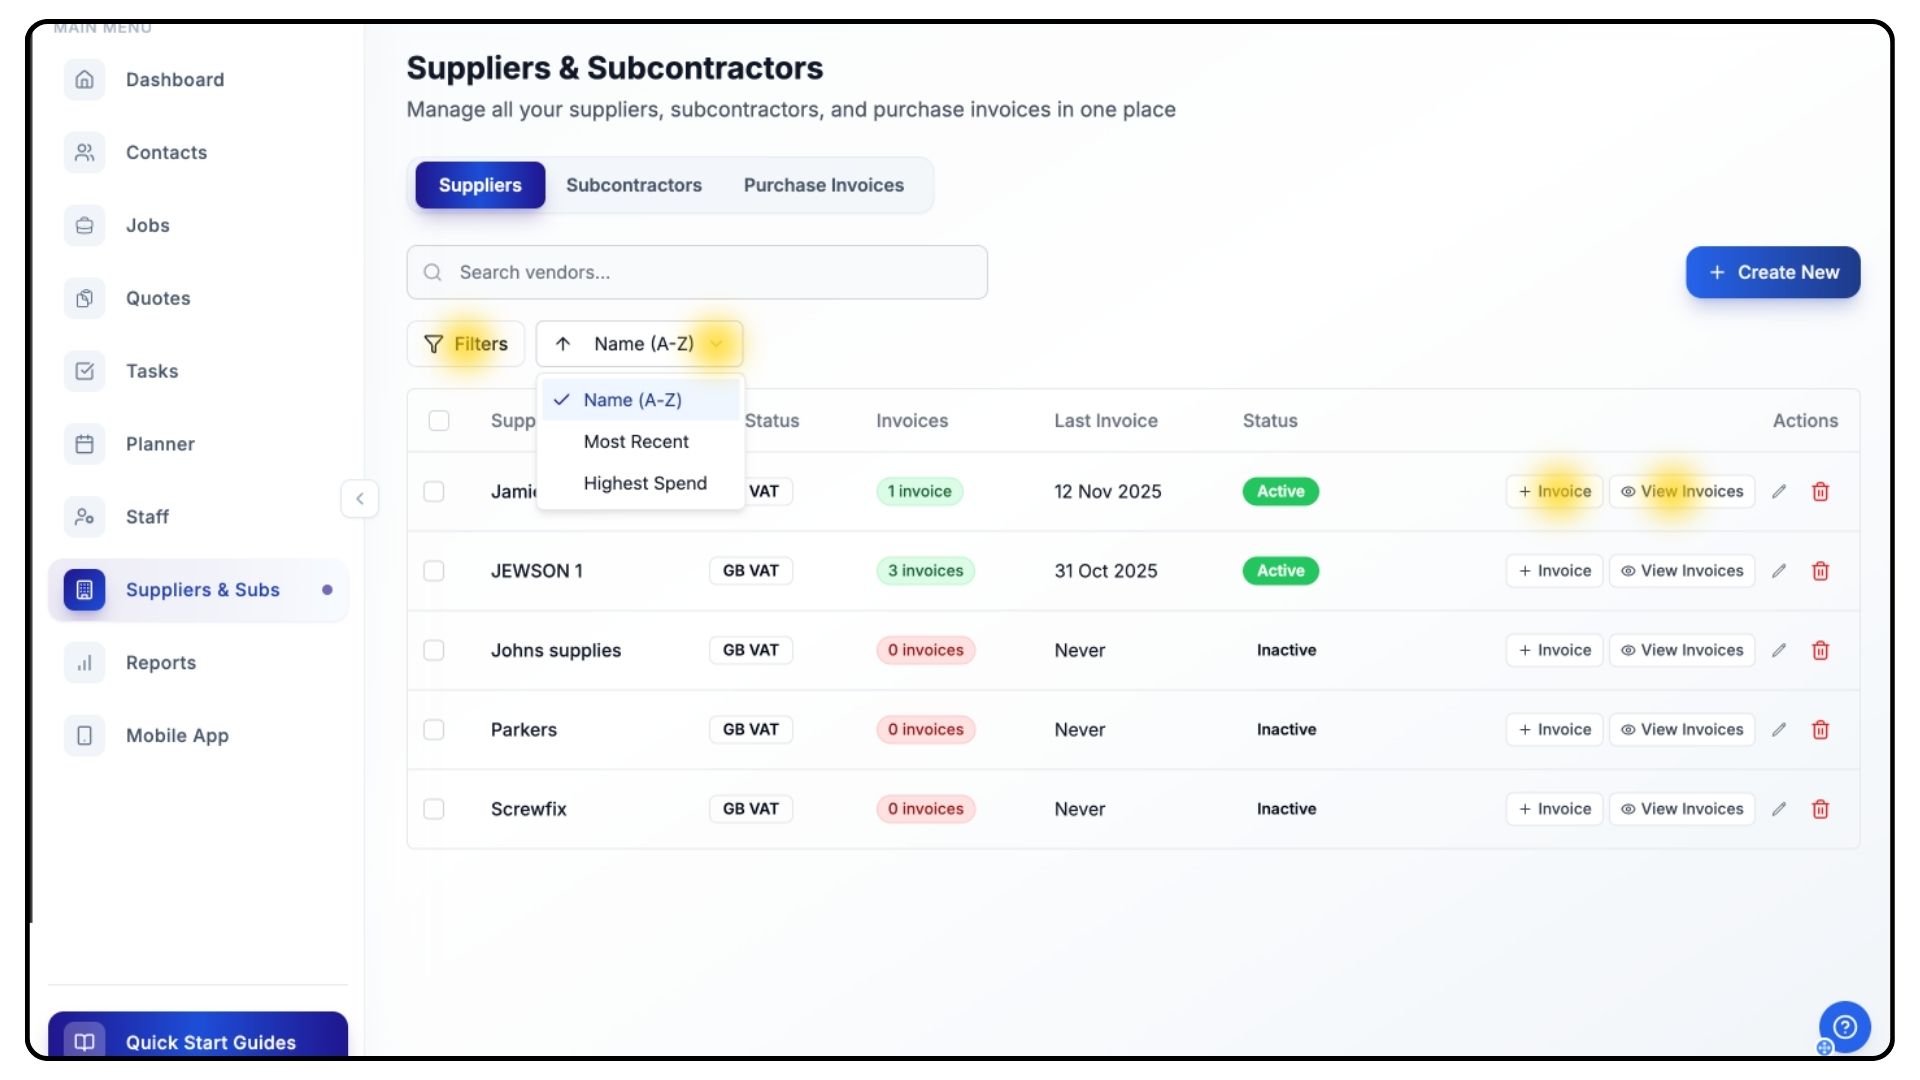
Once you’ve added suppliers, subcontractors, and invoices, use the Filter Button to manage them efficiently.
You can sort by:
Status
Total Spend
Alphabetical Order
Each supplier and subcontractor entry displays:
Total invoices
Date of last invoice
Current status
Two quick actions: Add Invoice and View Invoices
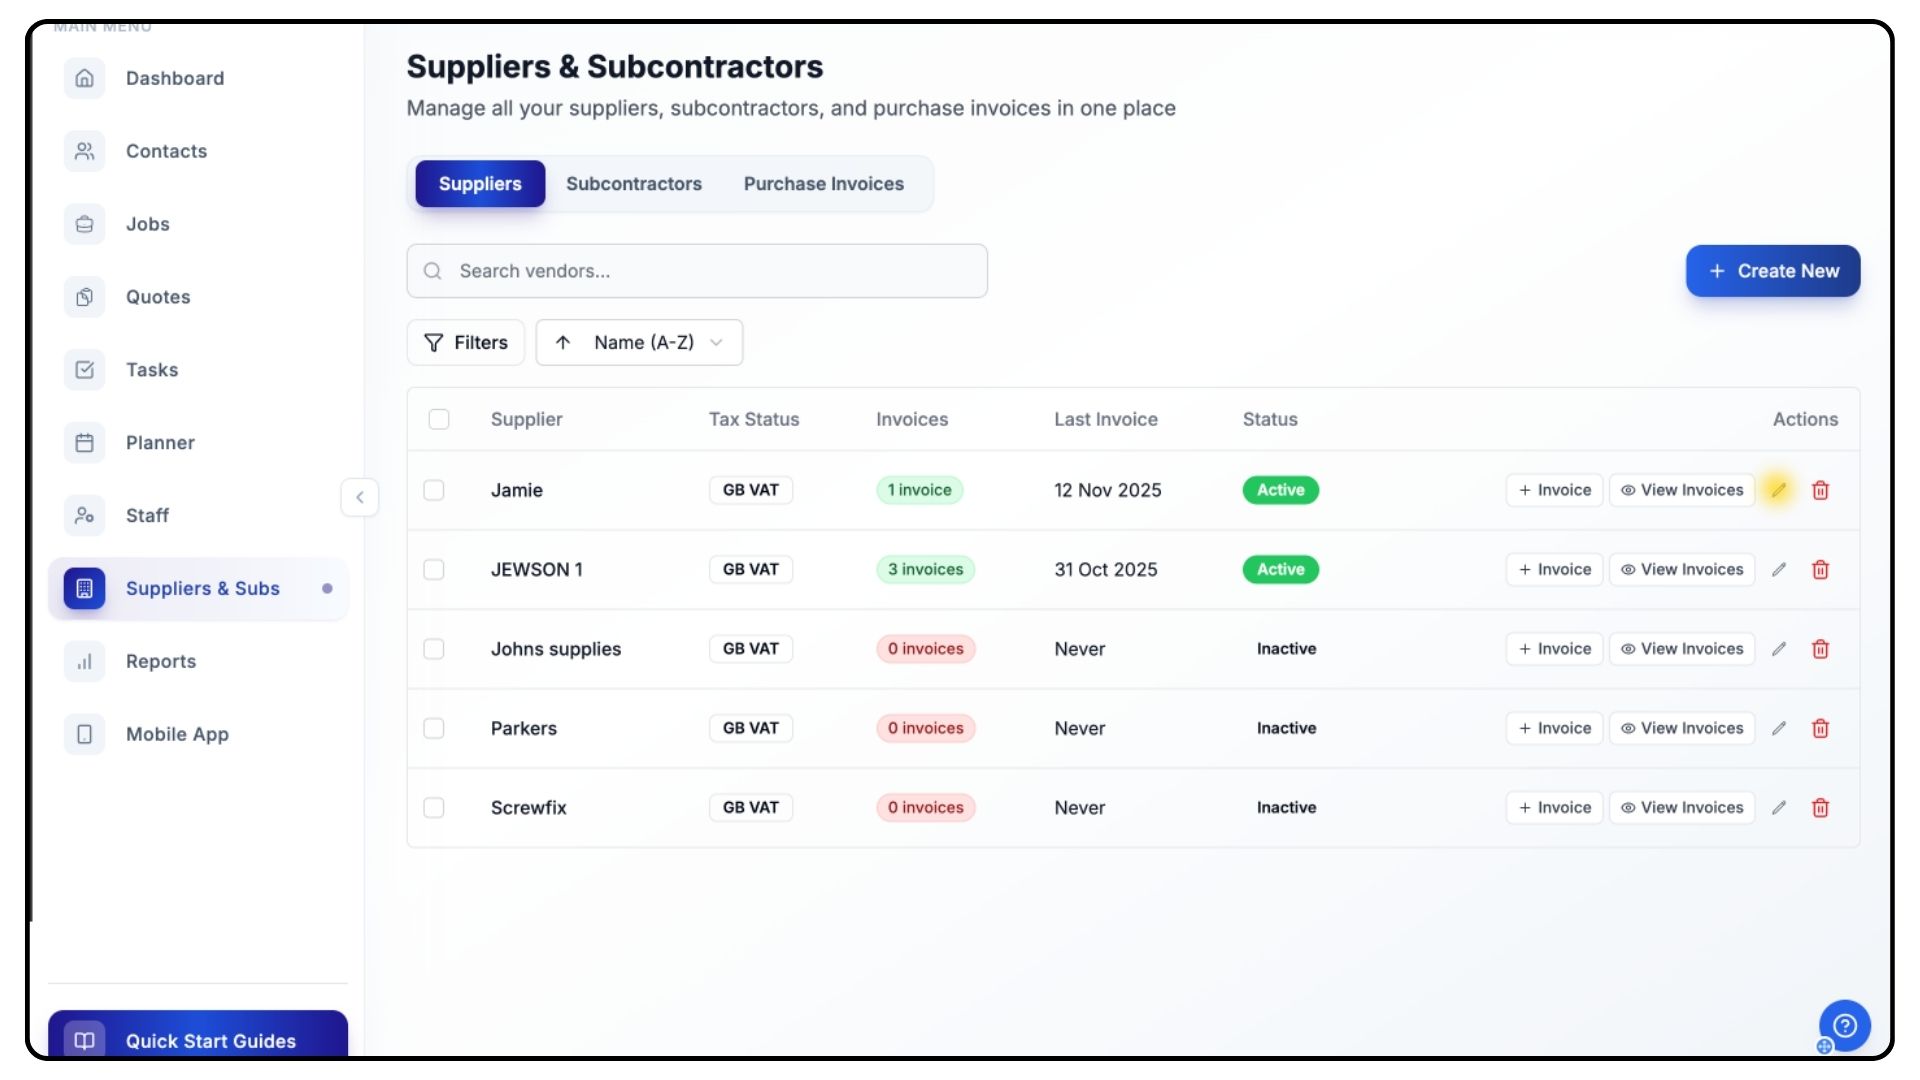
To edit supplier or subcontractor details, click the Pen Icon next to their name.
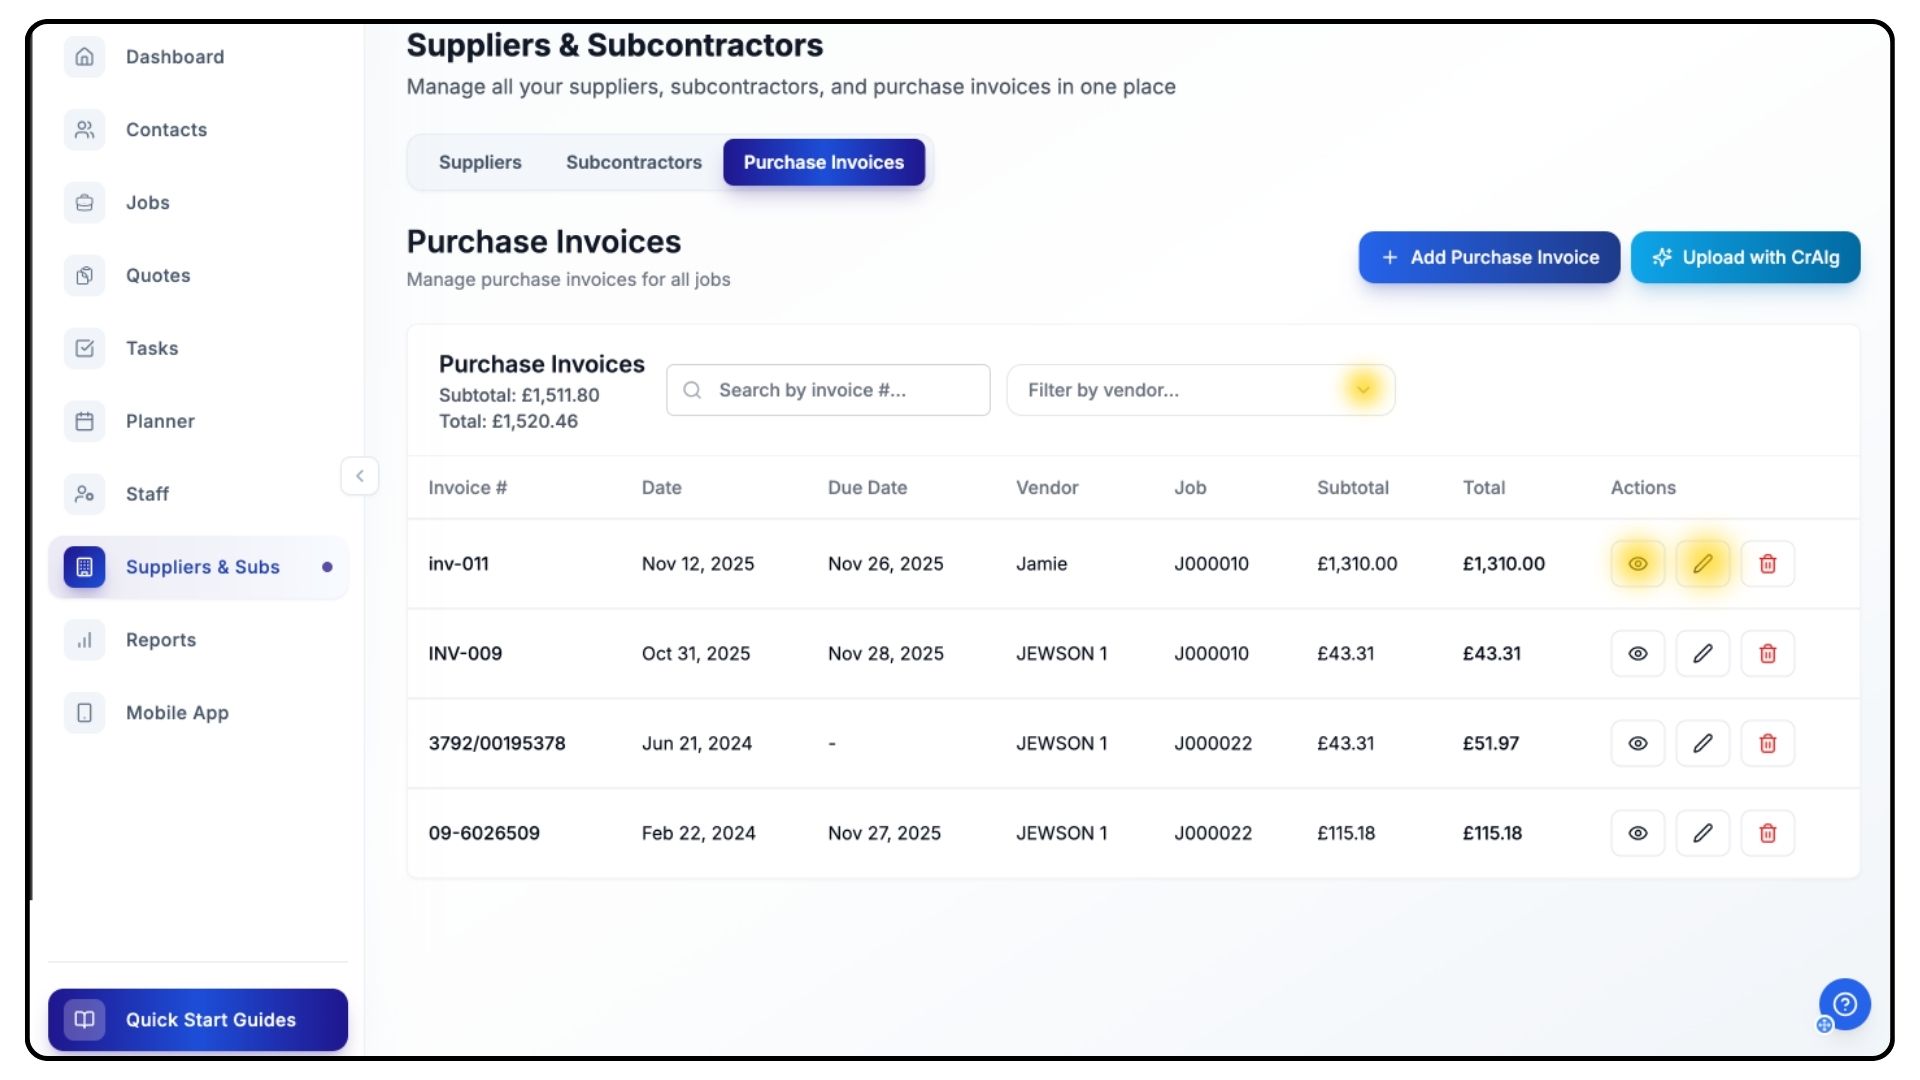
You can also manage invoices directly from the Purchase Invoices tab.
Filter by vendor to find what you need quickly.
Each invoice includes an Eye Icon to open and view details.
Click the Pen Icon to edit and update invoice information if needed.
Common Questions
Q: Can I add the same subcontractor to multiple projects?
Yes. Once added, subcontractors can be assigned to any job within your Trades Panel account.
Q: Do subcontractors need a Trades Panel account?
No, but inviting them to create one allows easier collaboration and invoice sharing.
Q: Can I track total spending per supplier?
Yes. Each supplier and subcontractor profile displays total spend and linked invoices.
Q: Can I delete an invoice after uploading?
Yes, you can delete or edit invoices at any time unless they’ve been finalised in your accounting records.