What It Does
Anticipated Dates allow you to plan when work is expected to take place within a job, before committing to staff and confirmed schedules. This helps you lay out your project timeline clearly and then assign your team when you’re ready to book the work in.
Accessing Anticipated Dates Within a Job
What It Does
Allows you to plan work at a job item and line item level.
Steps
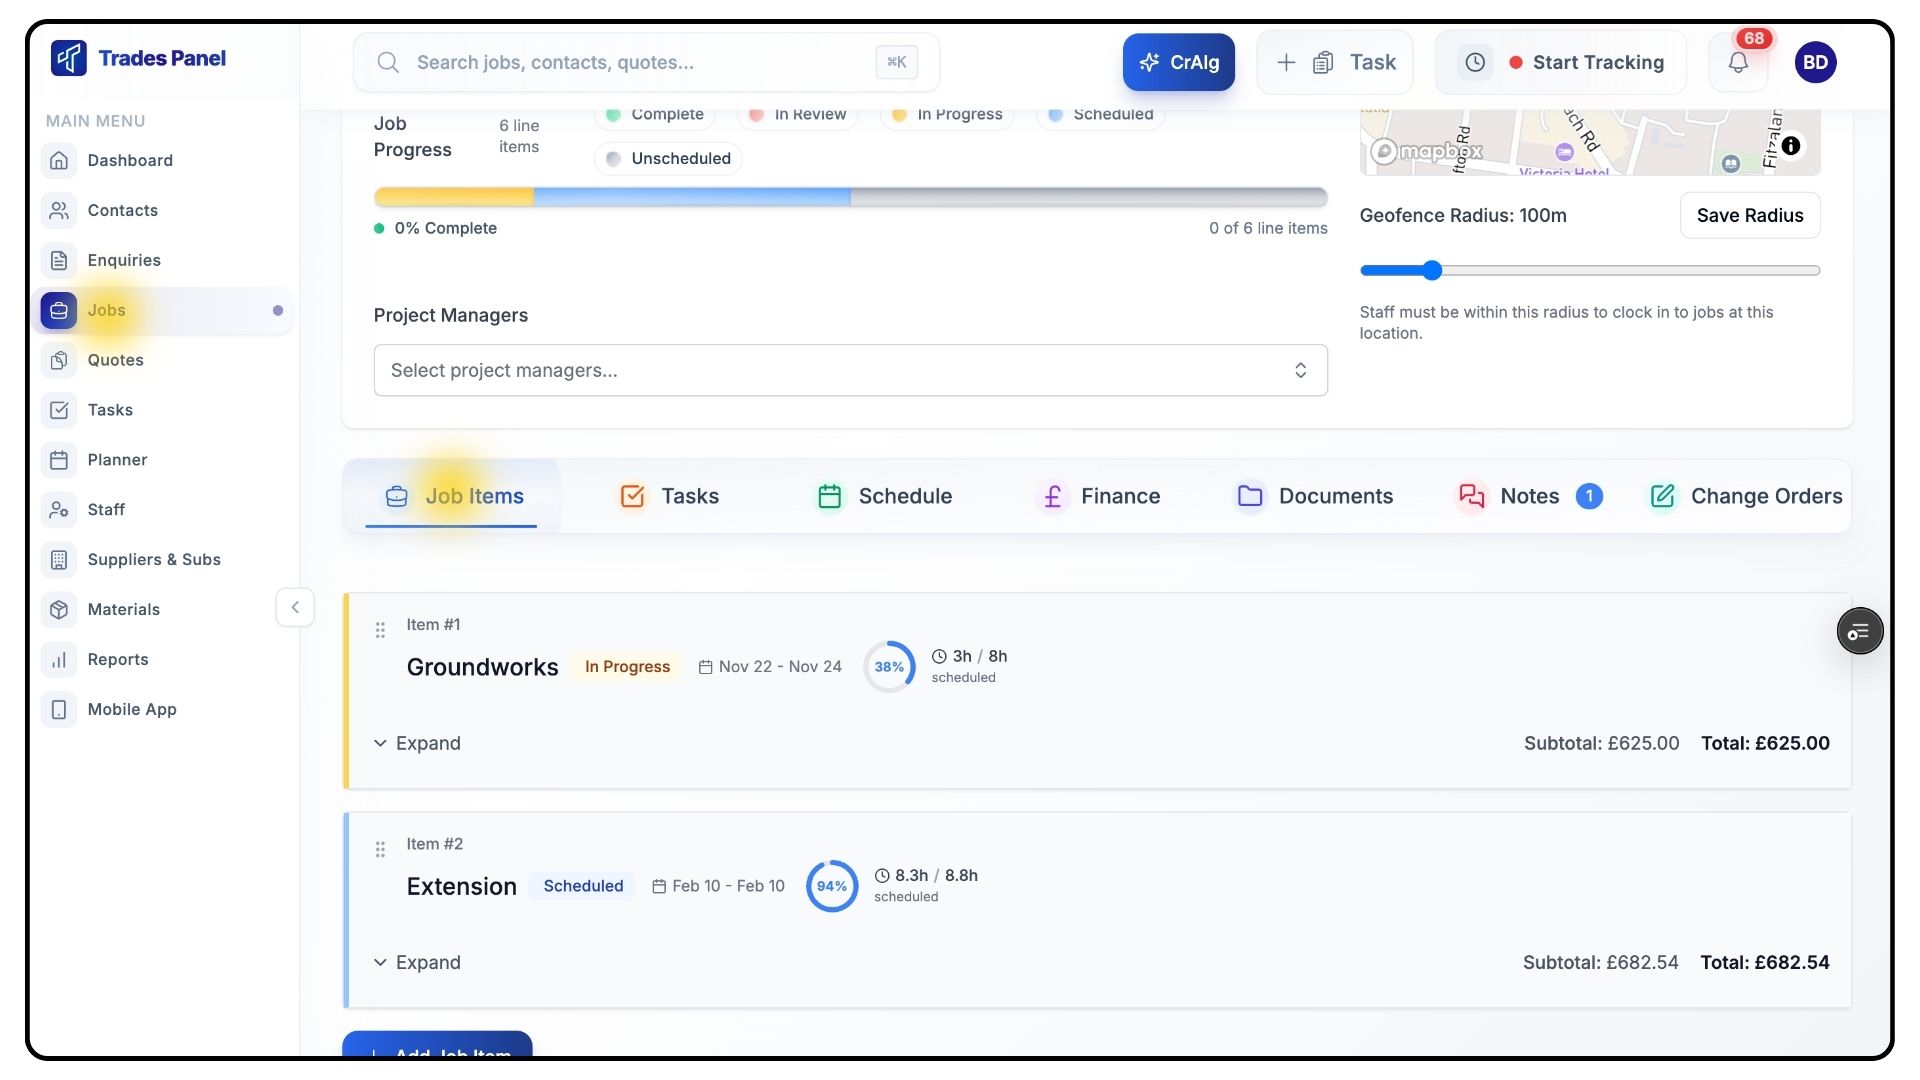
Go to Jobs and open the job you want to schedule.
Scroll down to the Job Items section.
Expand the job item you’re working on.
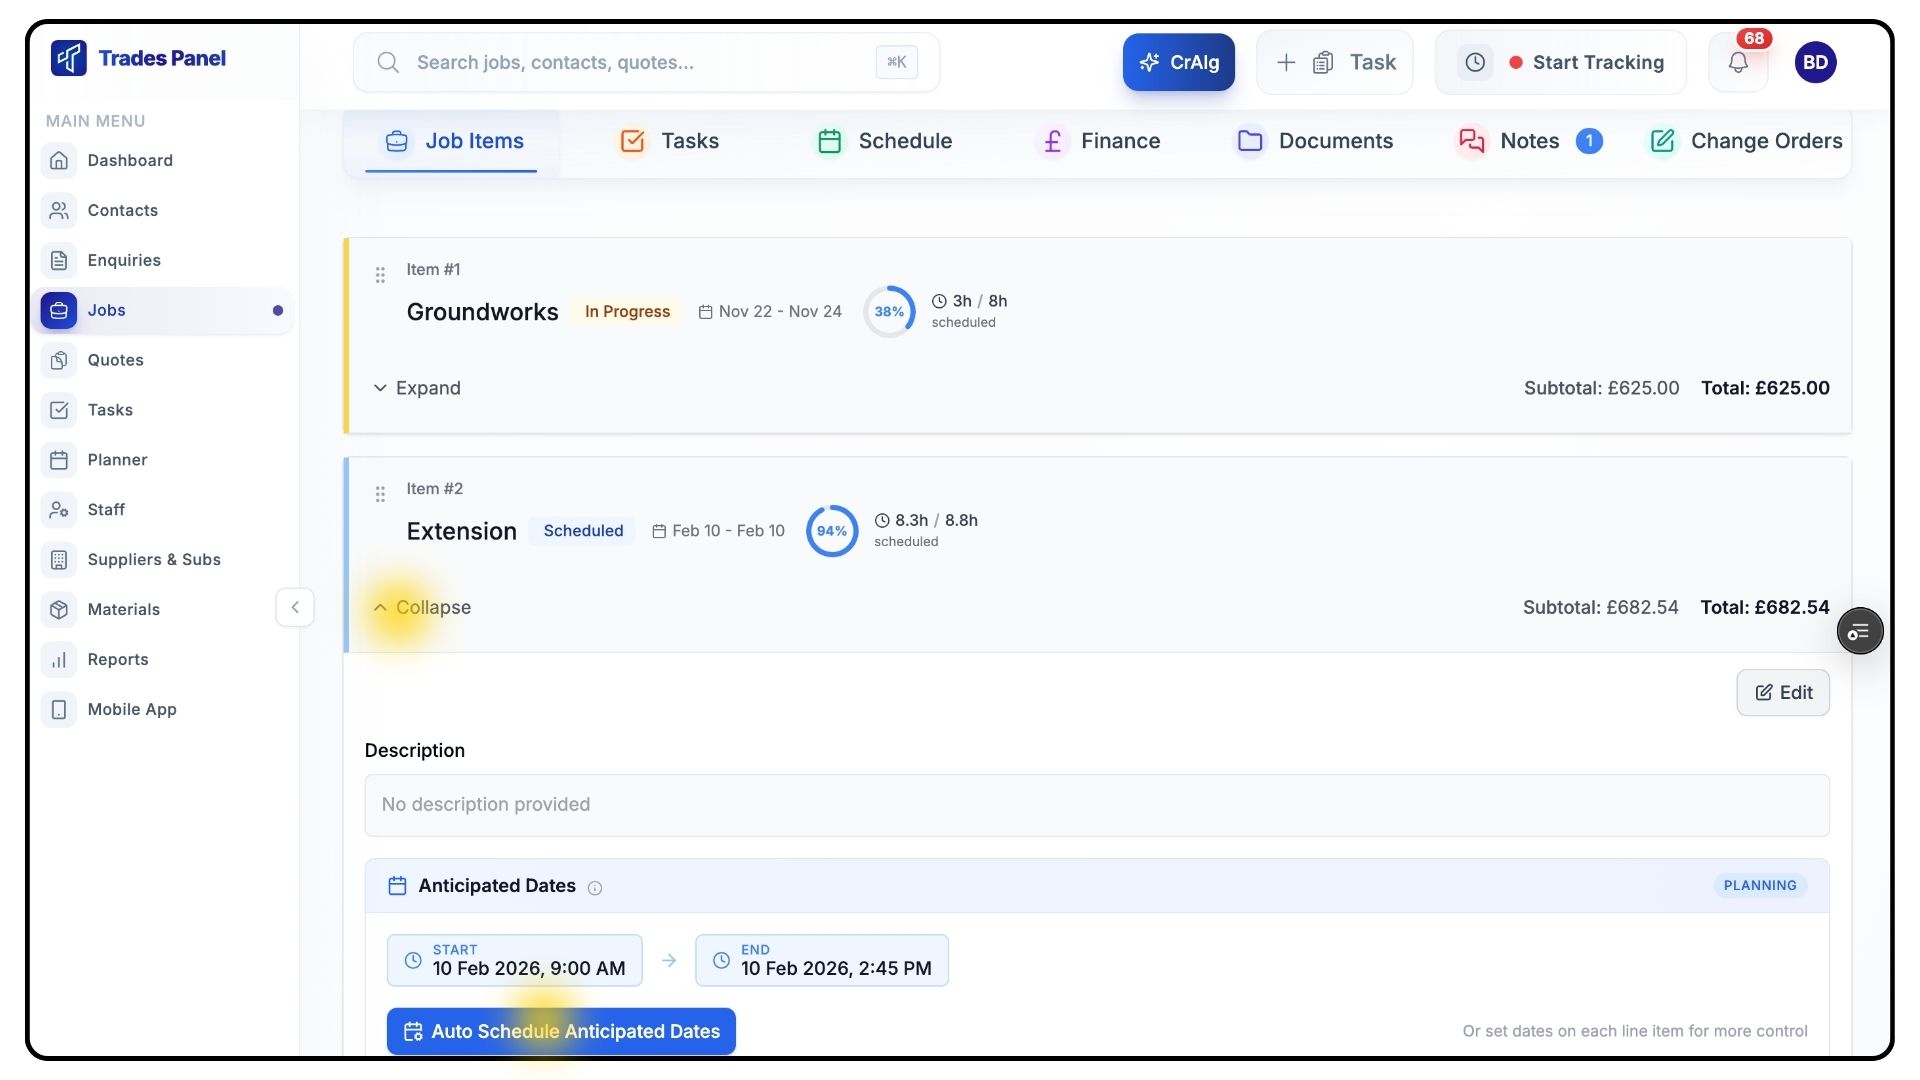
Within the job item, select the Anticipated Dates tab.
Understanding Anticipated Dates vs Scheduled Dates
Anticipated Dates are used to plan when work is expected to take place, based on your overall project timeline and customer commitments.
Scheduled Dates represent when work is actually booked in with specific staff members.
In most cases, anticipated and scheduled dates will align. However, they can differ due to staff availability, weather delays, or changes on site.
Setting Anticipated Dates at Job Item Level
What It Does
Quickly plans an entire stage of work in one action.
Steps
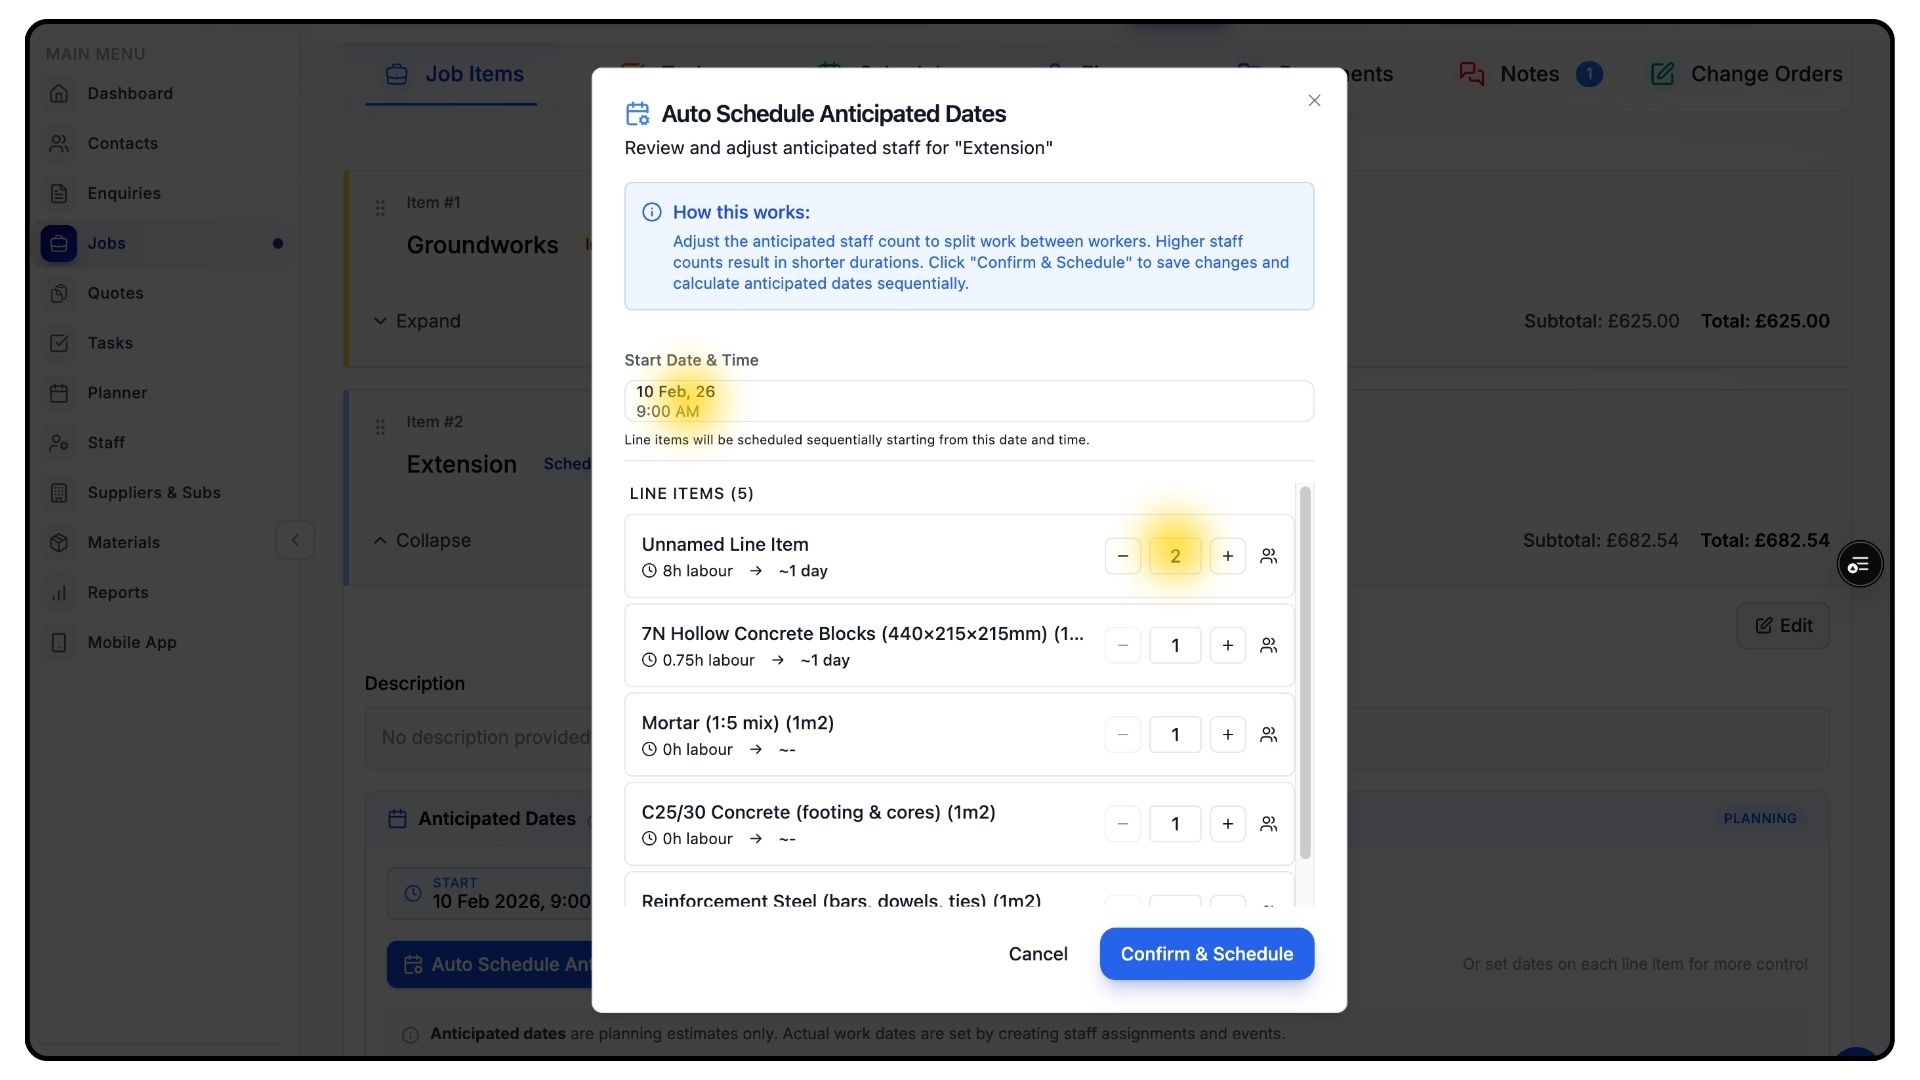
In the Anticipated Dates tab, select the expected start date for the job item.
Enter the number of staff required for each line item.
TradesPanel will automatically split the total labour time between the workers.
Once entered, TradesPanel will automatically populate anticipated dates for all line items within that job item.
If things change later, you can easily adjust these dates — nothing is locked in.
Setting Anticipated Dates at Line Item Level
What It Does
Gives you more control over individual tasks within a job item.
Steps
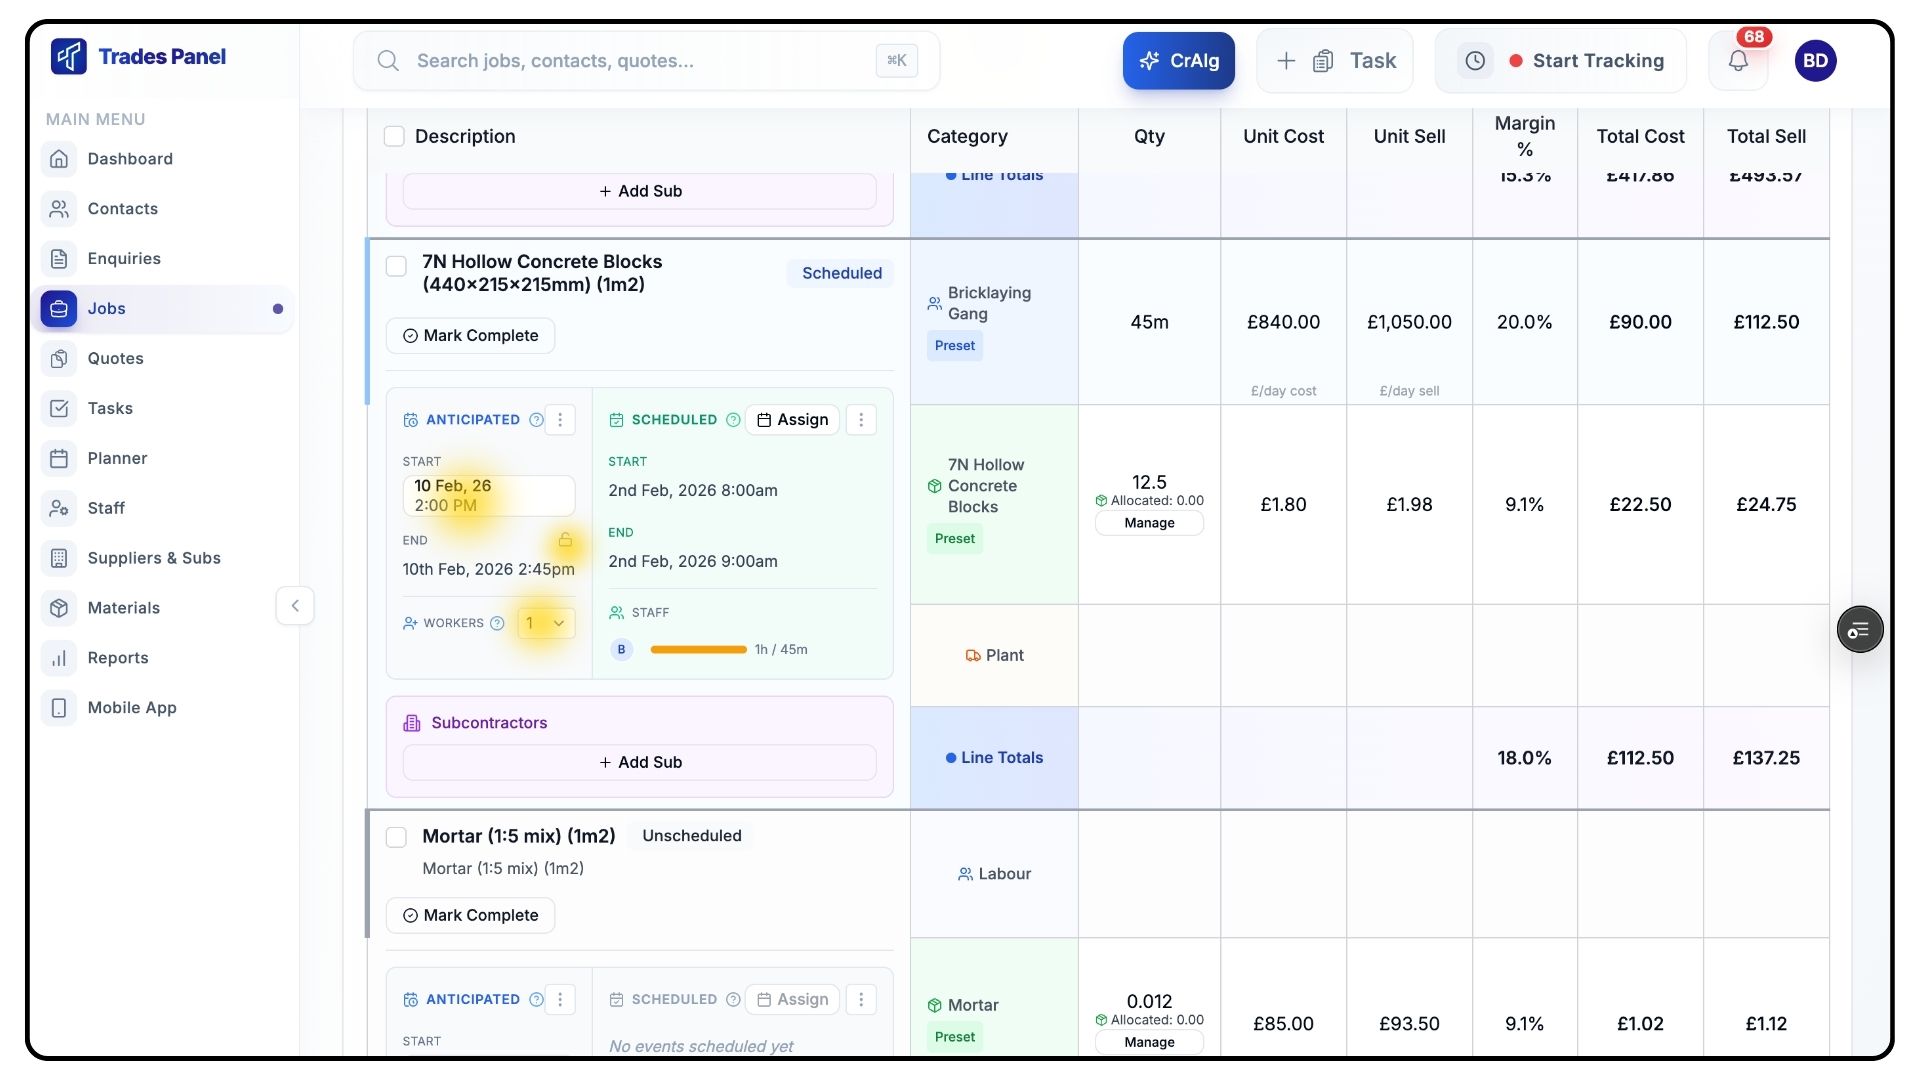
Scroll down to the list of Line Items.
Within the Anticipated section for a line item, select:
Number of workers
Start date
TradesPanel will calculate the end date automatically based on the information provided.
If you need to manually adjust the end date — for example, to allow drying time after plastering — click the lock icon beneath the start date.
This unlocks the end date and allows you to set it manually.
Assigning Staff Using the Planner
What It Does
Turns planned work into confirmed, staff-scheduled activity.
You don’t have to set anticipated dates to assign staff, but doing so helps pre-lay out the job before scheduling.
Steps
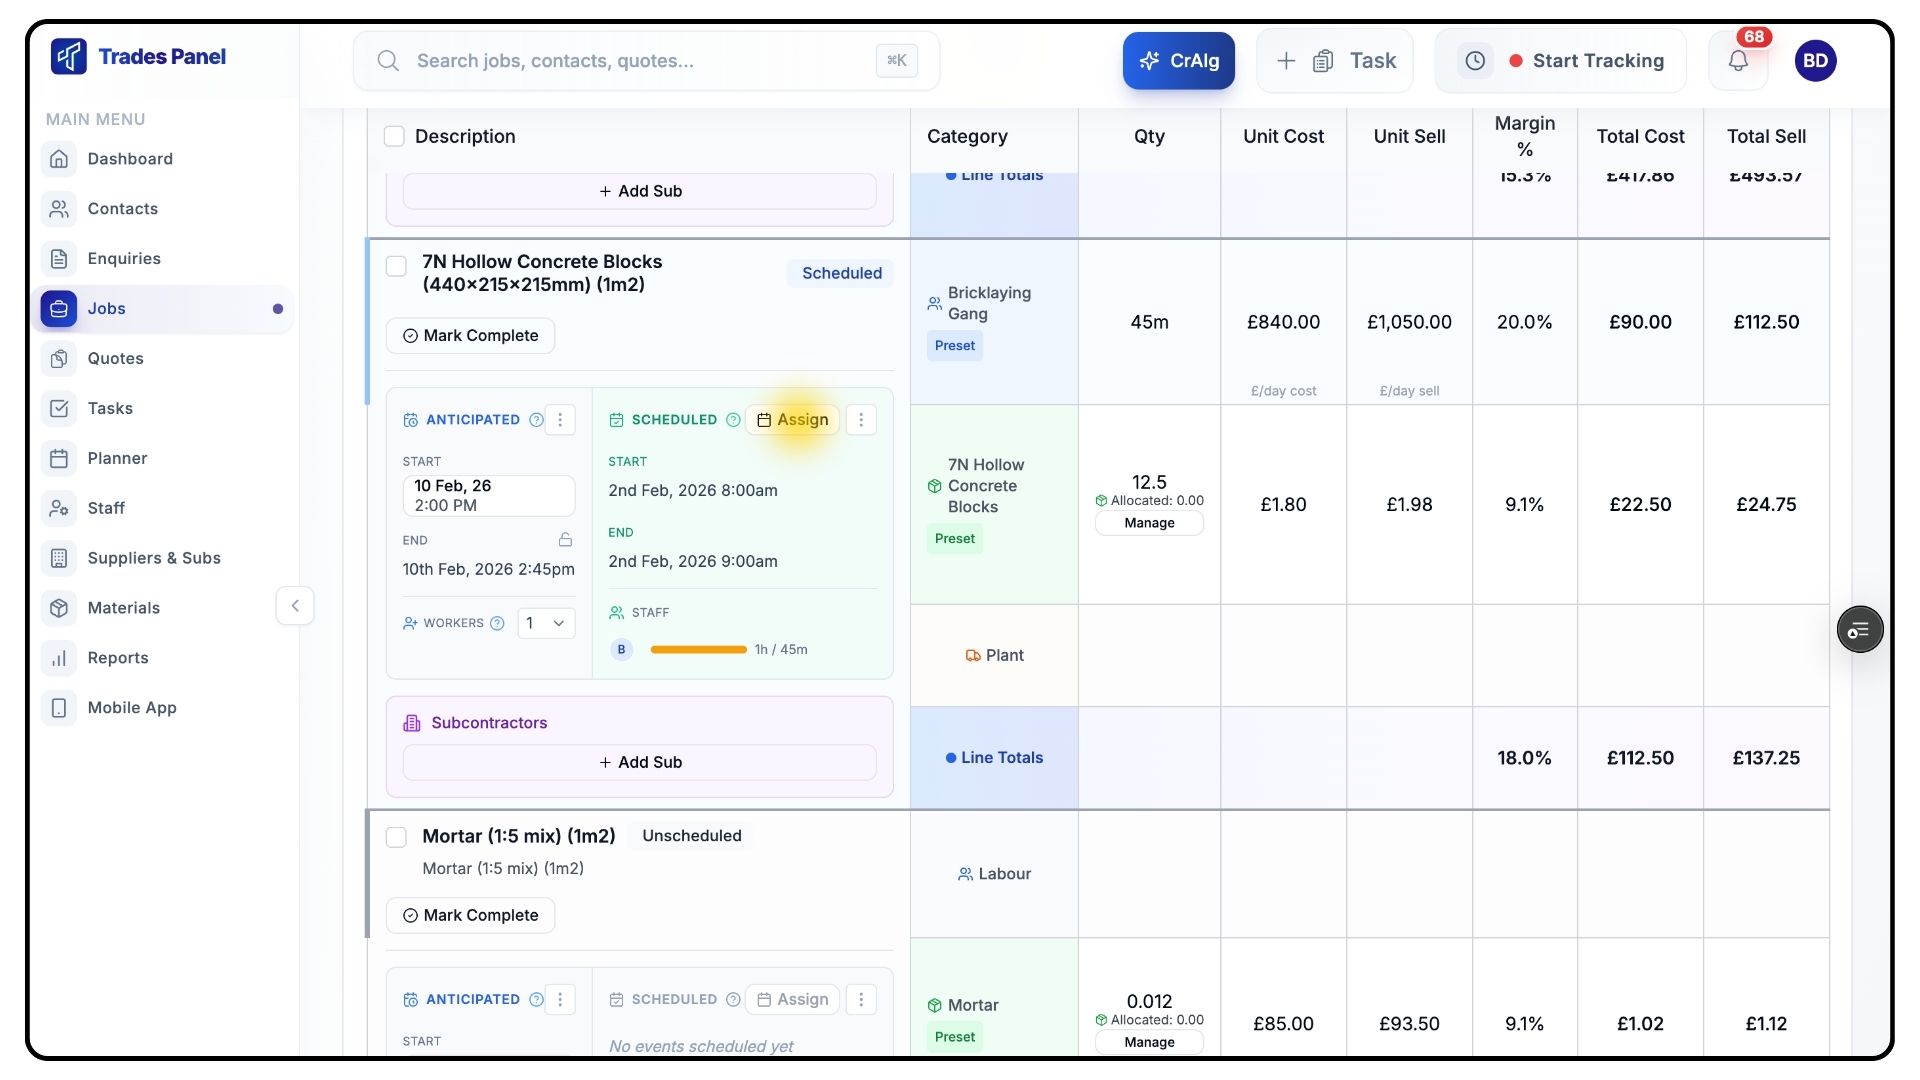
Once your anticipated dates are set and you’re ready to schedule, click Assign.
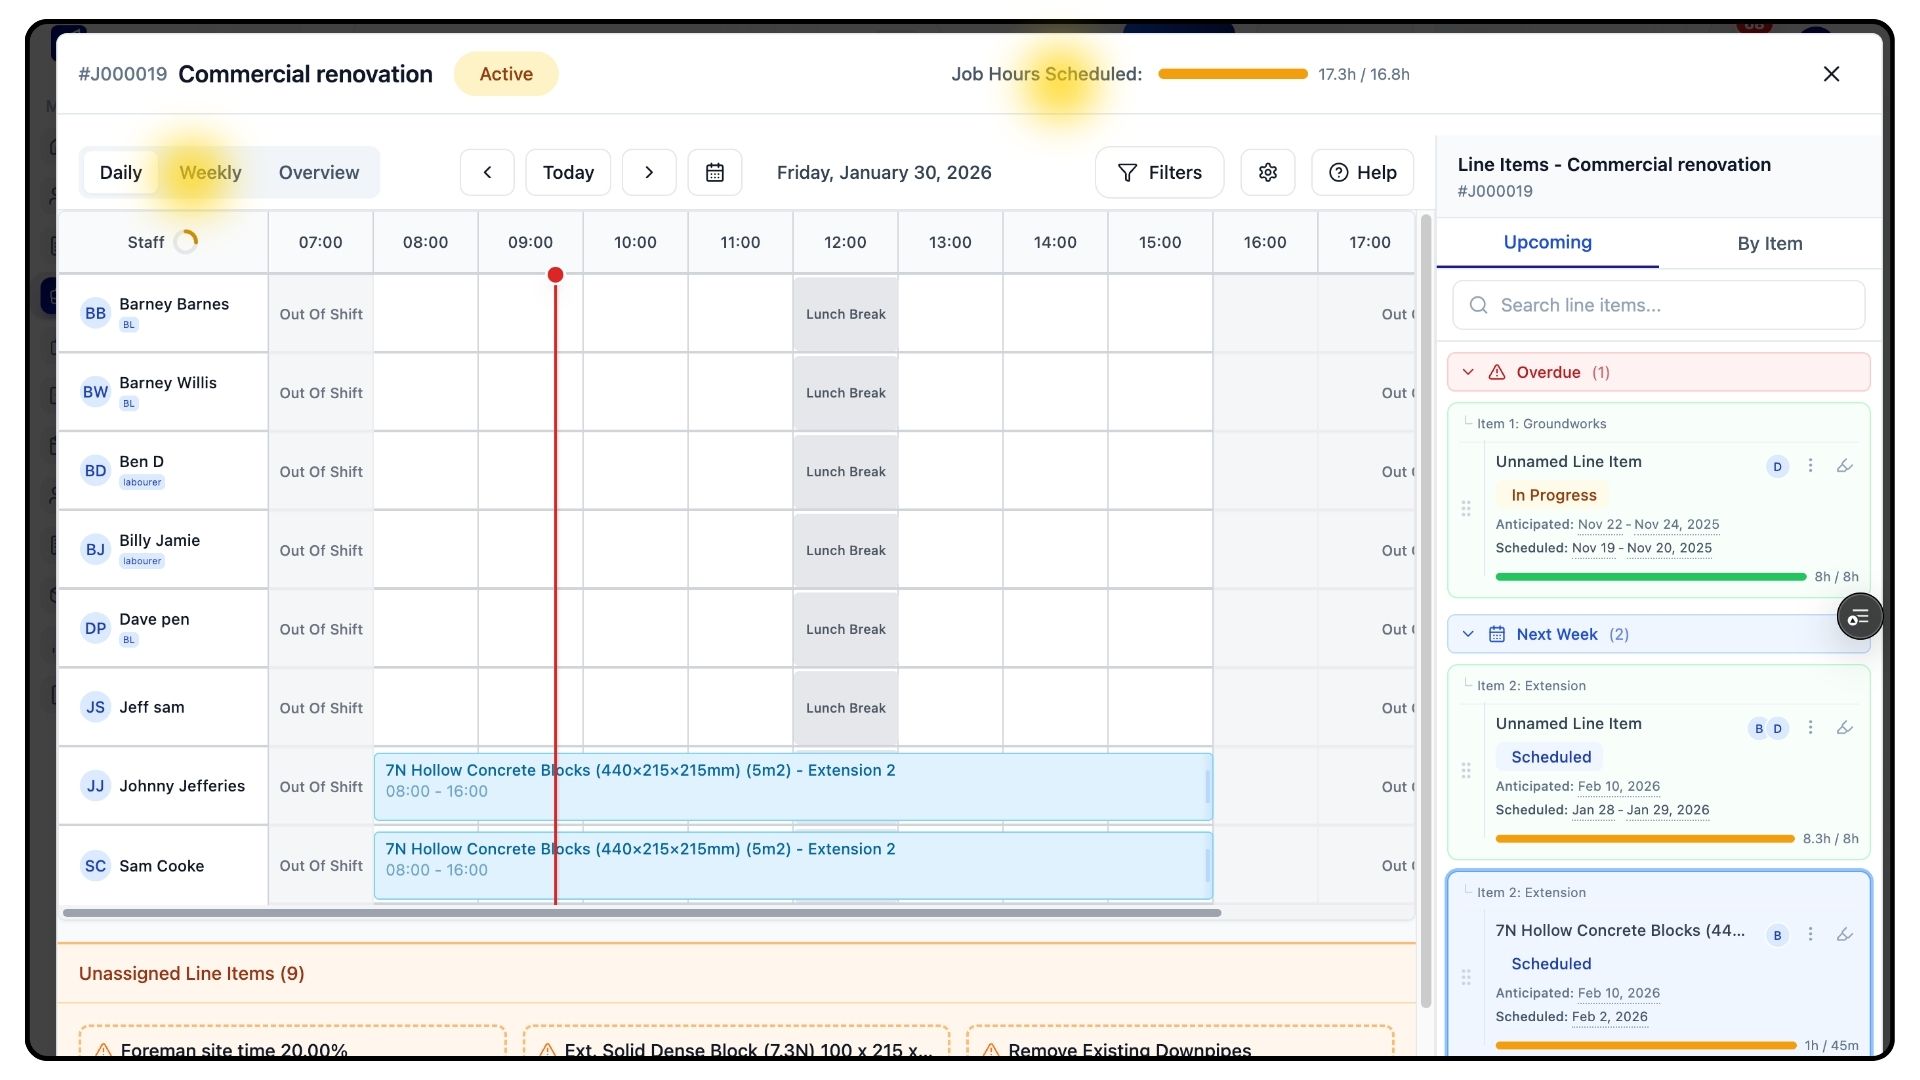
This opens the Planner, showing:
Your staff
Any existing bookings
Other jobs scheduled for that day or week
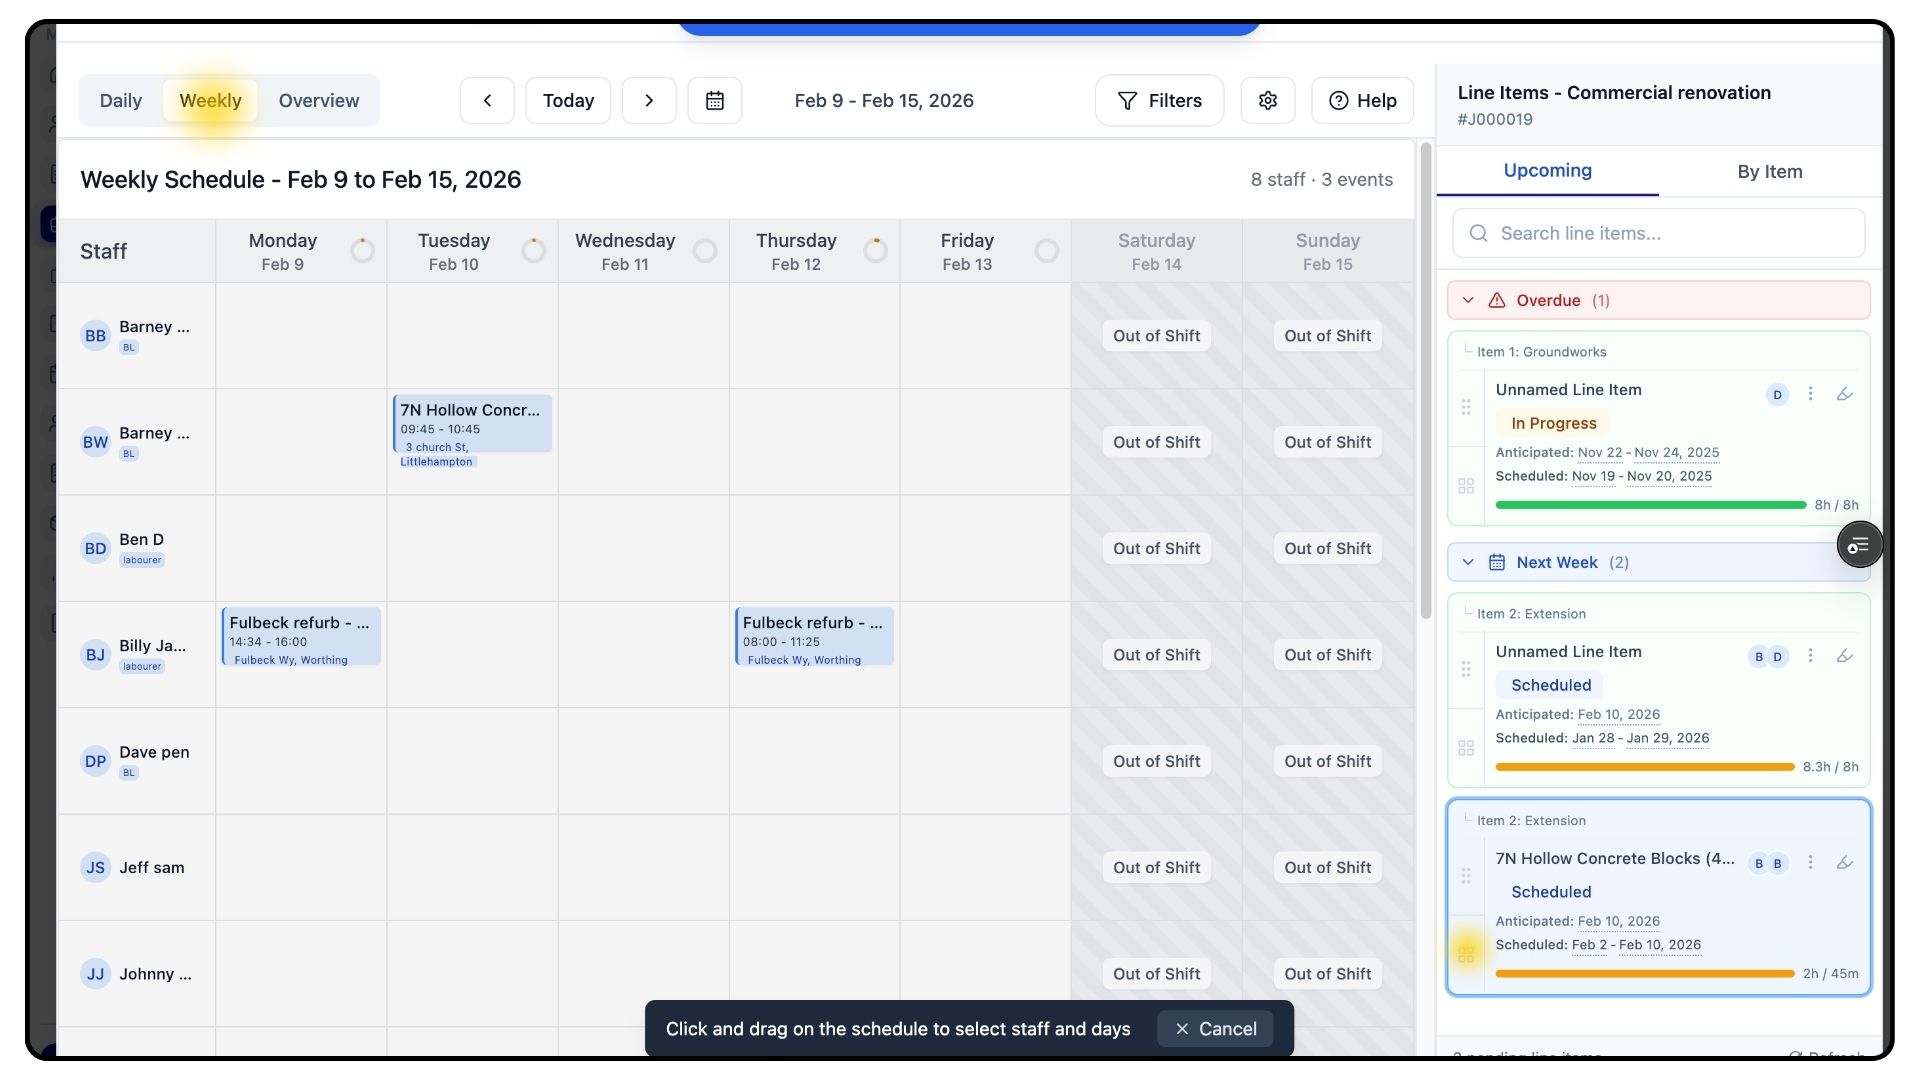
You can switch between Daily, Weekly, or Overview views using the options at the top.
At the top of the page, you’ll also see a summary of the total hours scheduled so far for the job.
Scheduling Line Items in the Planner
What It Does
Allows you to assign work to specific staff members.
Steps
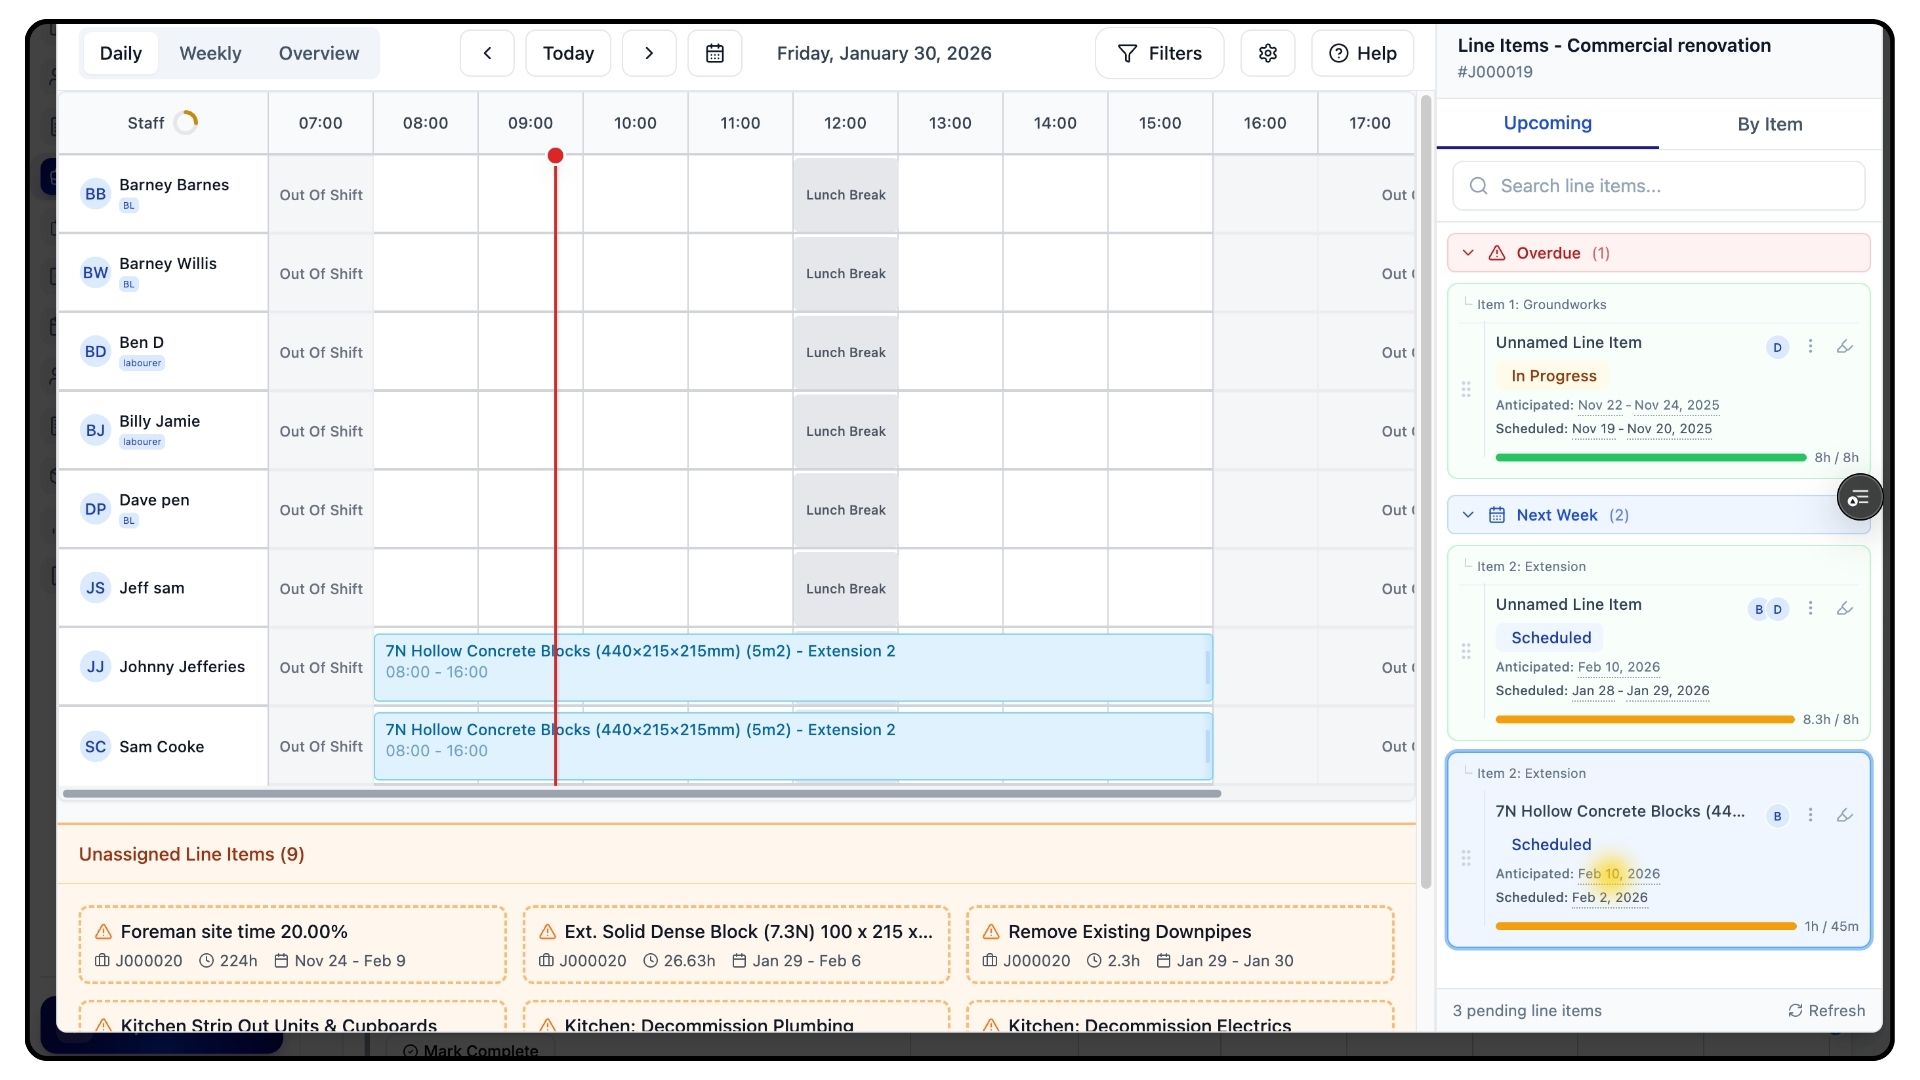
On the right-hand side, the relevant line item will be highlighted in blue.
Within the line item card, the anticipated dates are shown in smaller text.
Clicking on the date will jump you directly to that day in the calendar.
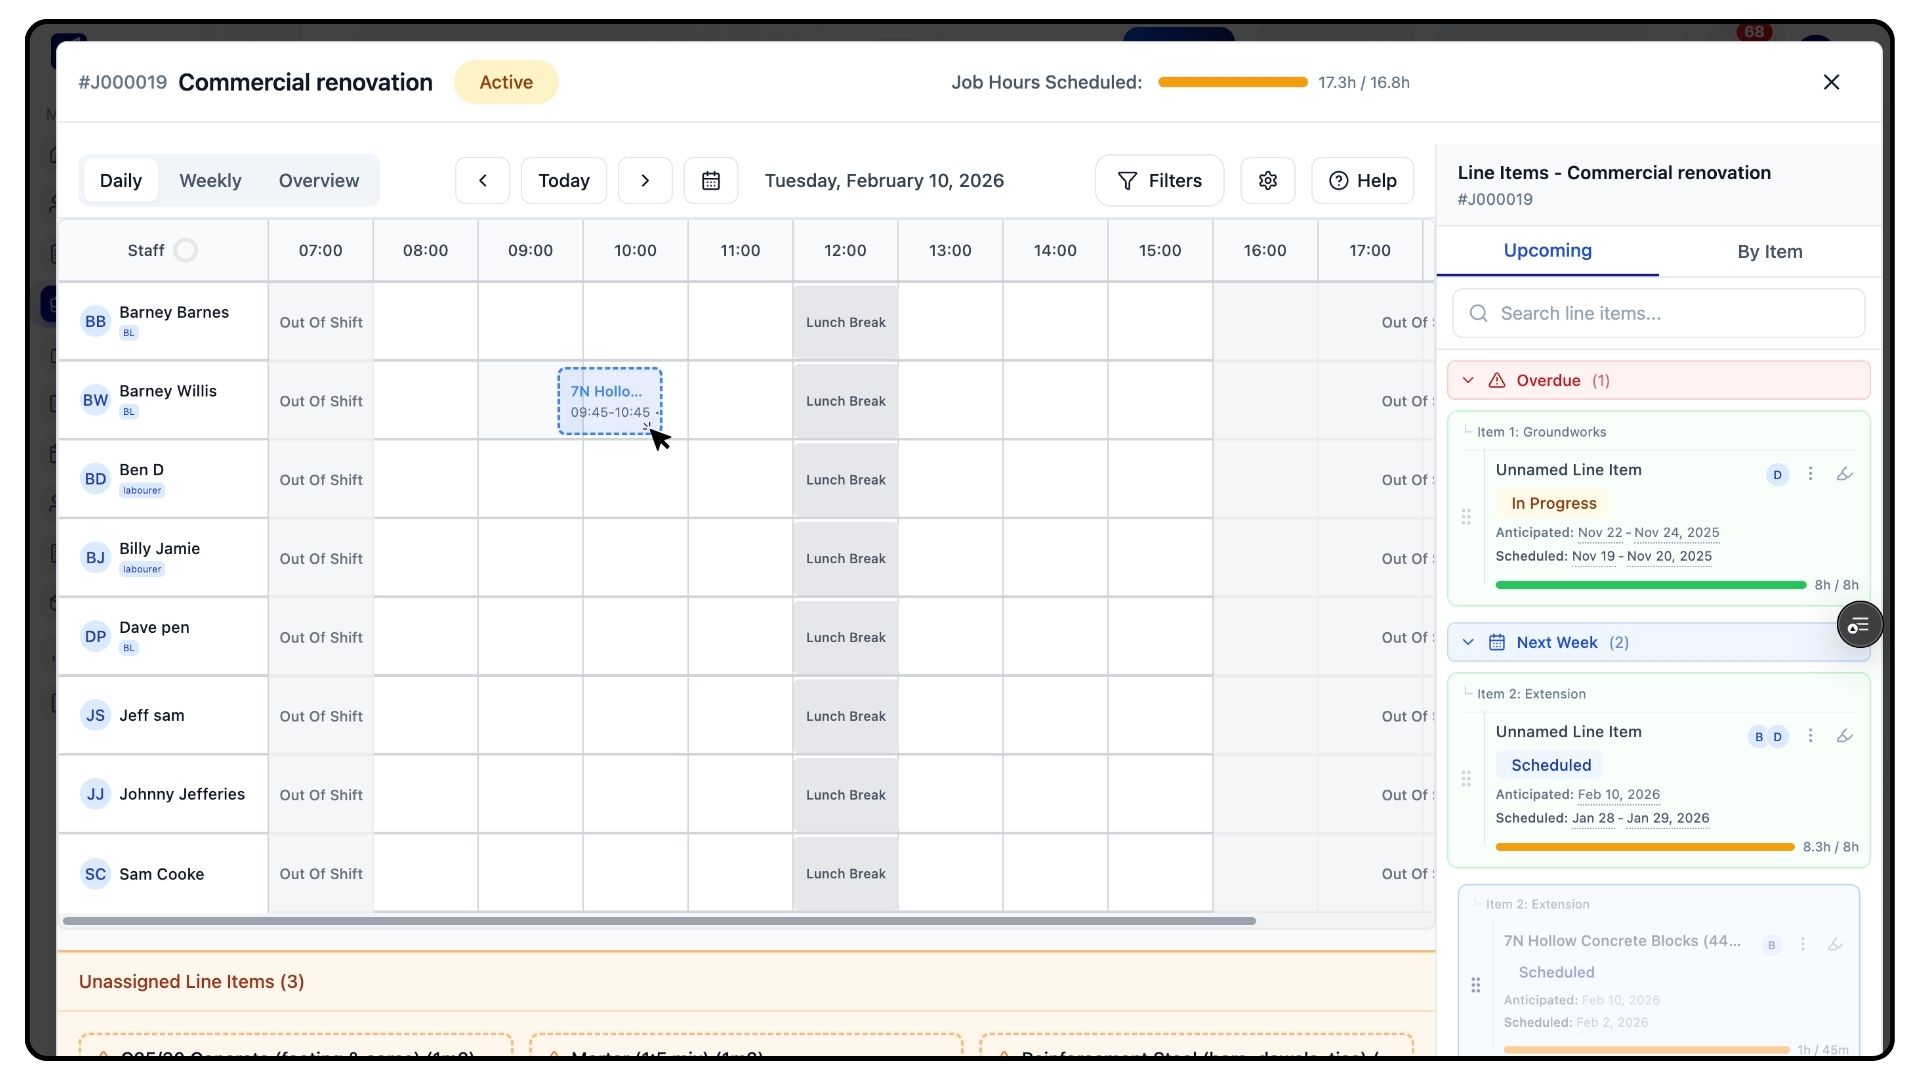
If the date looks correct and there are no conflicts, drag the line item onto the appropriate staff member’s schedule.
Once dropped into place, the line item is now scheduled and assigned.
Bulk Scheduling and Managing Assignments
What It Does
Speeds up scheduling and gives you control over changes.
Steps
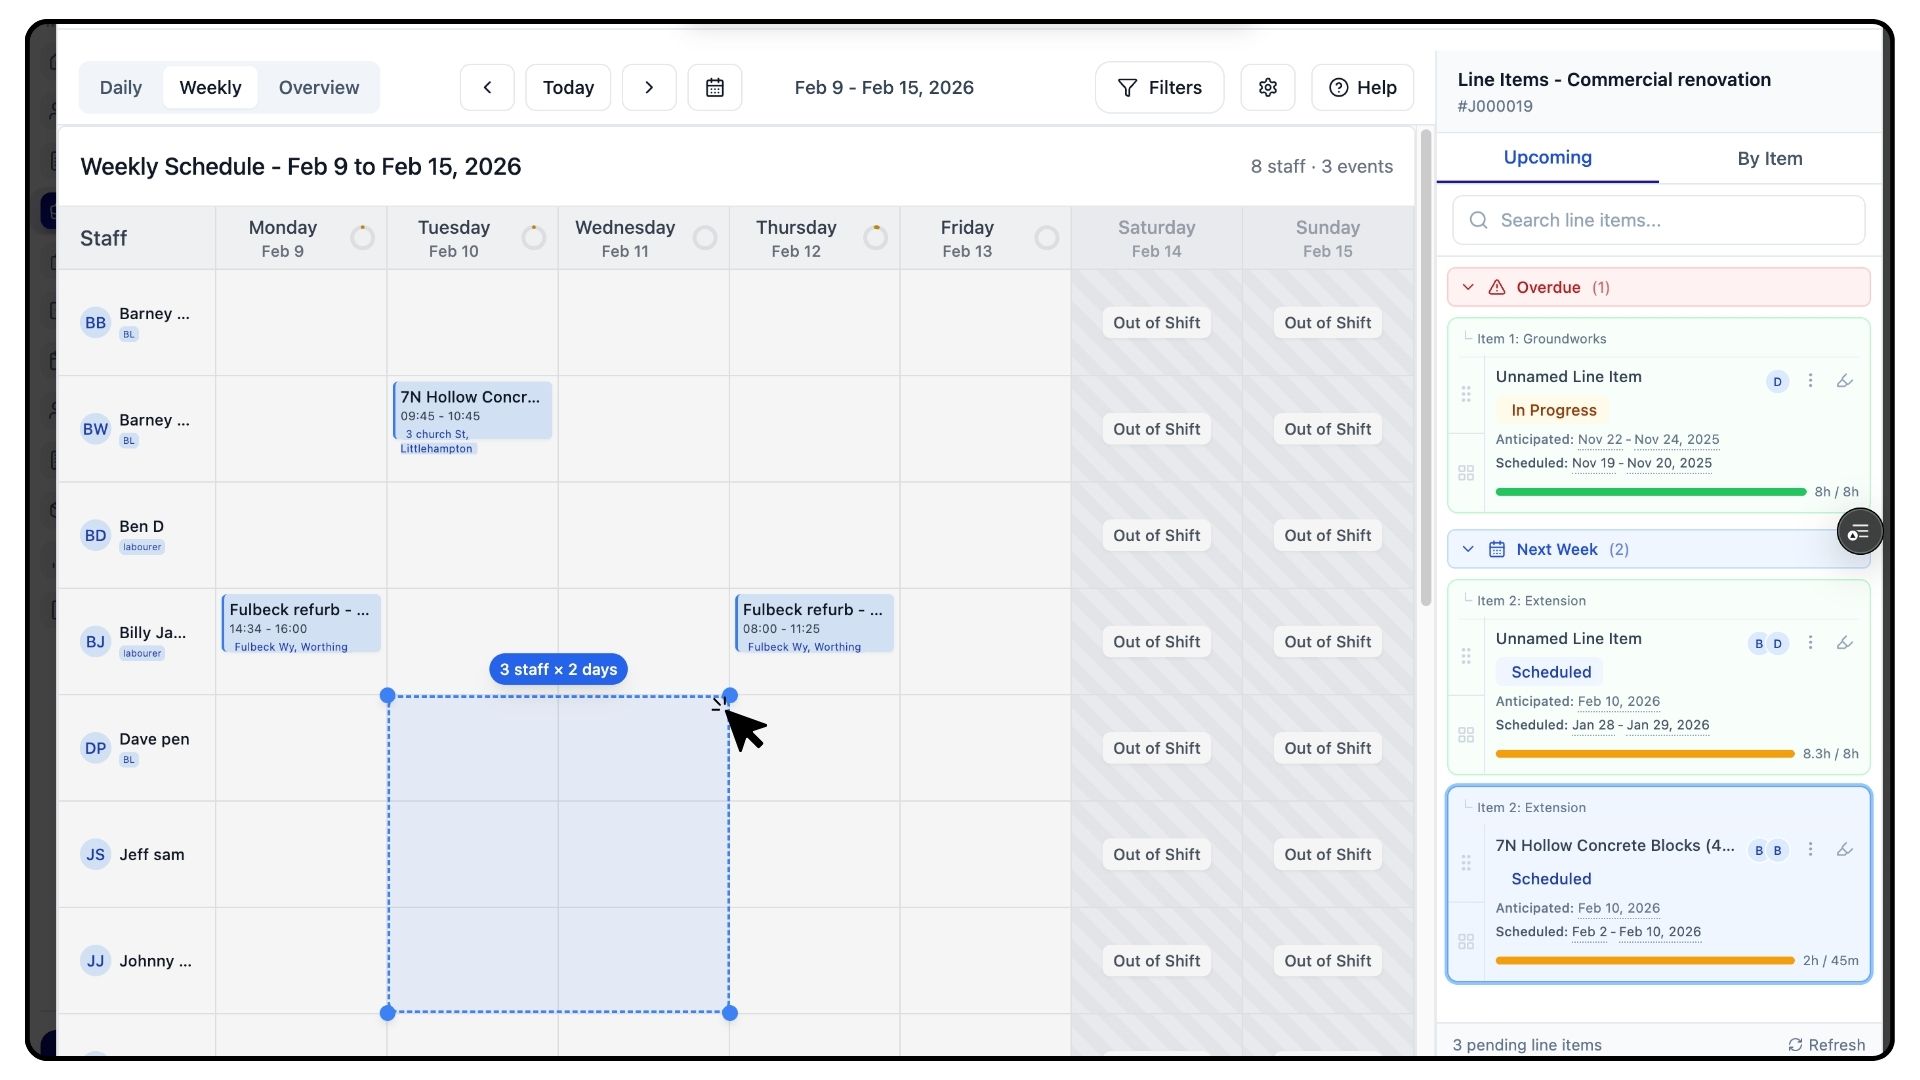
To bulk schedule work, switch to the Weekly or Overview view.
Use the grid tool to drag across the required time period and staff to assign work in one action.
To unschedule work:
Click the event and press Delete, or
Open the More Options menu within the item card
From here, you can:
Unassign the individual line item, or
Select Manage Assignees to bulk unschedule all events for that job from a specific staff member
Scheduling by Job Stage
What It Does
Allows you to plan work by project phases instead of people.
Steps
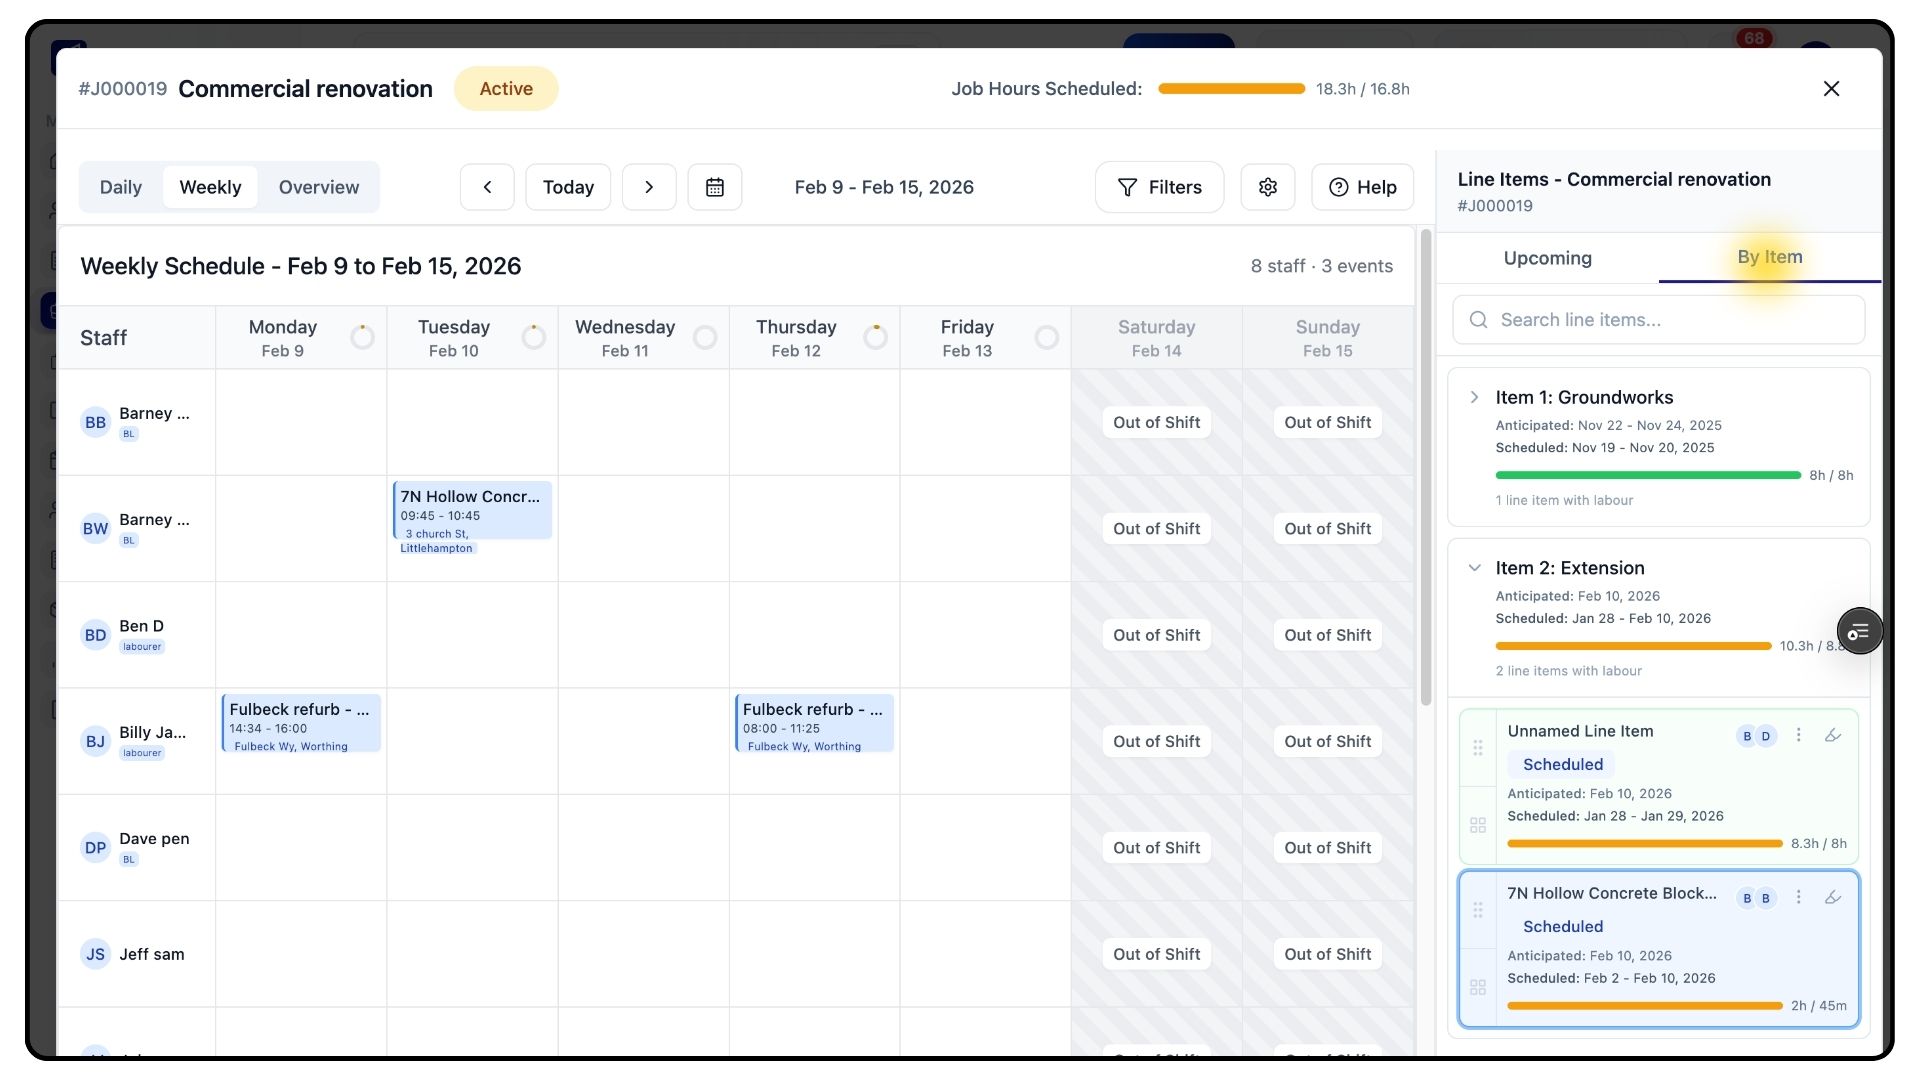
In the top-right corner of the planner, switch to List by Item view.
This allows you to schedule work by stages — for example, groundworks first, followed by brickwork.
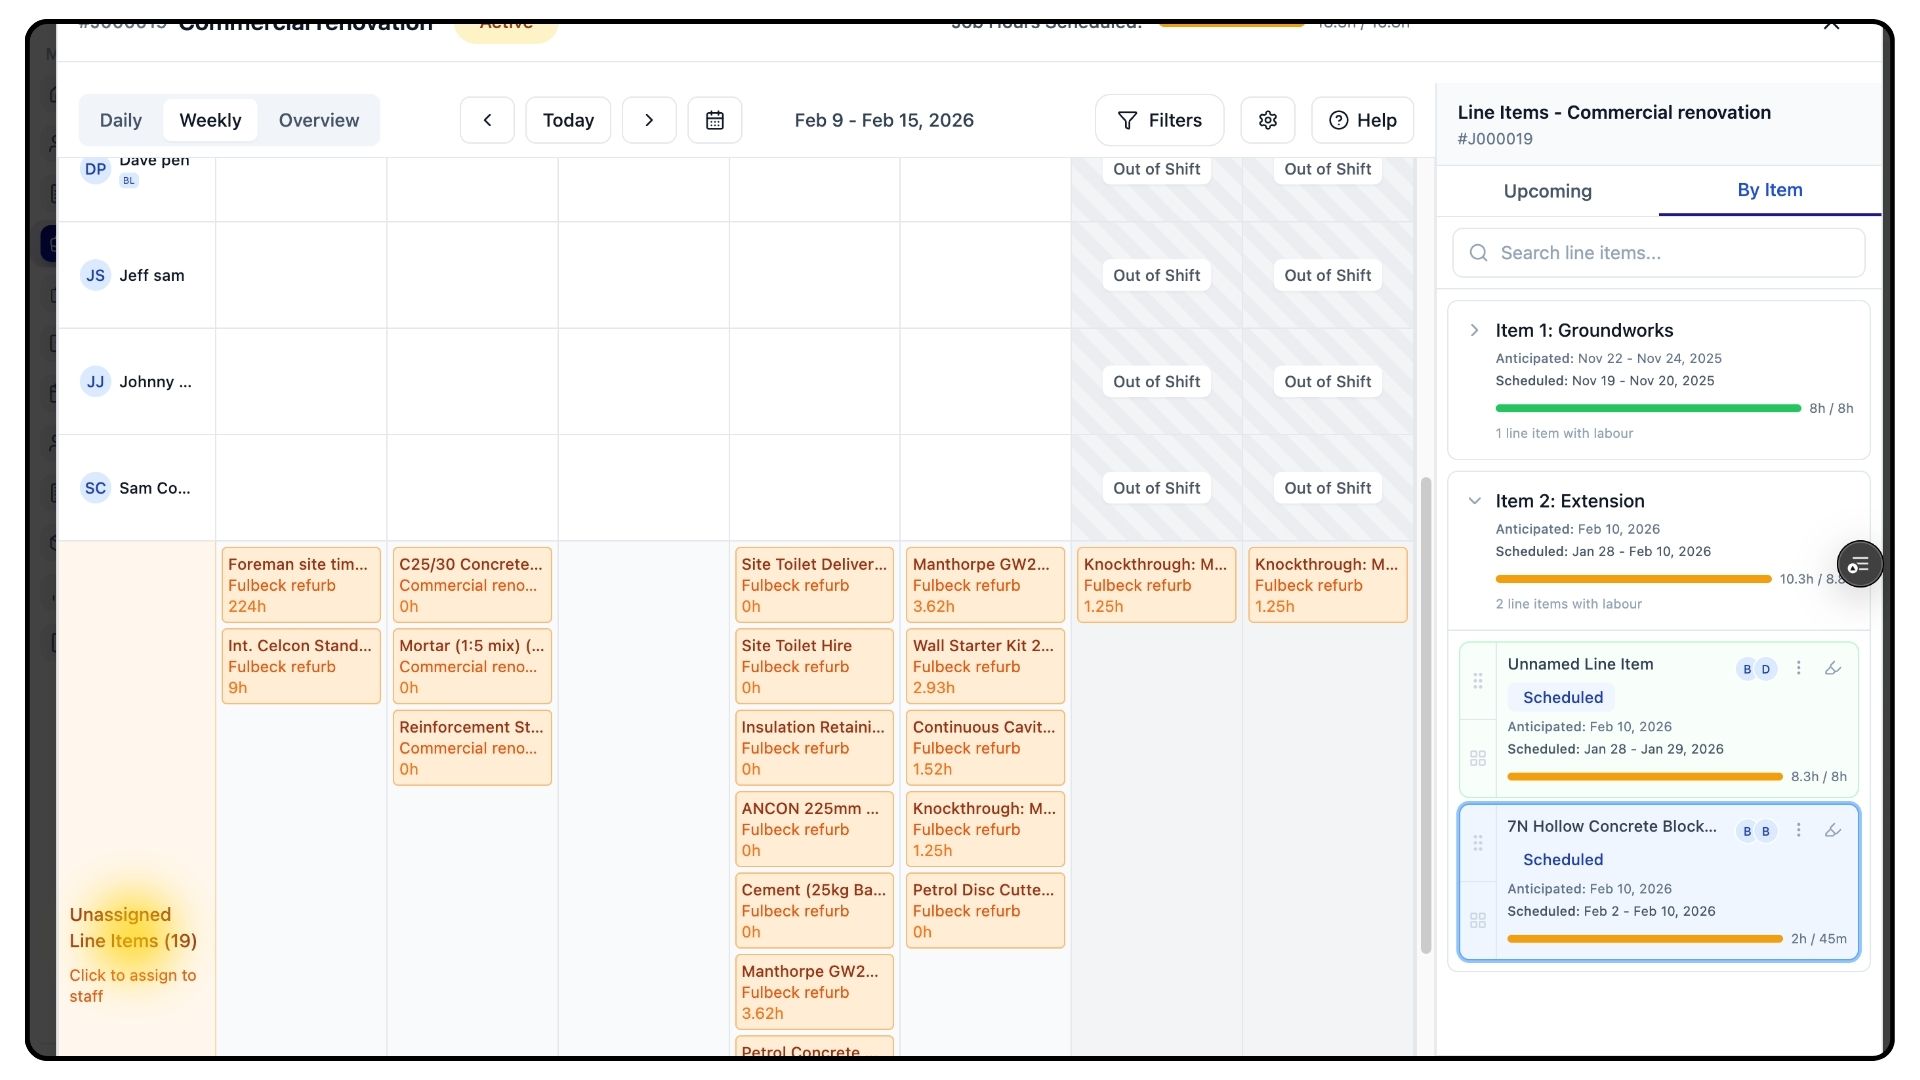
Below the planner, you’ll also see unassigned items from other jobs, giving you full visibility of outstanding work across your schedule.
Final Notes
What It Does
Ensures your project is clearly planned and properly scheduled.
And that’s how to plan, schedule, and assign work in TradesPanel using anticipated dates.
For more tutorials and walkthroughs, visit the Guides section in the navigation bar.