What It Does
The Job Schedule view gives you a clear, structured overview of how a specific project is planned. It shows all job items and their line items in one place, allowing you to review schedules, manage assignments, and apply anticipated dates efficiently.
Accessing the Job Schedule
What It Does
Allows you to view the full schedule for a single job.
Steps
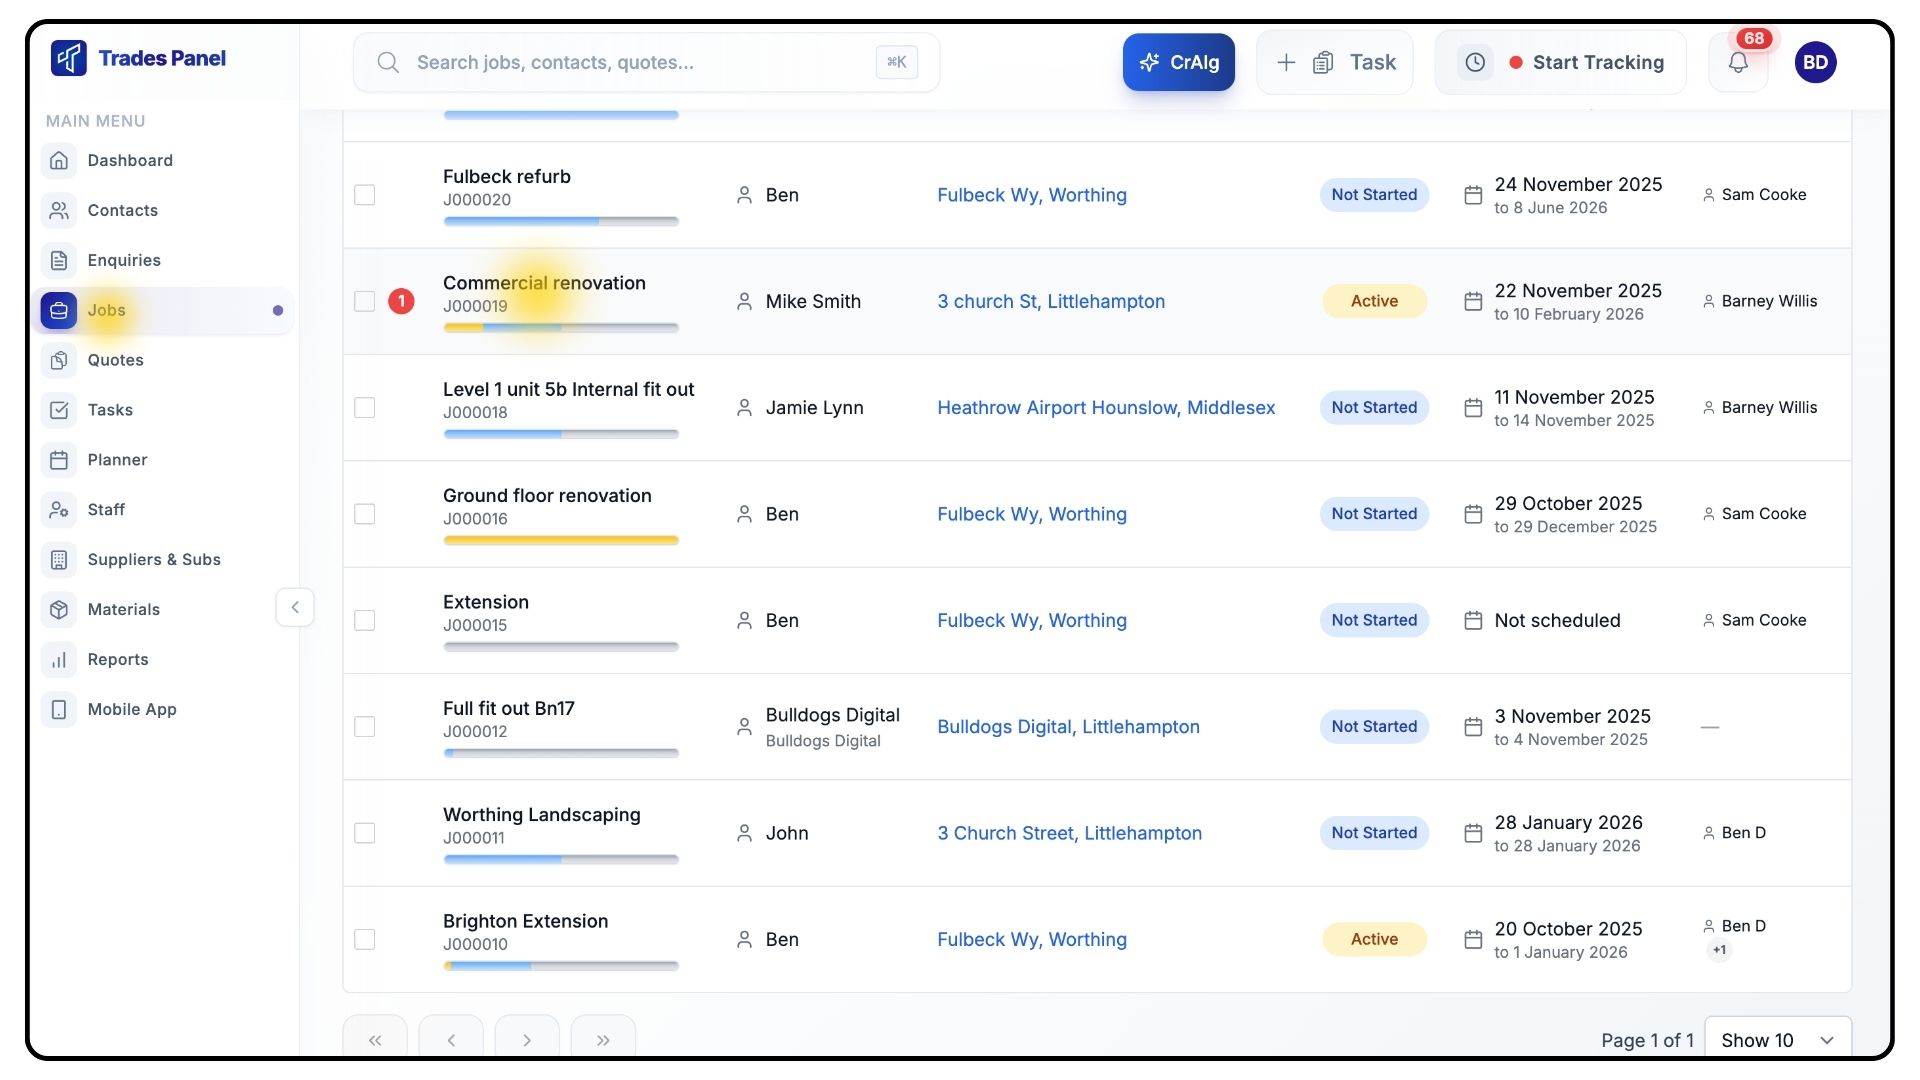
Go to Jobs and open the job you want to view.
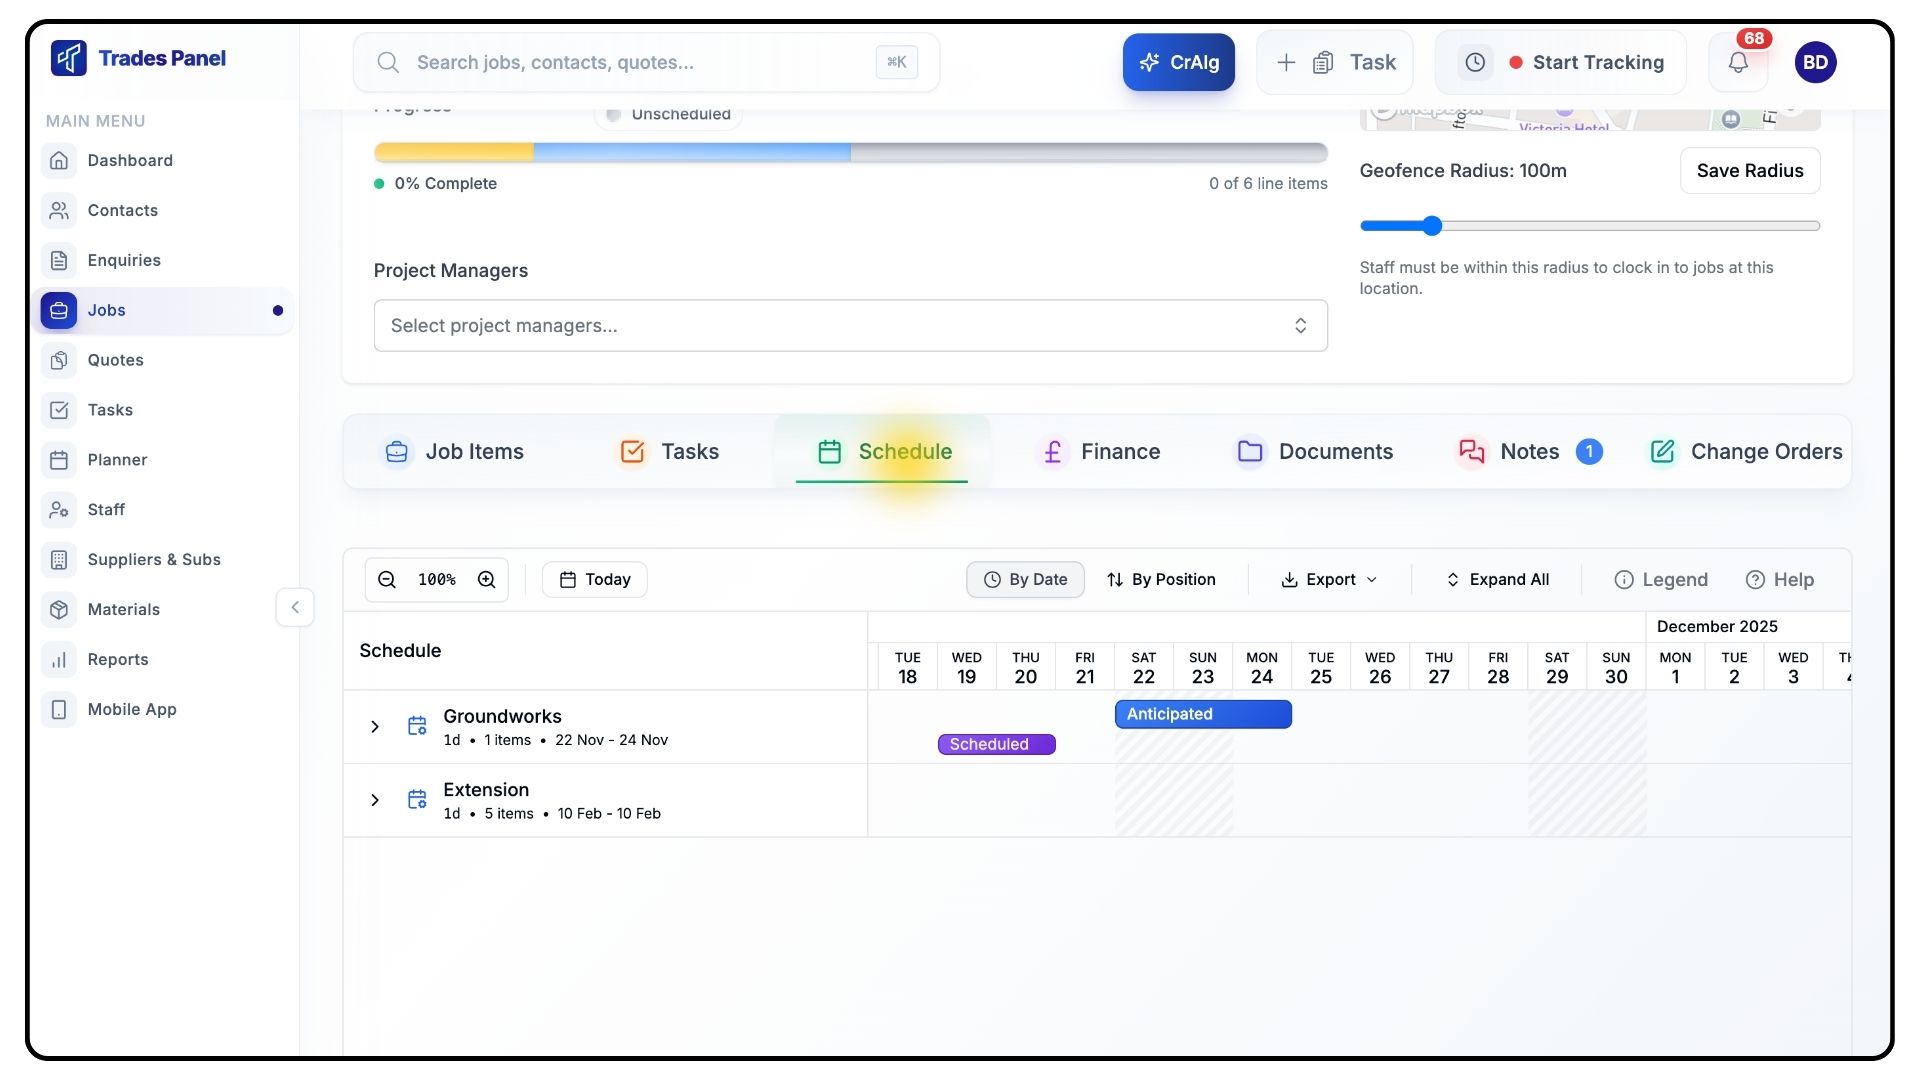
Select the Schedule tab.
This opens the job’s schedule view, showing all job items and their associated line items.
Understanding the Schedule Layout
What It Does
Helps you quickly assess workload, staffing, and timelines.
Steps
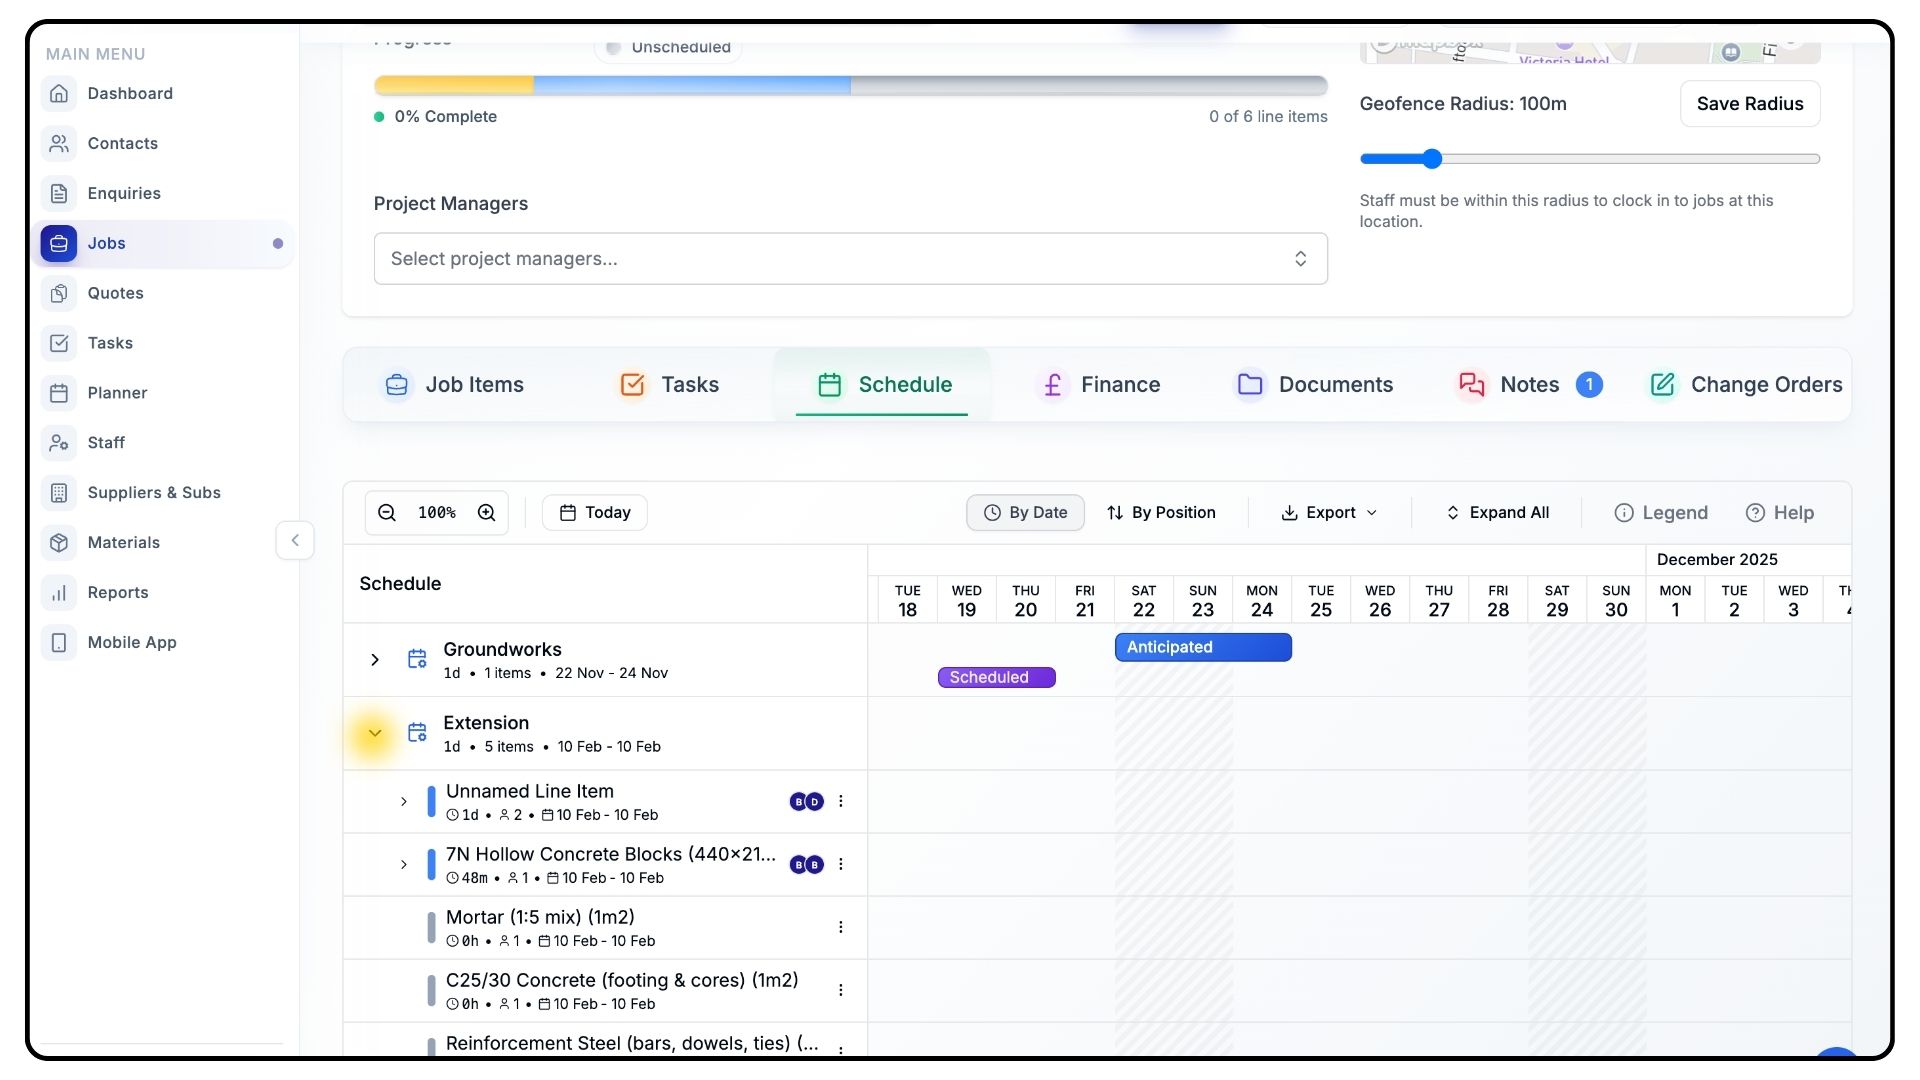
Down the left-hand side, you’ll see each job item listed, along with:
The number of line items it contains
How many people are assigned
The date range it currently covers
Click the arrow next to a job item to expand it and reveal the individual line items underneath.
Managing Line Item Assignments
What It Does
Allows you to control staffing and scheduling for individual line items.
Steps
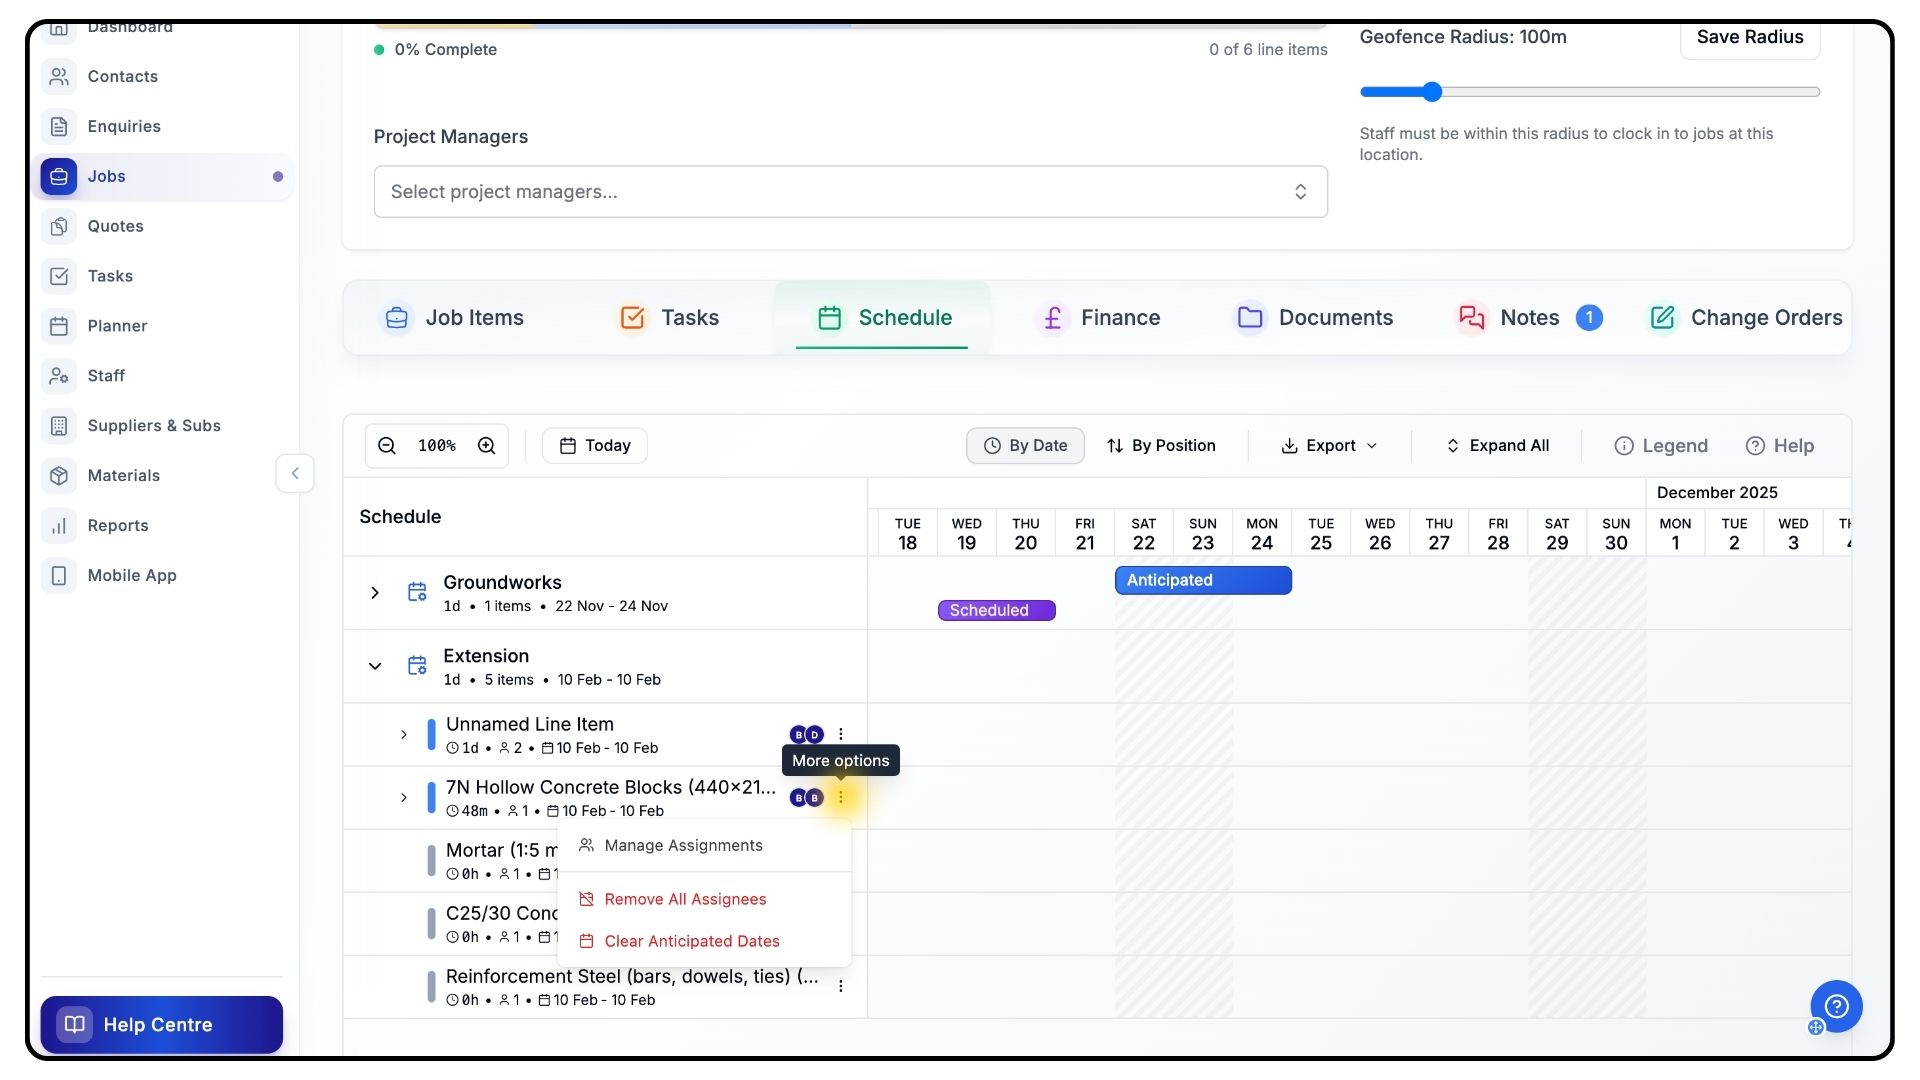
Next to each line item, click the three-dot menu.
From here, you can:
Manage Assignments
Clear Assignments
Clear Anticipated Dates
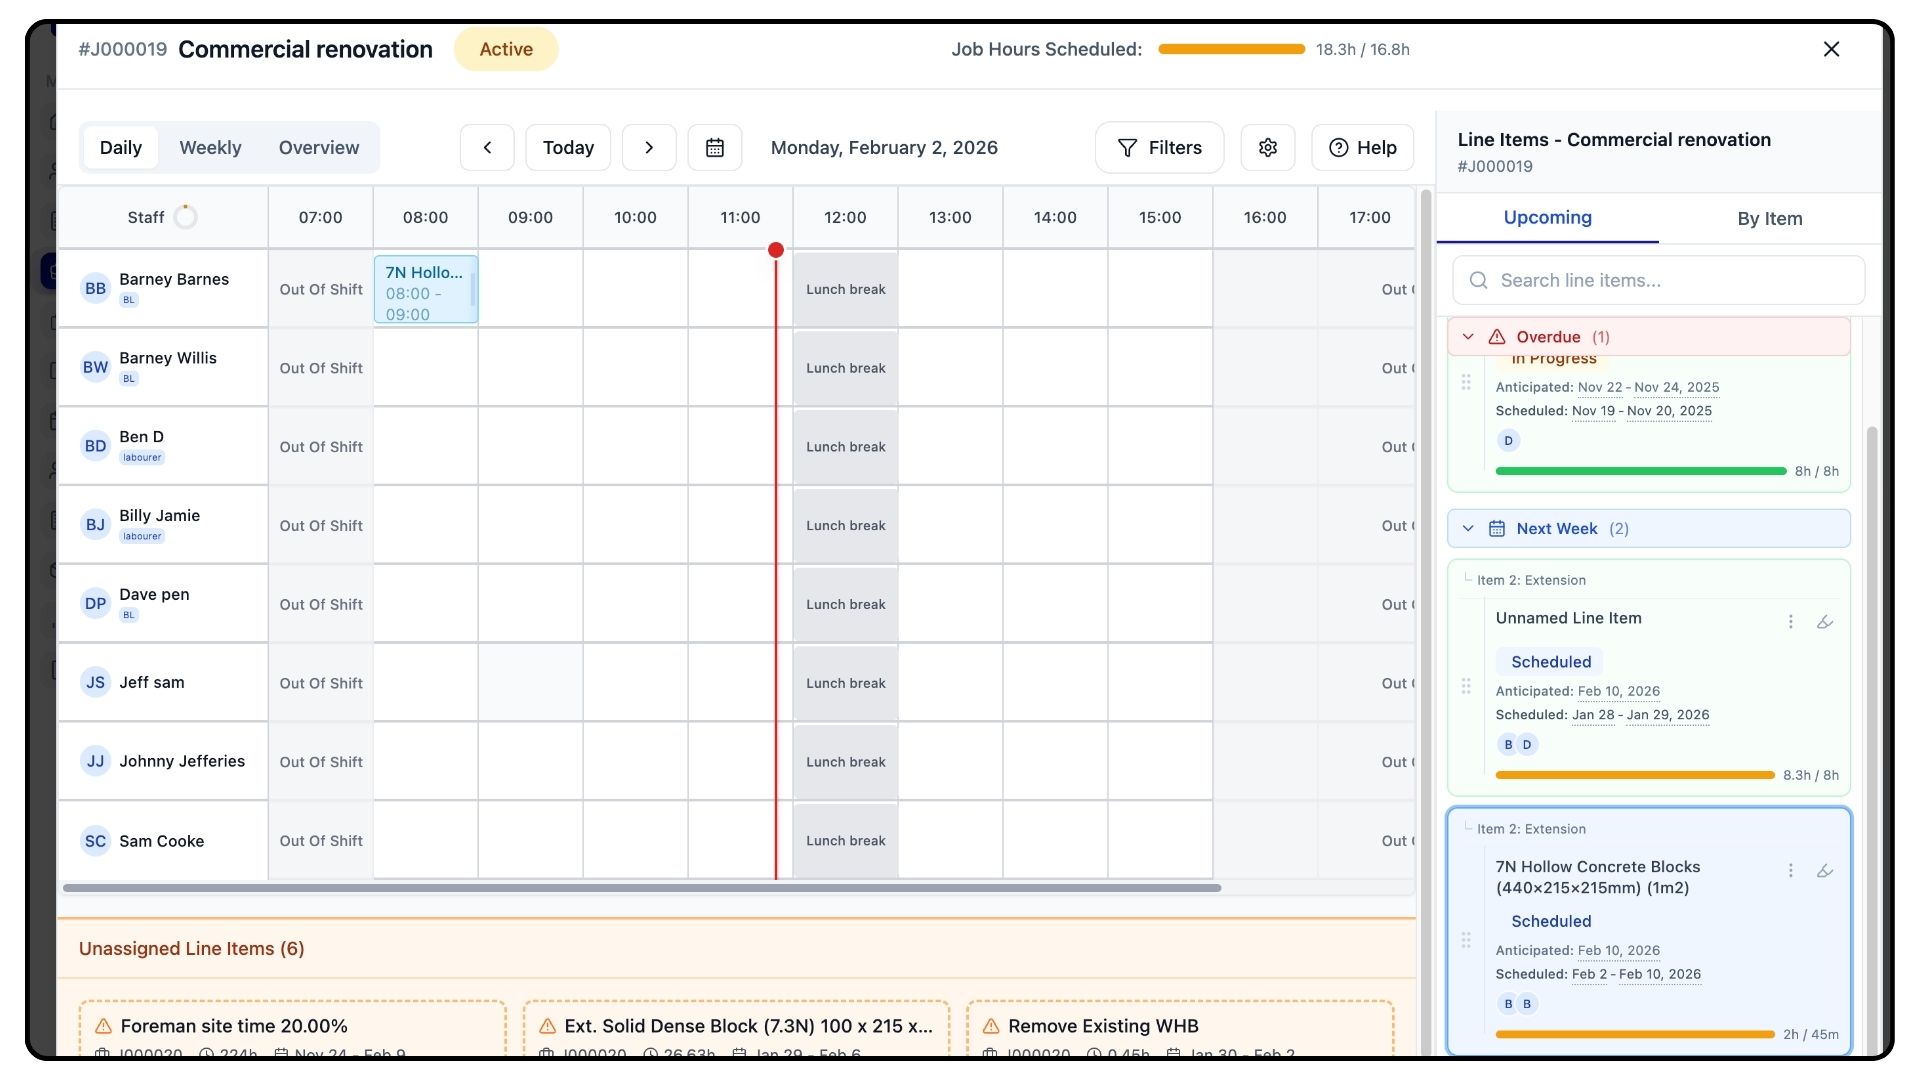
Selecting Manage Assignments opens the manage view, where you can see:
Which days the item is scheduled for
Which team members are assigned
If you’d like a more detailed walkthrough of this view, watch the tutorial titled “Scheduling items through the job” in the Guides section.
Exit the manage view to return to the job schedule.
Auto-Scheduling Anticipated Dates
What It Does
Automatically plans an entire job item in sequence.
Steps
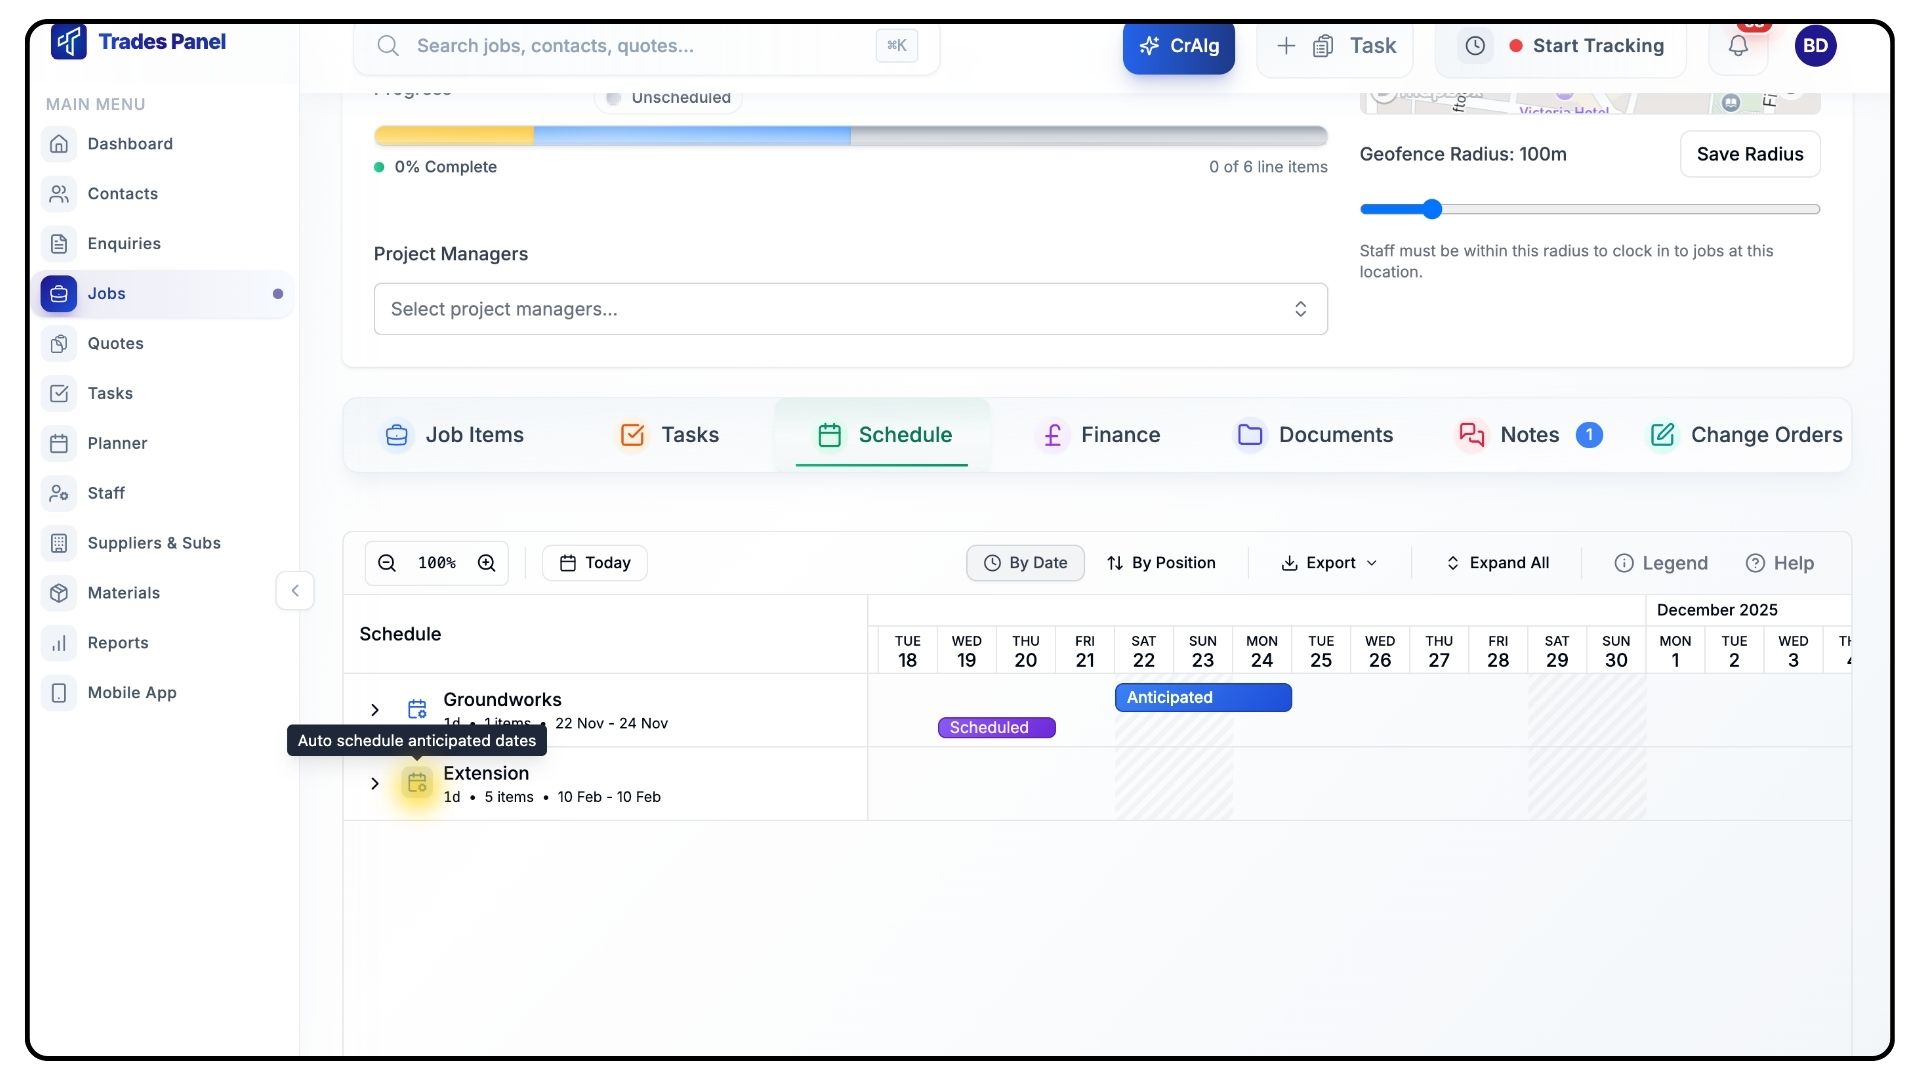
Next to each job item, click the calendar icon.
A pop-up will appear.
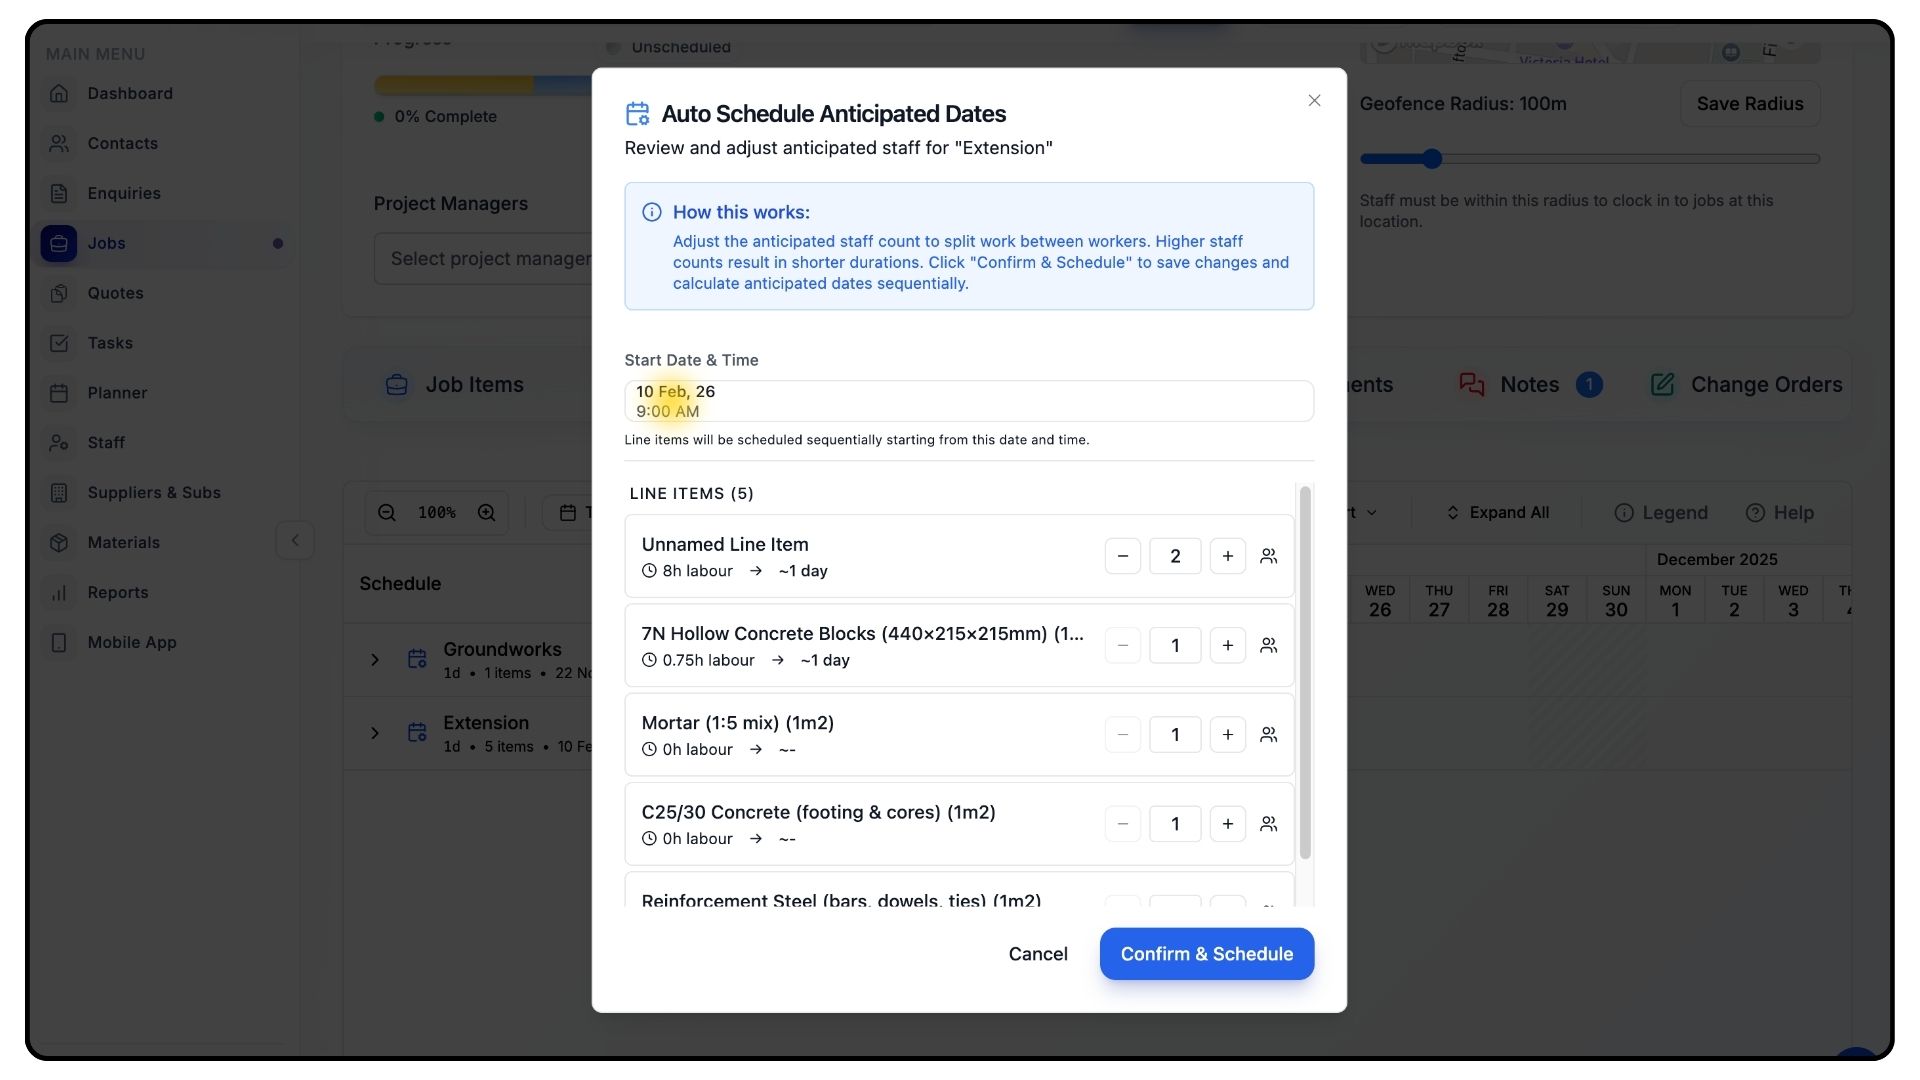
Enter the start date and time you expect the job item to begin.
TradesPanel will automatically schedule all subsequent line items within that job item in sequence.
Reviewing and Adjusting Line Item Details
What It Does
Lets you fine-tune staffing and timings before applying the schedule.
Steps
Below the job item, review the breakdown of each line item.
For each line item, you can:
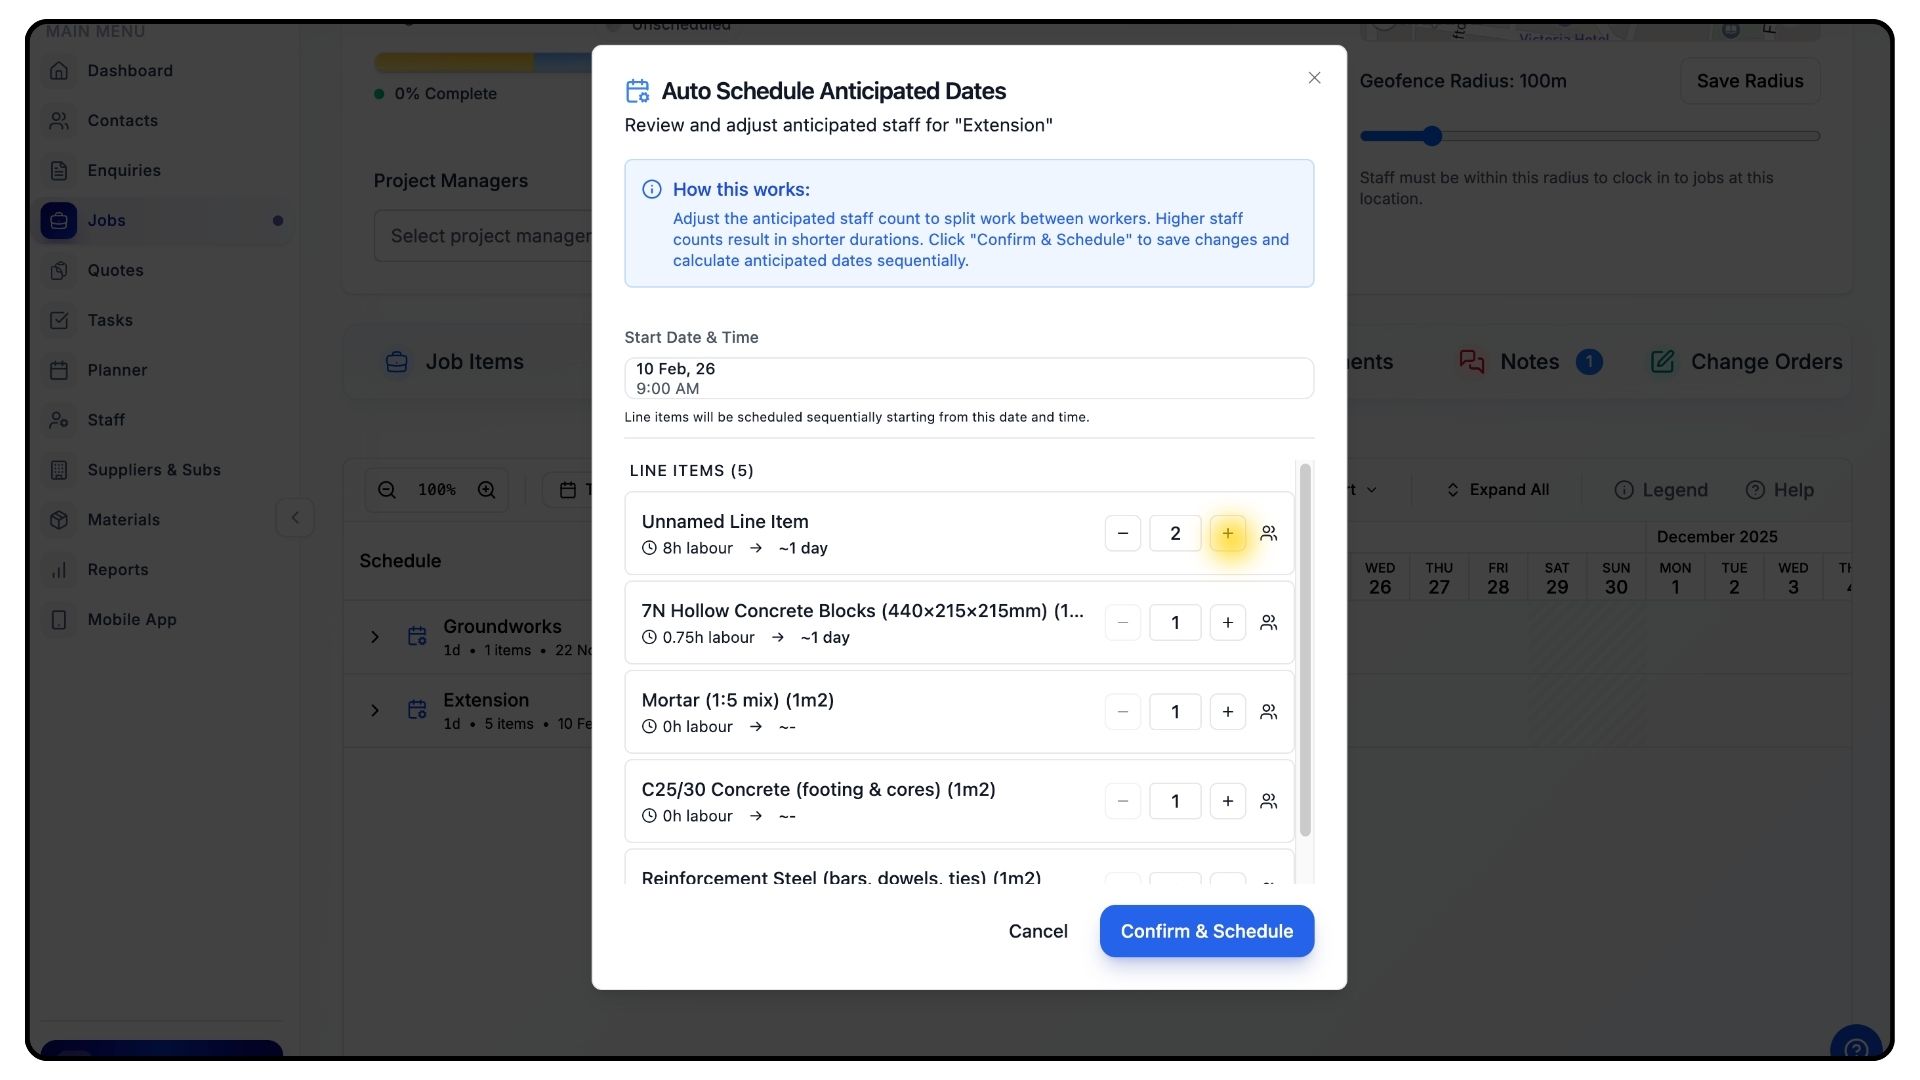
Adjust the number of staff assigned
Review the labour hours allocated
This allows you to ensure the schedule accurately reflects how the work will be carried out.
Once you’re happy, click Confirm & Schedule.
The anticipated schedule will now be applied across the job item.
Sorting, Exporting, and Navigating the Schedule
What It Does
Helps you organise and share the schedule.
Steps
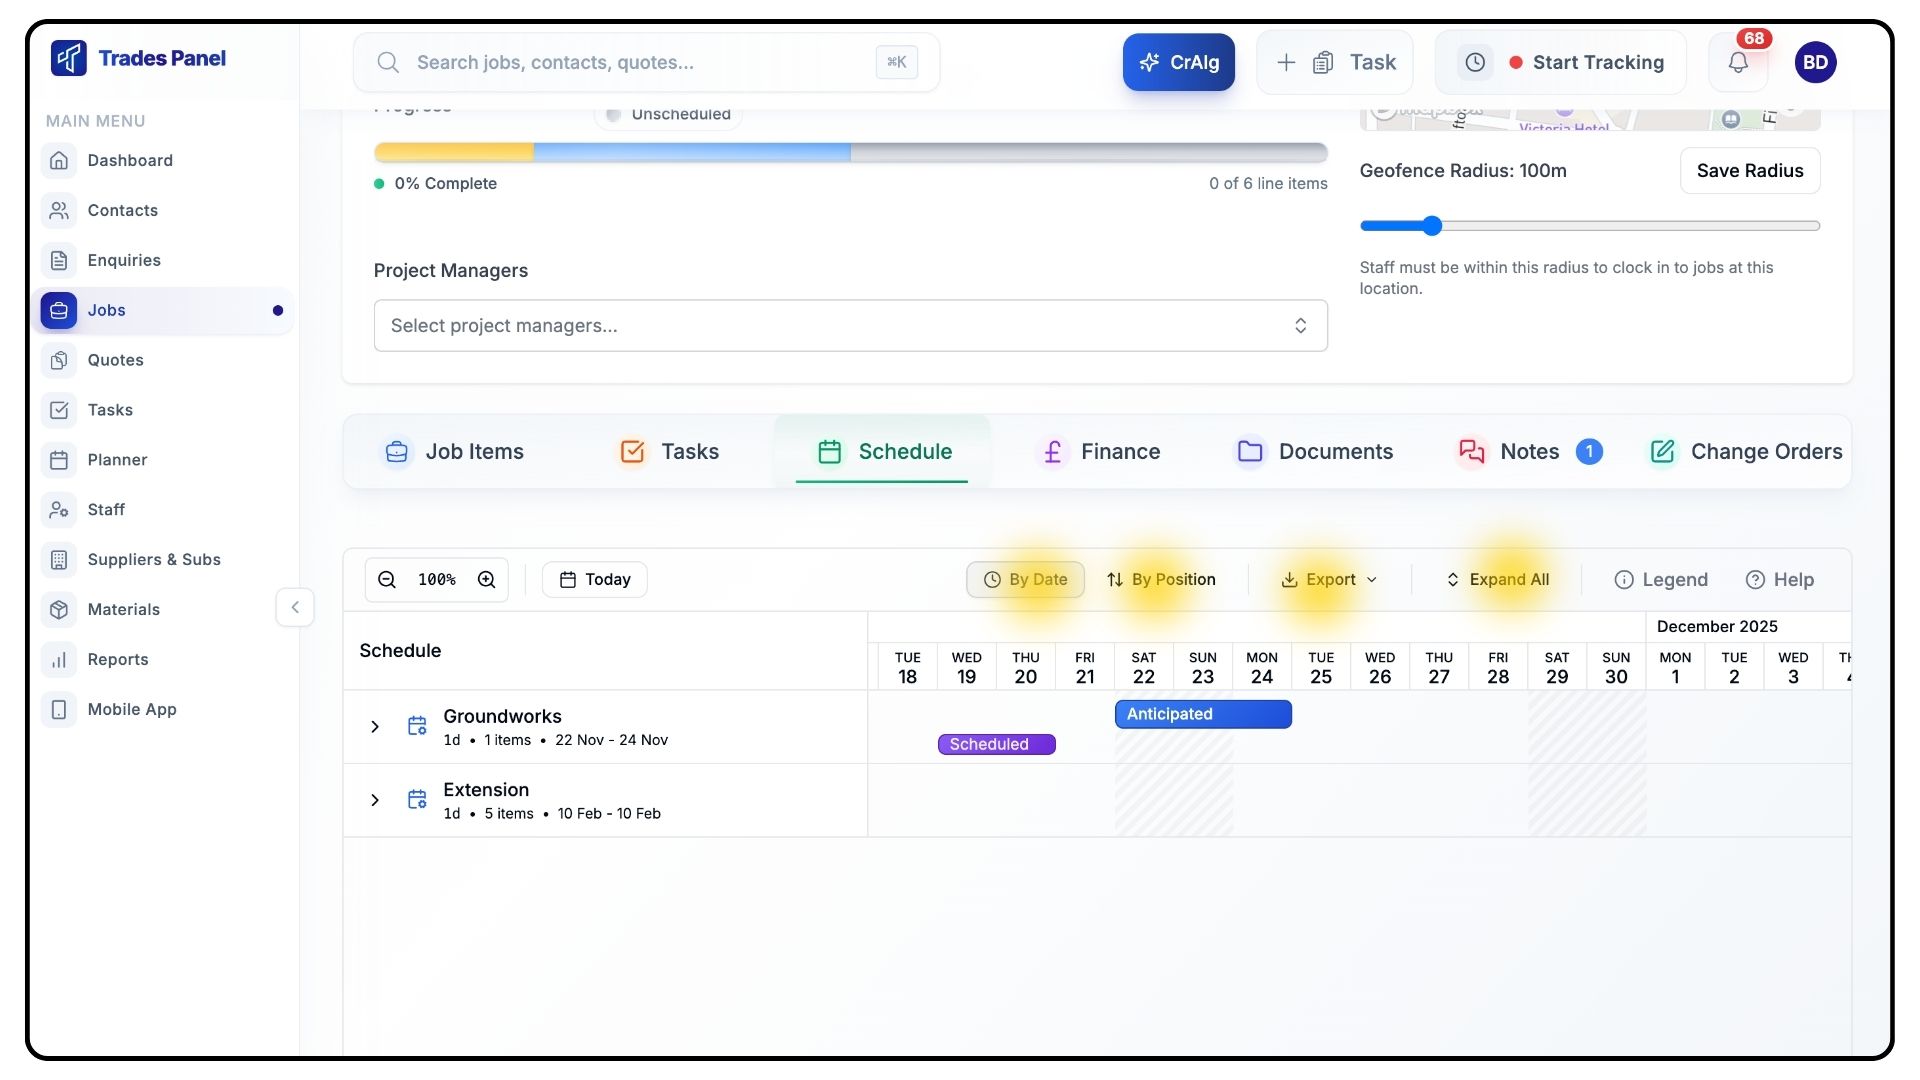
At the top of the schedule, you can:
Sort by Date or Position
Export the schedule for yourself, a subcontractor, or a client
Use Collapse All or Expand All to quickly open or close all job items
Moving and Updating Scheduled Items
What It Does
Allows you to make changes quickly when plans shift.
Steps
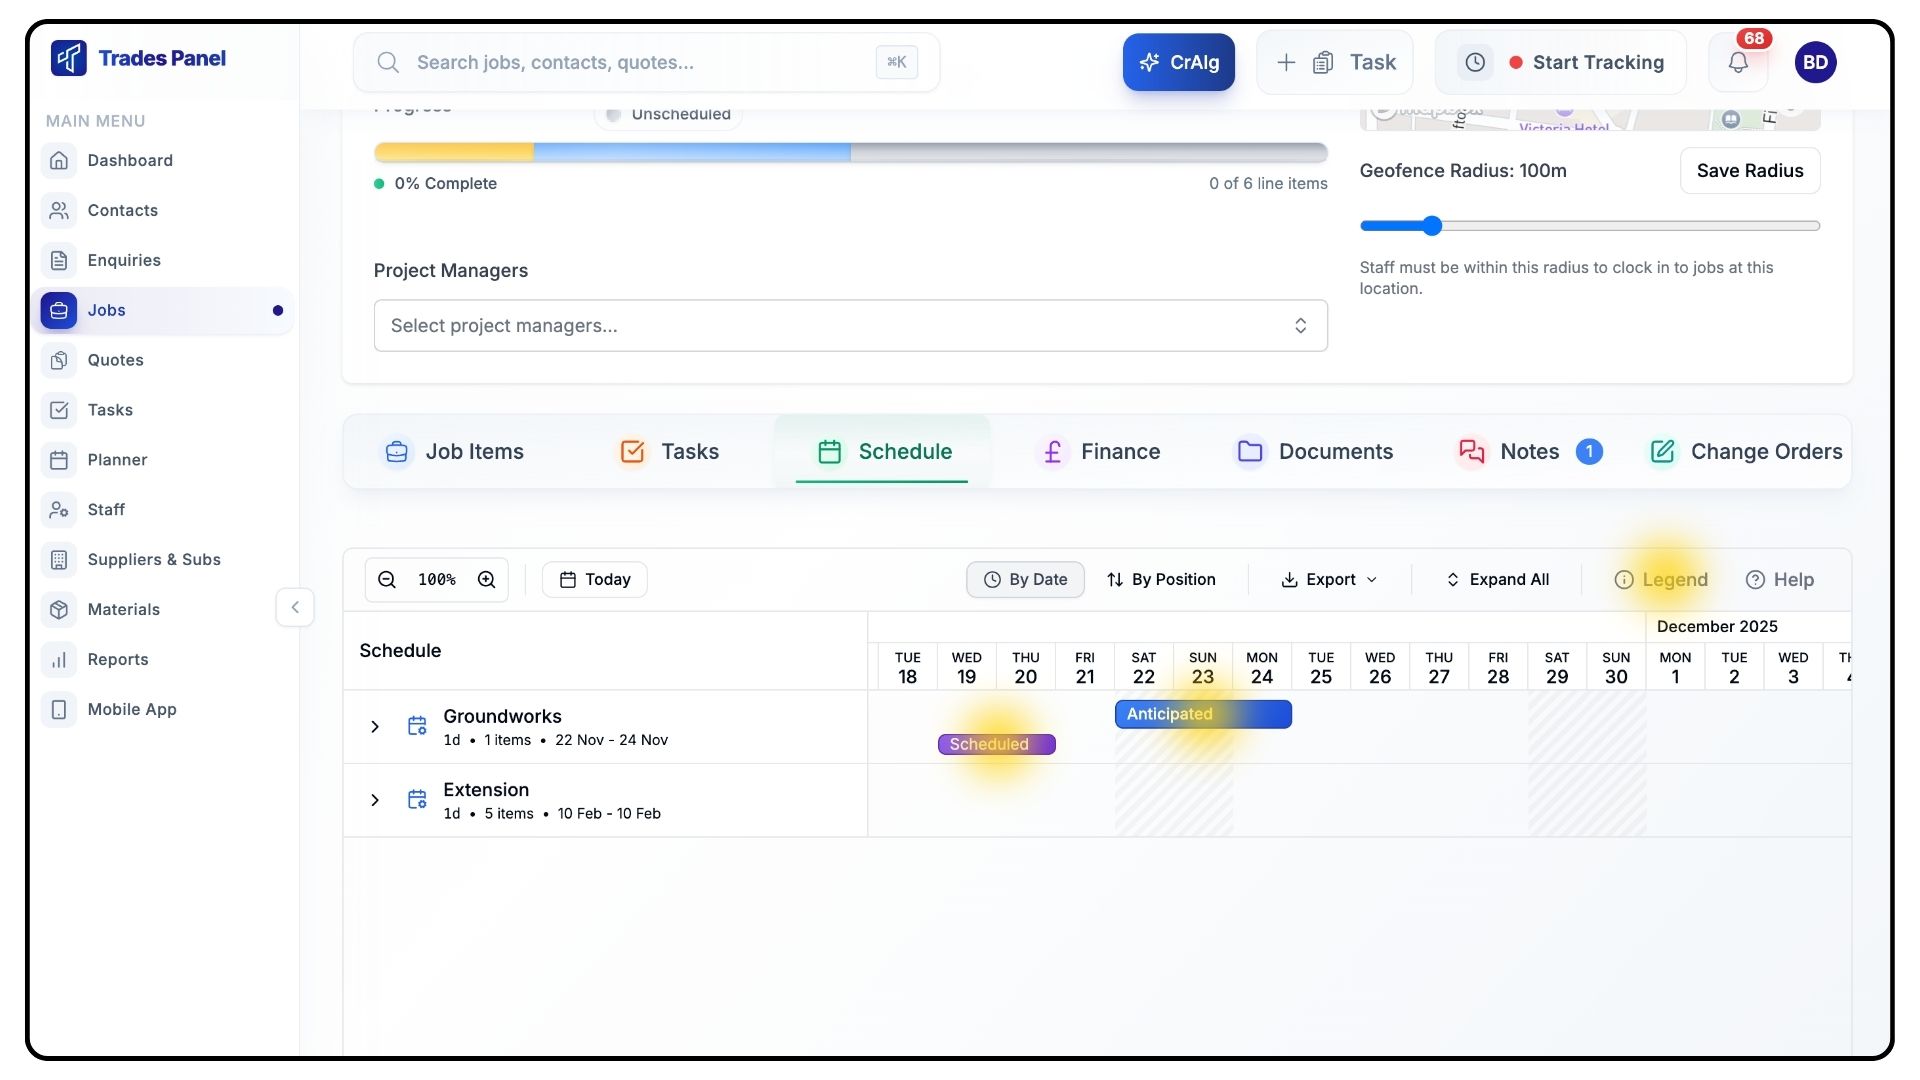
Click the 'Legend' button.
Anticipated items are shown in blue.
Scheduled items are shown in purple.
To move an anticipated item, drag it to a new date on the schedule.
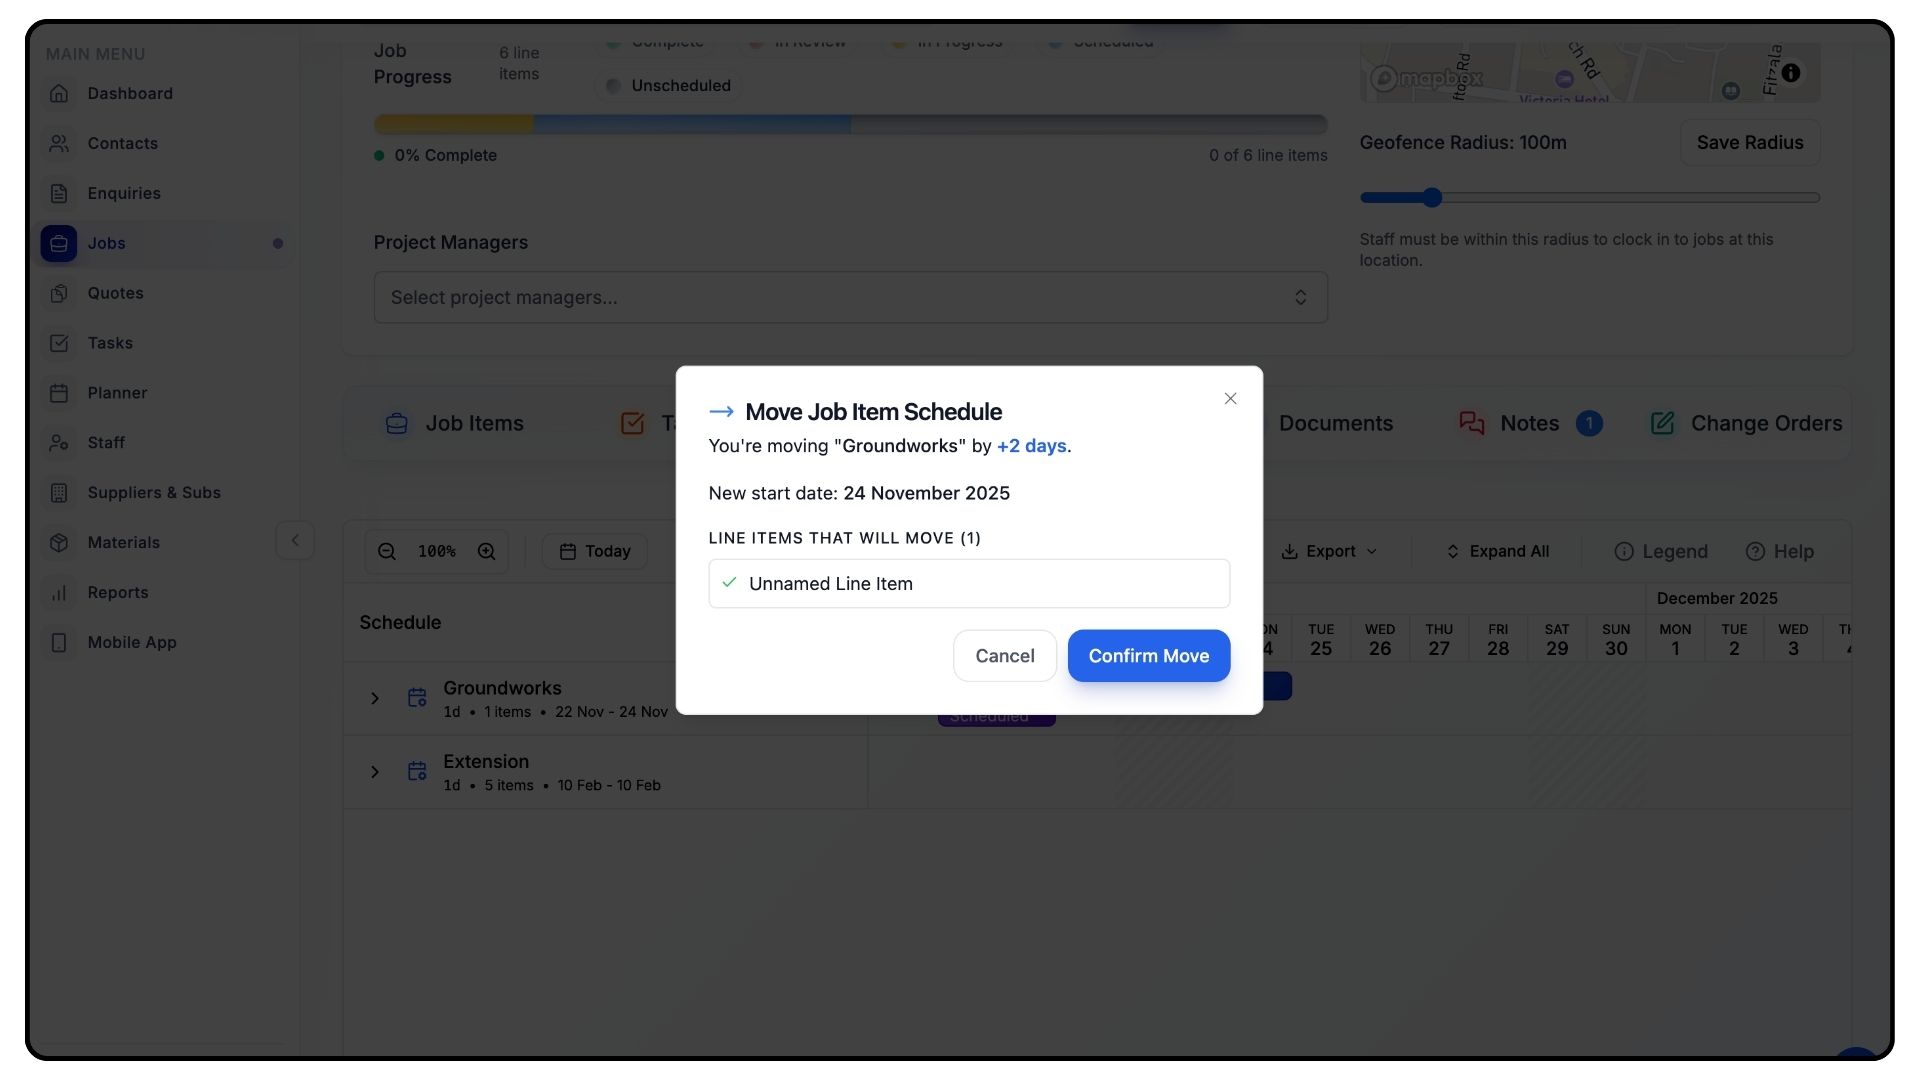
A confirmation pop-up will appear showing exactly what will be moved.
If everything looks correct, click Confirm.
The schedule will update accordingly.
And that’s how to plan, schedule, and manage work using the Schedule tab in TradesPanel.
For more tutorials and walkthroughs, visit the Guides section in the navigation bar.