Before You Start
Before creating your contact form, you must complete the following two steps.
Step 1: Set Up Your Enquiries Pipeline
What It Does
Your contact form needs an Enquiries Pipeline to function.
This pipeline organises enquiries submitted from your website.
Steps
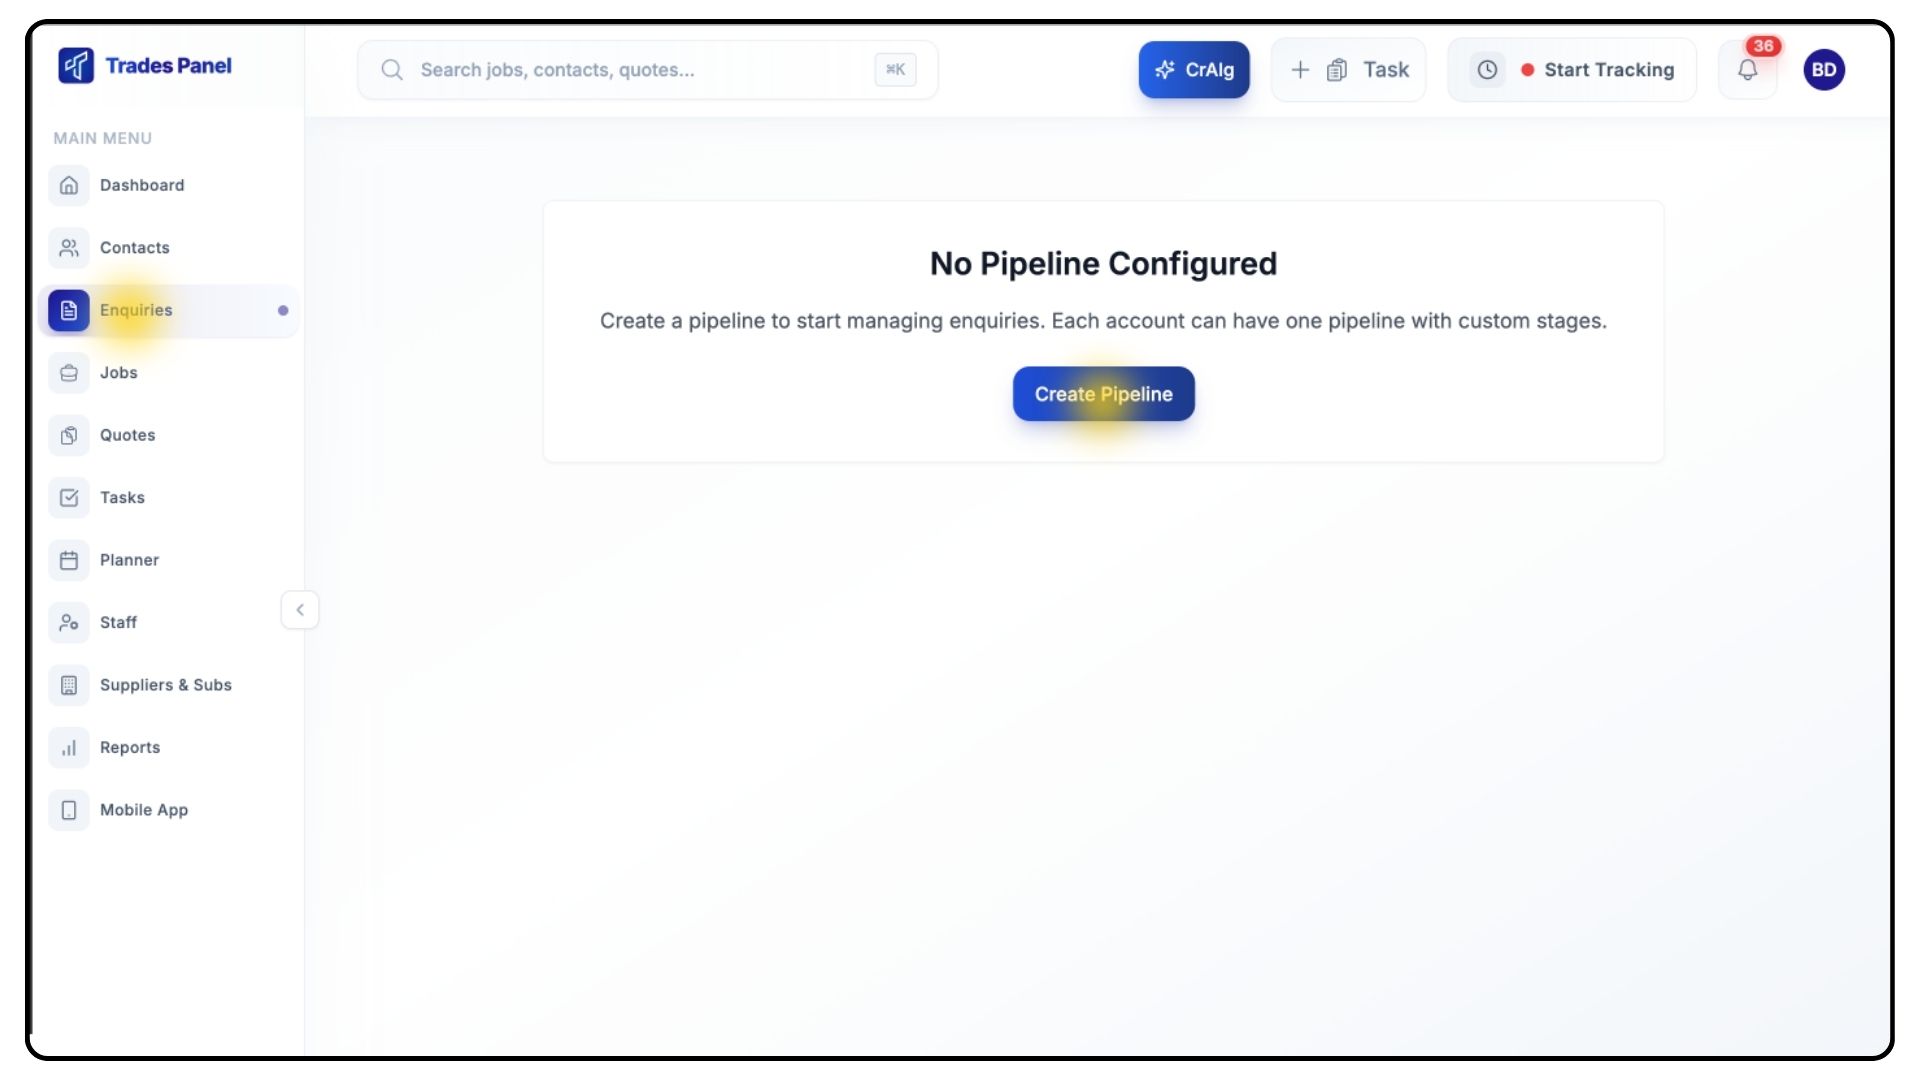
Go to Enquiries in the main menu.
Click Create Pipeline.
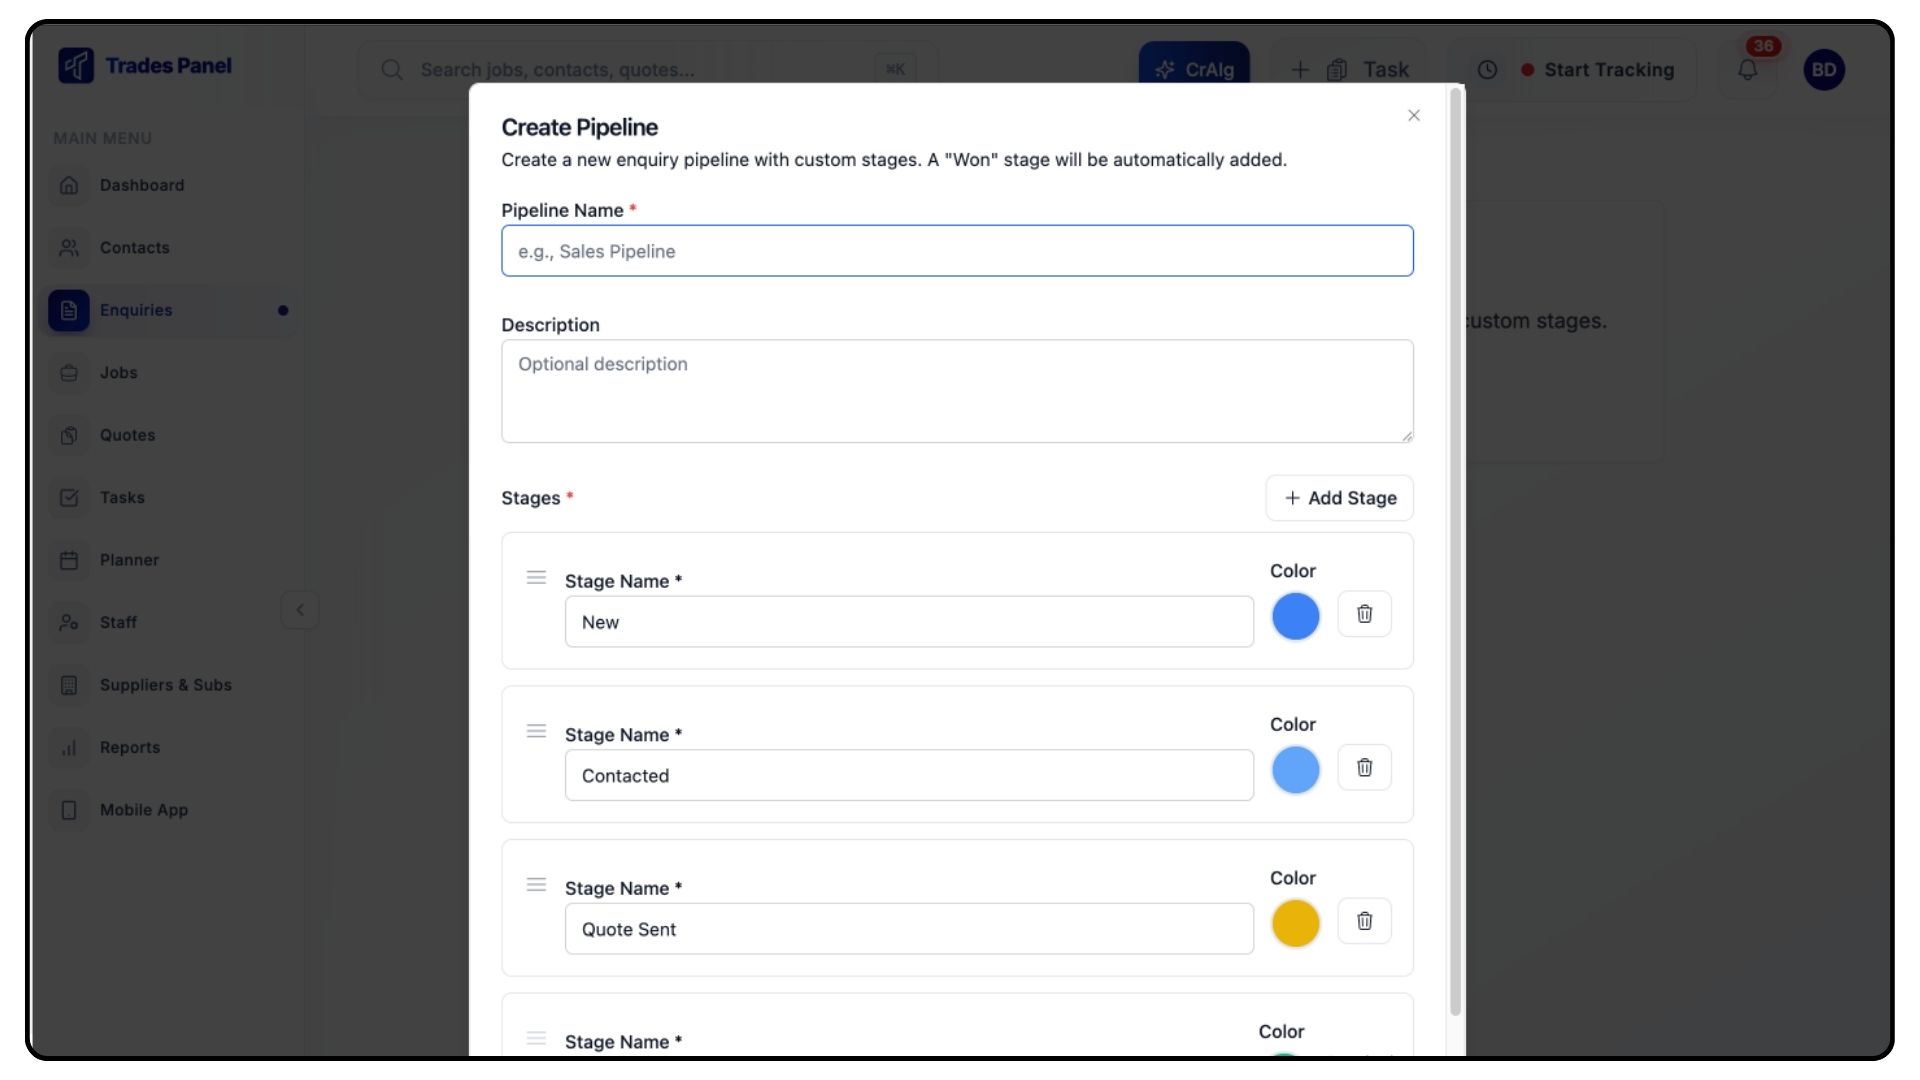
Give your pipeline a name (e.g., Website Enquiries).
Add at least one stage (e.g., New, In Progress, Completed).
Click Save Pipeline.
Tip: You only need one stage to get started. You can add more stages later.
Step 2: Set Your Company Email
What It Does
This ensures you receive email notifications whenever someone submits your form.
Steps
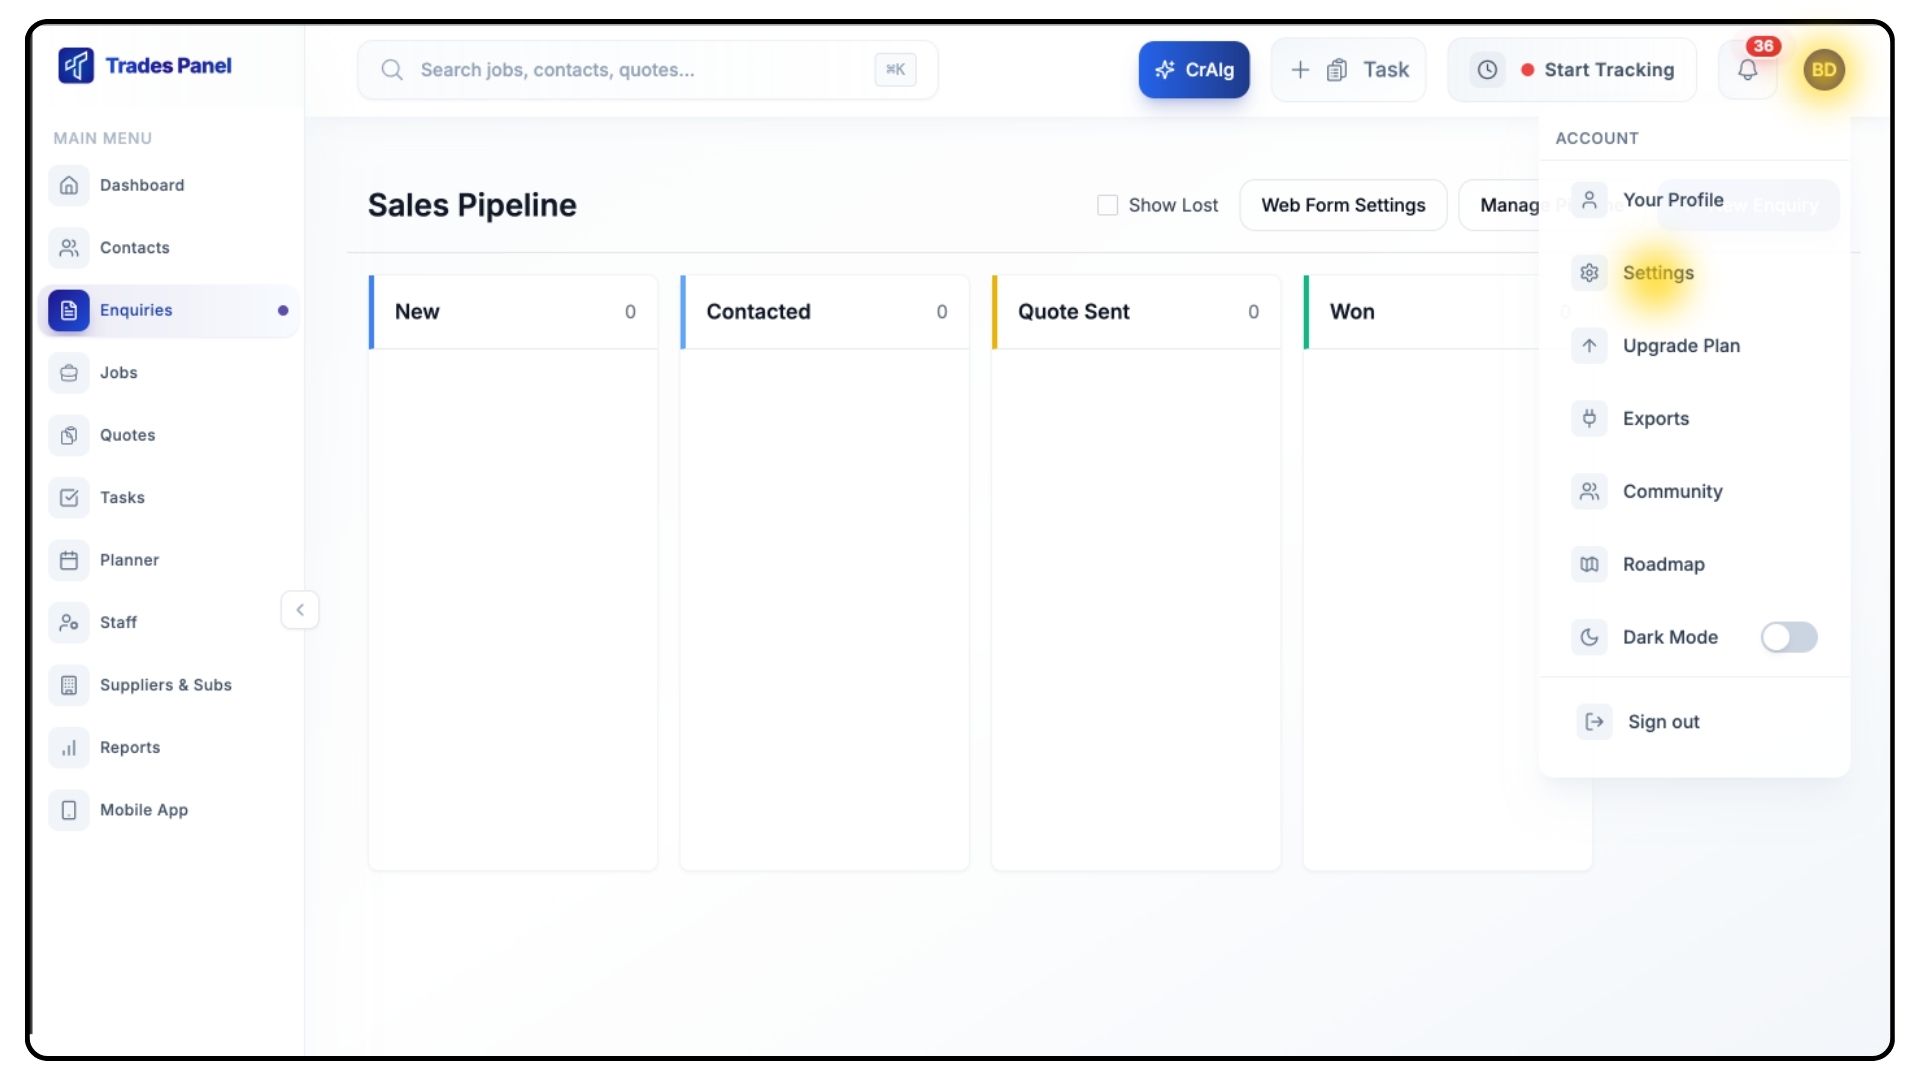
Go to Settings → Company Profile.
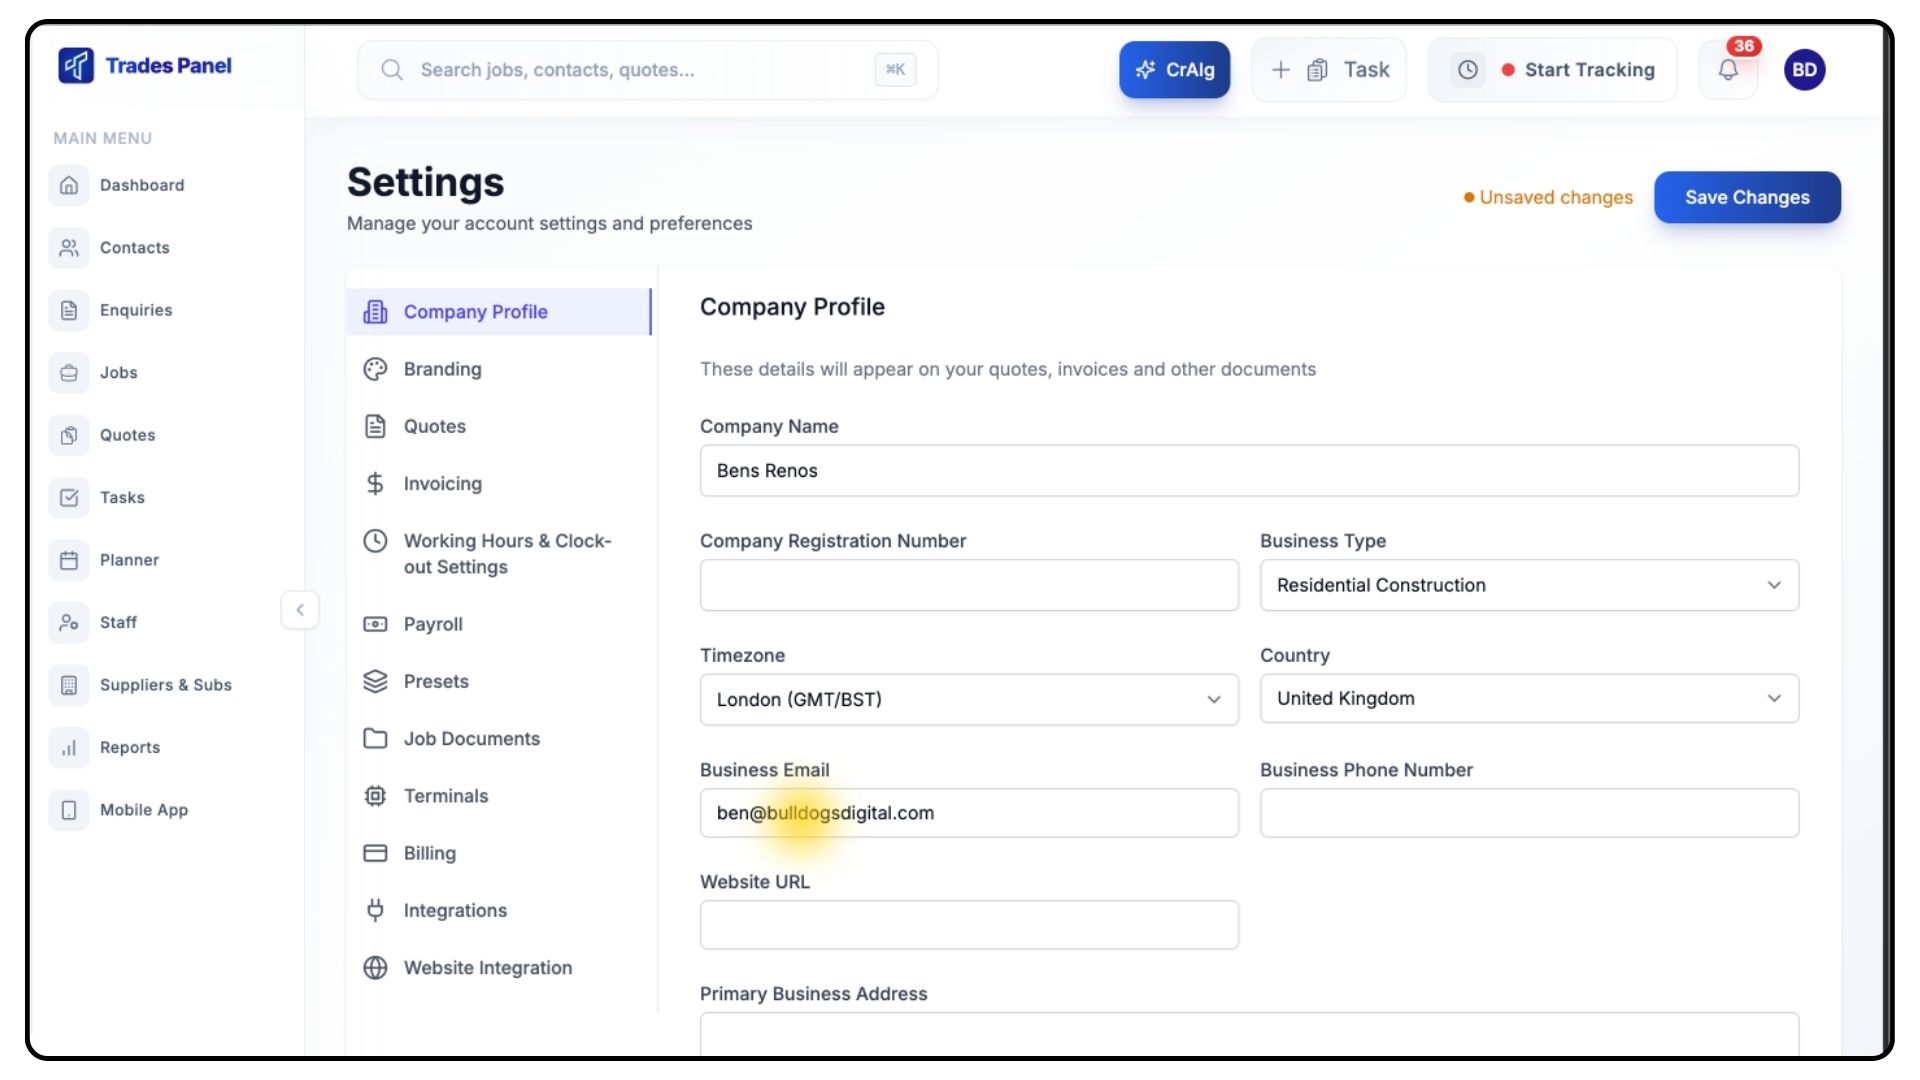
Enter your Company Email Address.
Click Save.
Setting Up Your Contact Form
Once you’ve completed the steps above, you're ready to build and customise your form.
Accessing the Form Builder
Steps
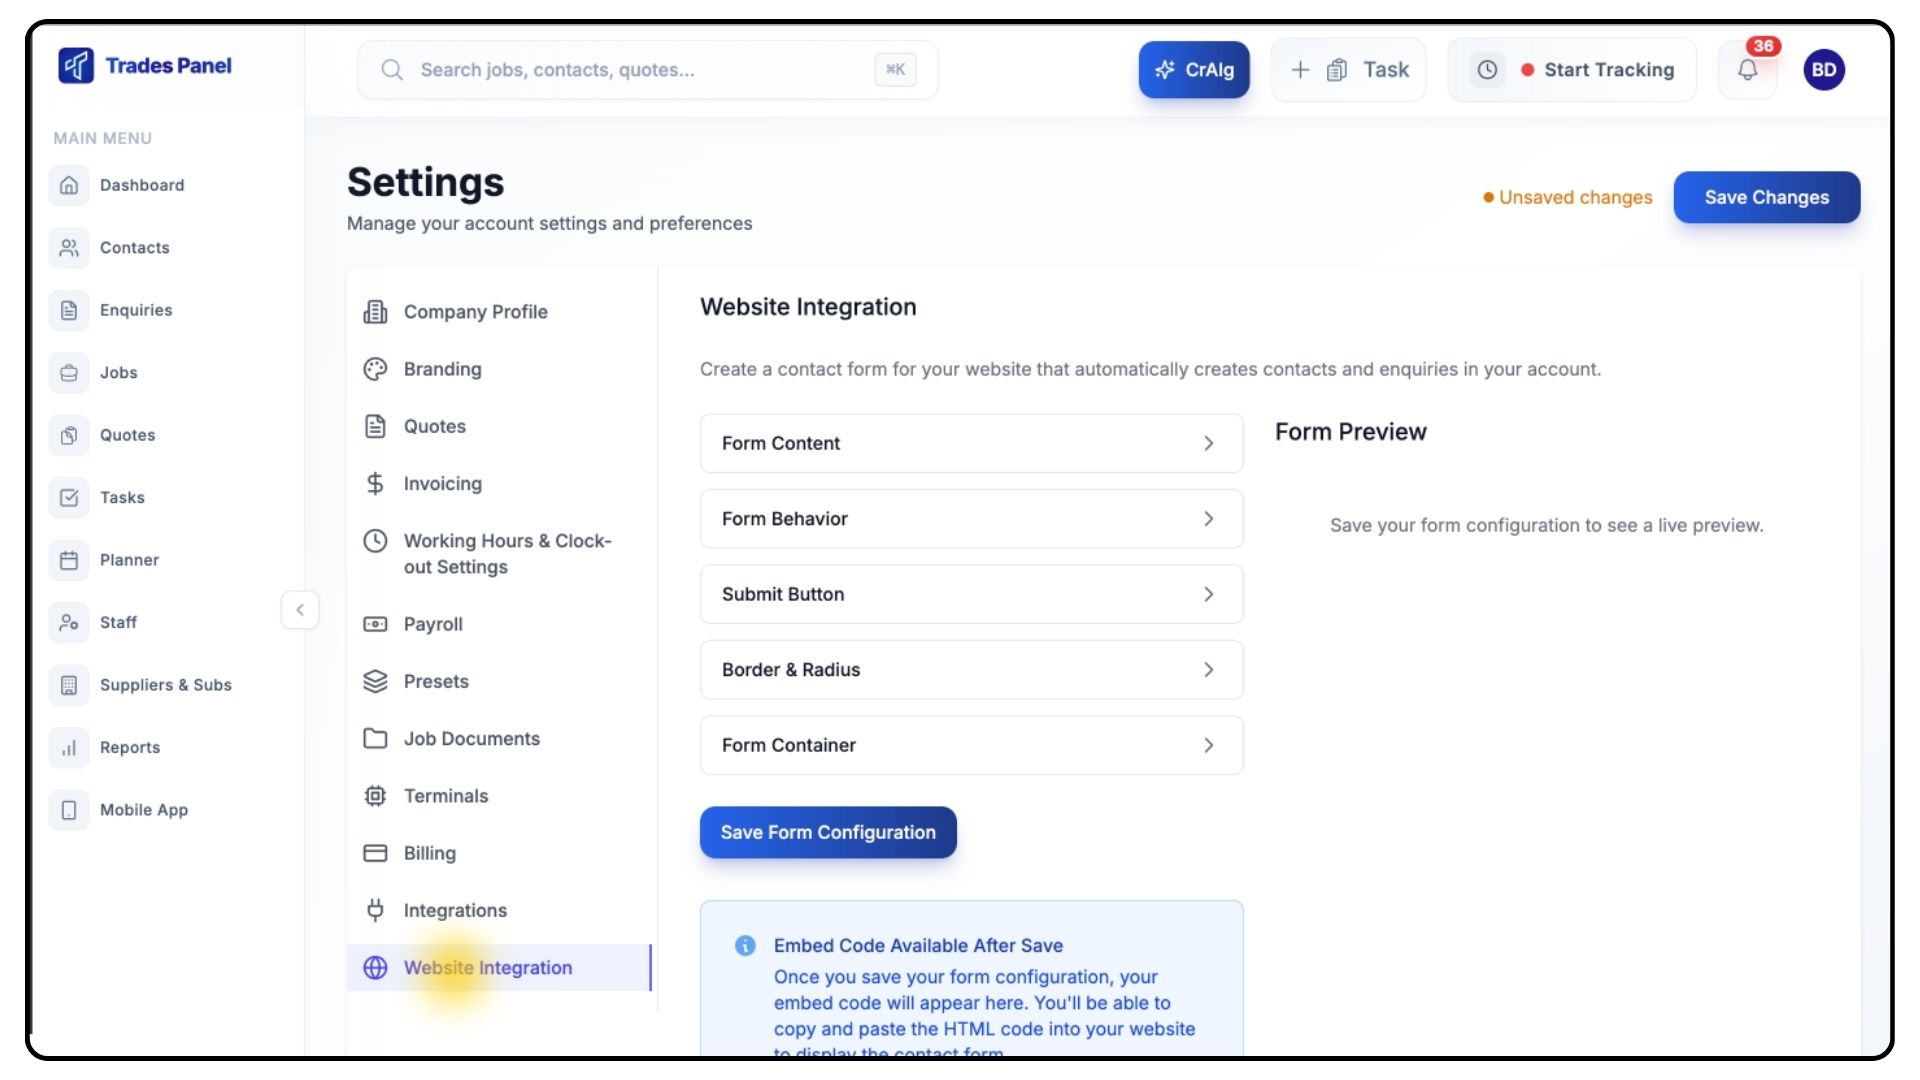
Go to Settings → Website Integration.
A live preview of your form will appear on the right as you make changes.
Form Content
What It Does
Controls the text, styling, and basic layout of your form.

Steps
Click Form Content to edit:
Heading — main title above the form (default: Contact Us)
Subheading — optional supporting message
Font Family — choose a font style (Arial, Helvetica, Georgia, etc.)
Layout Mode — adjust overall layout and alignment
Font Colours:
Heading Colour
Subheading Colour
Label Colour
Tip: Use the colour picker or enter a hex code (e.g., #000000 for black).
Form Behaviour
What It Does
Controls required fields and what happens after form submission.
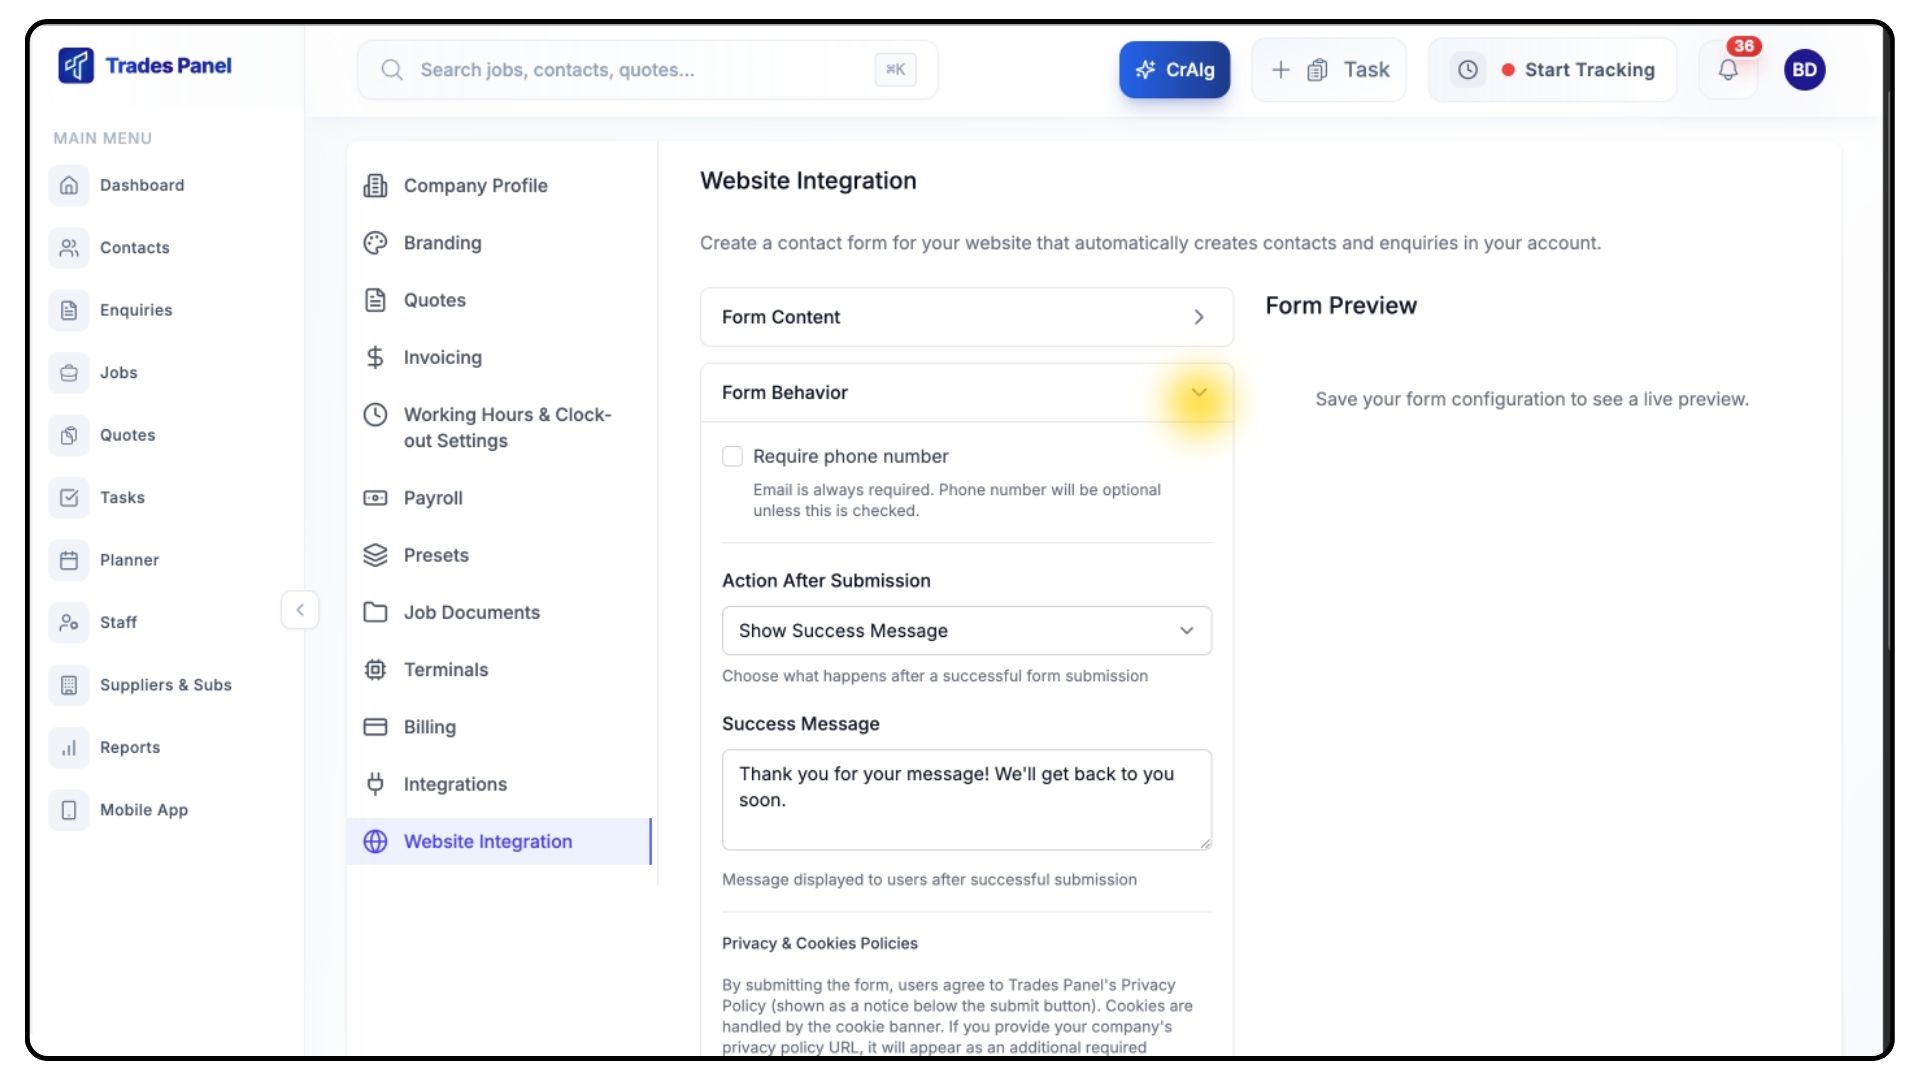
Steps
Click Form Behaviour.
Configure the following:
Require Phone Number — make phone numbers mandatory (optional).
Action After Submission:
Show Success Message — display a custom thank-you message.
Redirect to URL — send visitors to a separate page.
Privacy Policy URL — optional but recommended for GDPR compliance.
Cookies Policy URL — optional.
Anti-Spam Protection:
Basic bot protection is included automatically.
Optionally enable hCaptcha (requires a free account). For more information, view our hCaptcha set up guide.
Submit Button
What It Does
Controls the look and text of your submit button.
Steps
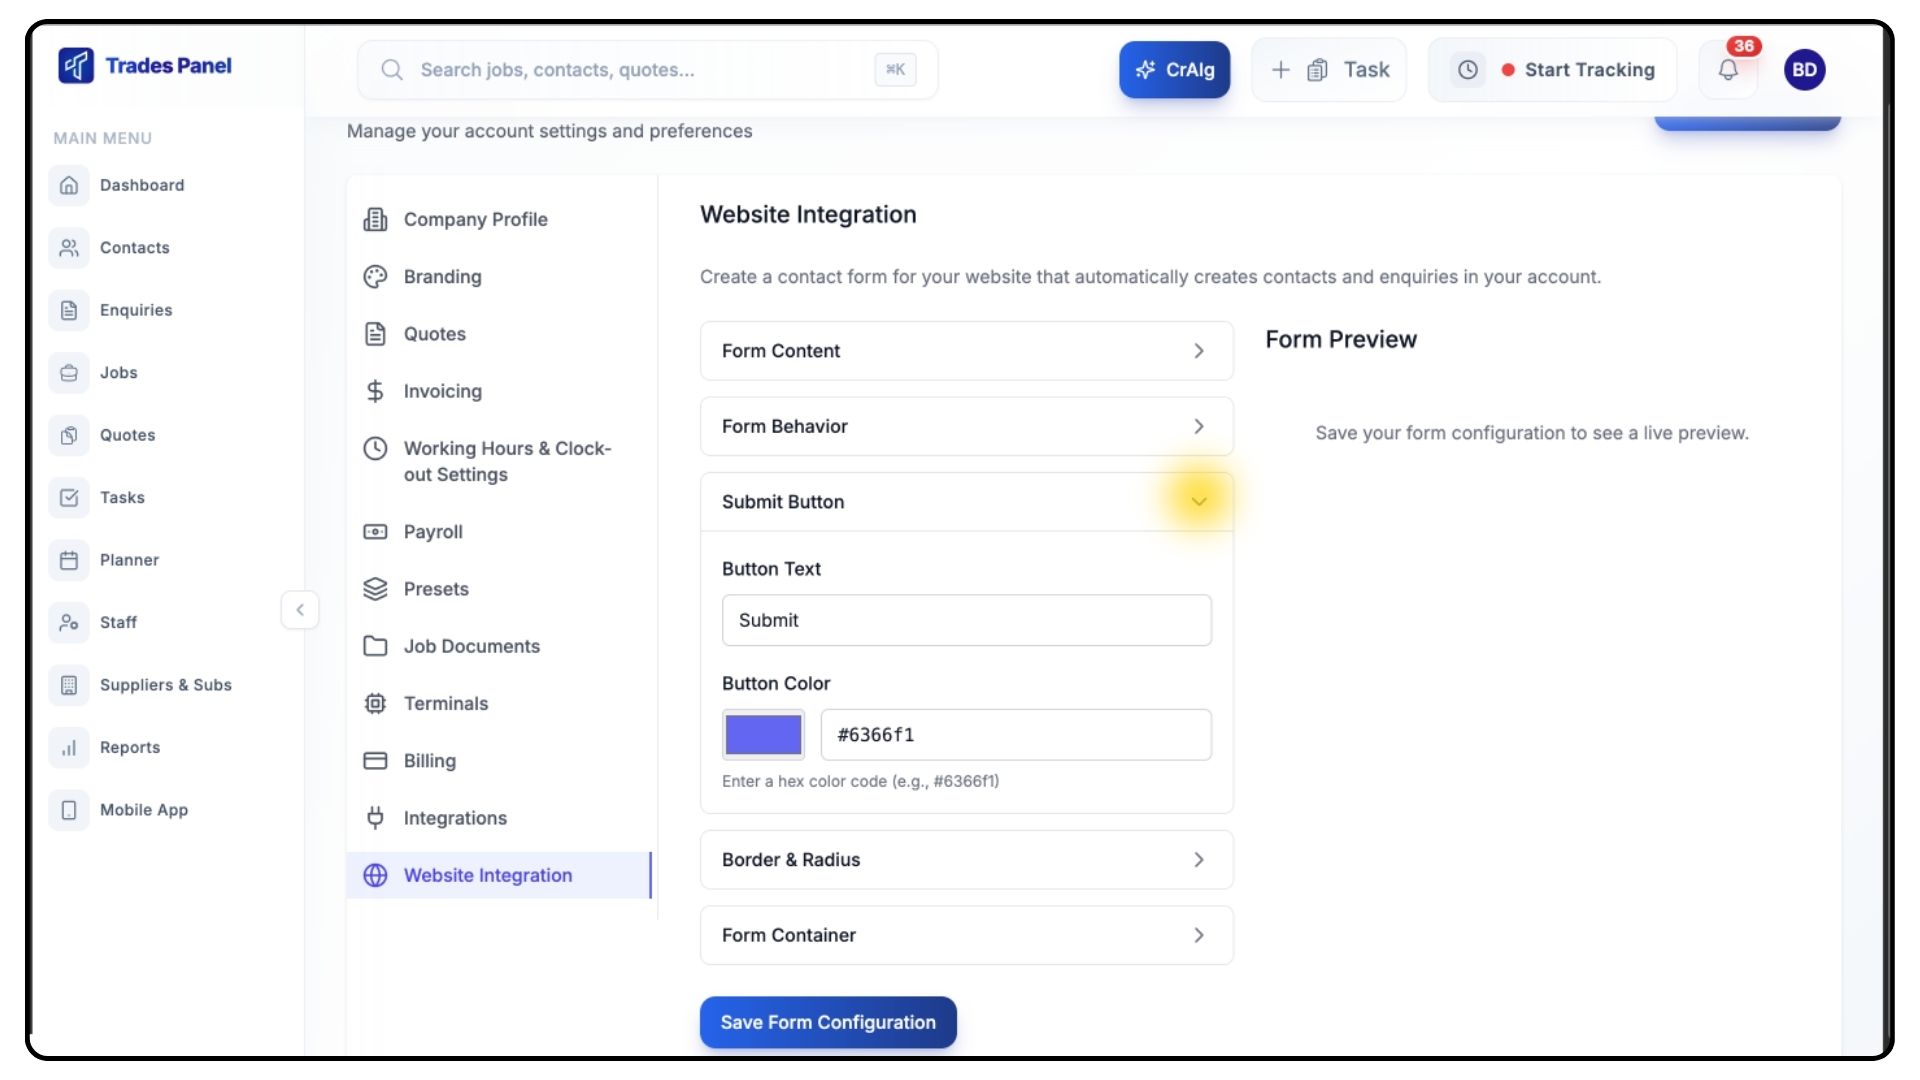
Click Submit Button.
Customise:
Button Text (default: Submit)
Button Colour
Border & Radius
What It Does
Controls the shape and styling of the form and input fields.
Steps
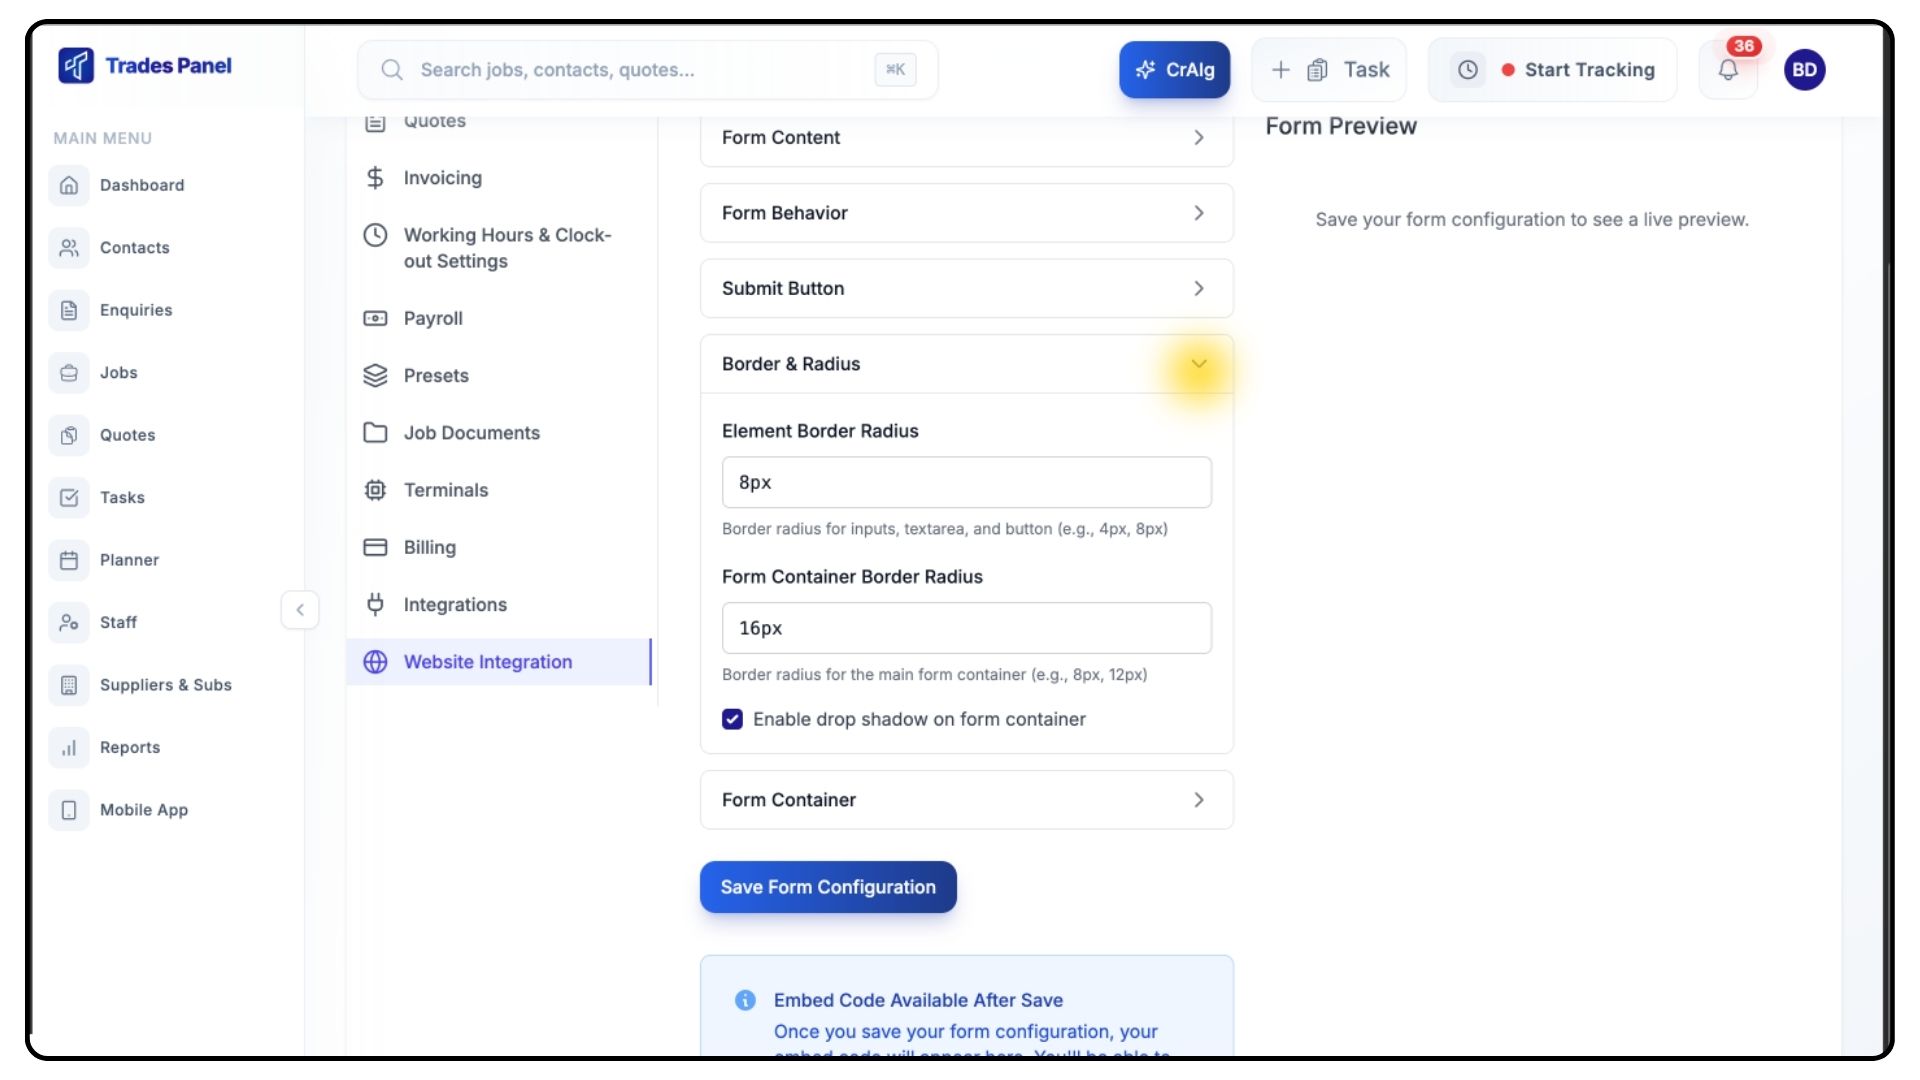
Click Border & Radius.
Adjust:
Element Border Radius — rounding for inputs and buttons.
Form Container Border Radius — rounding for the overall form box.
Enable Drop Shadow — adds modern form shading.
Form Container
What It Does
Controls the styling of the form box.
Steps
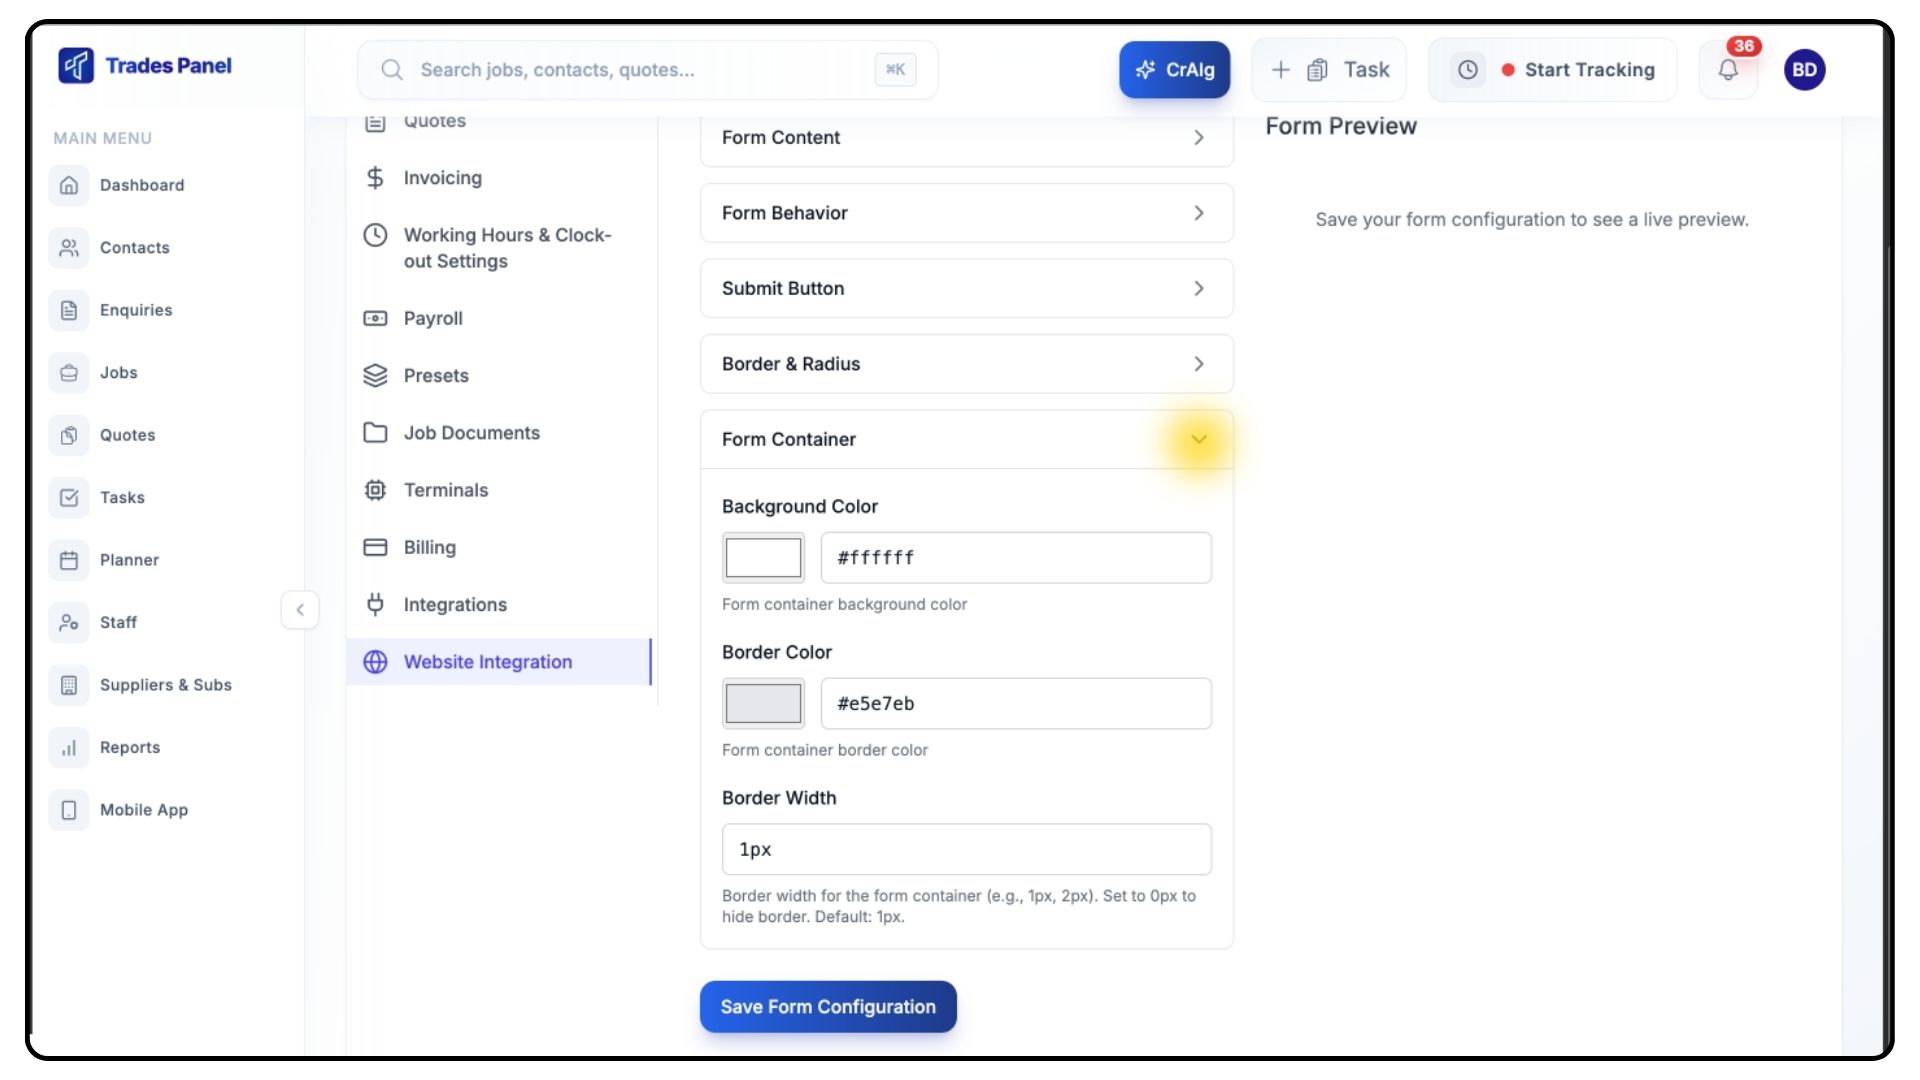
Click Form Container.
Customise:
Background Colour
Border Colour
Border Width
Saving Your Form
Steps
Review the form preview on the right.
Make any adjustments needed.
Click Save Form Configuration.
Wait for the success message.
Adding the Form to Your Website
Once saved, the Embed Code section will appear.
Step 1: Copy the Embed Code
Steps
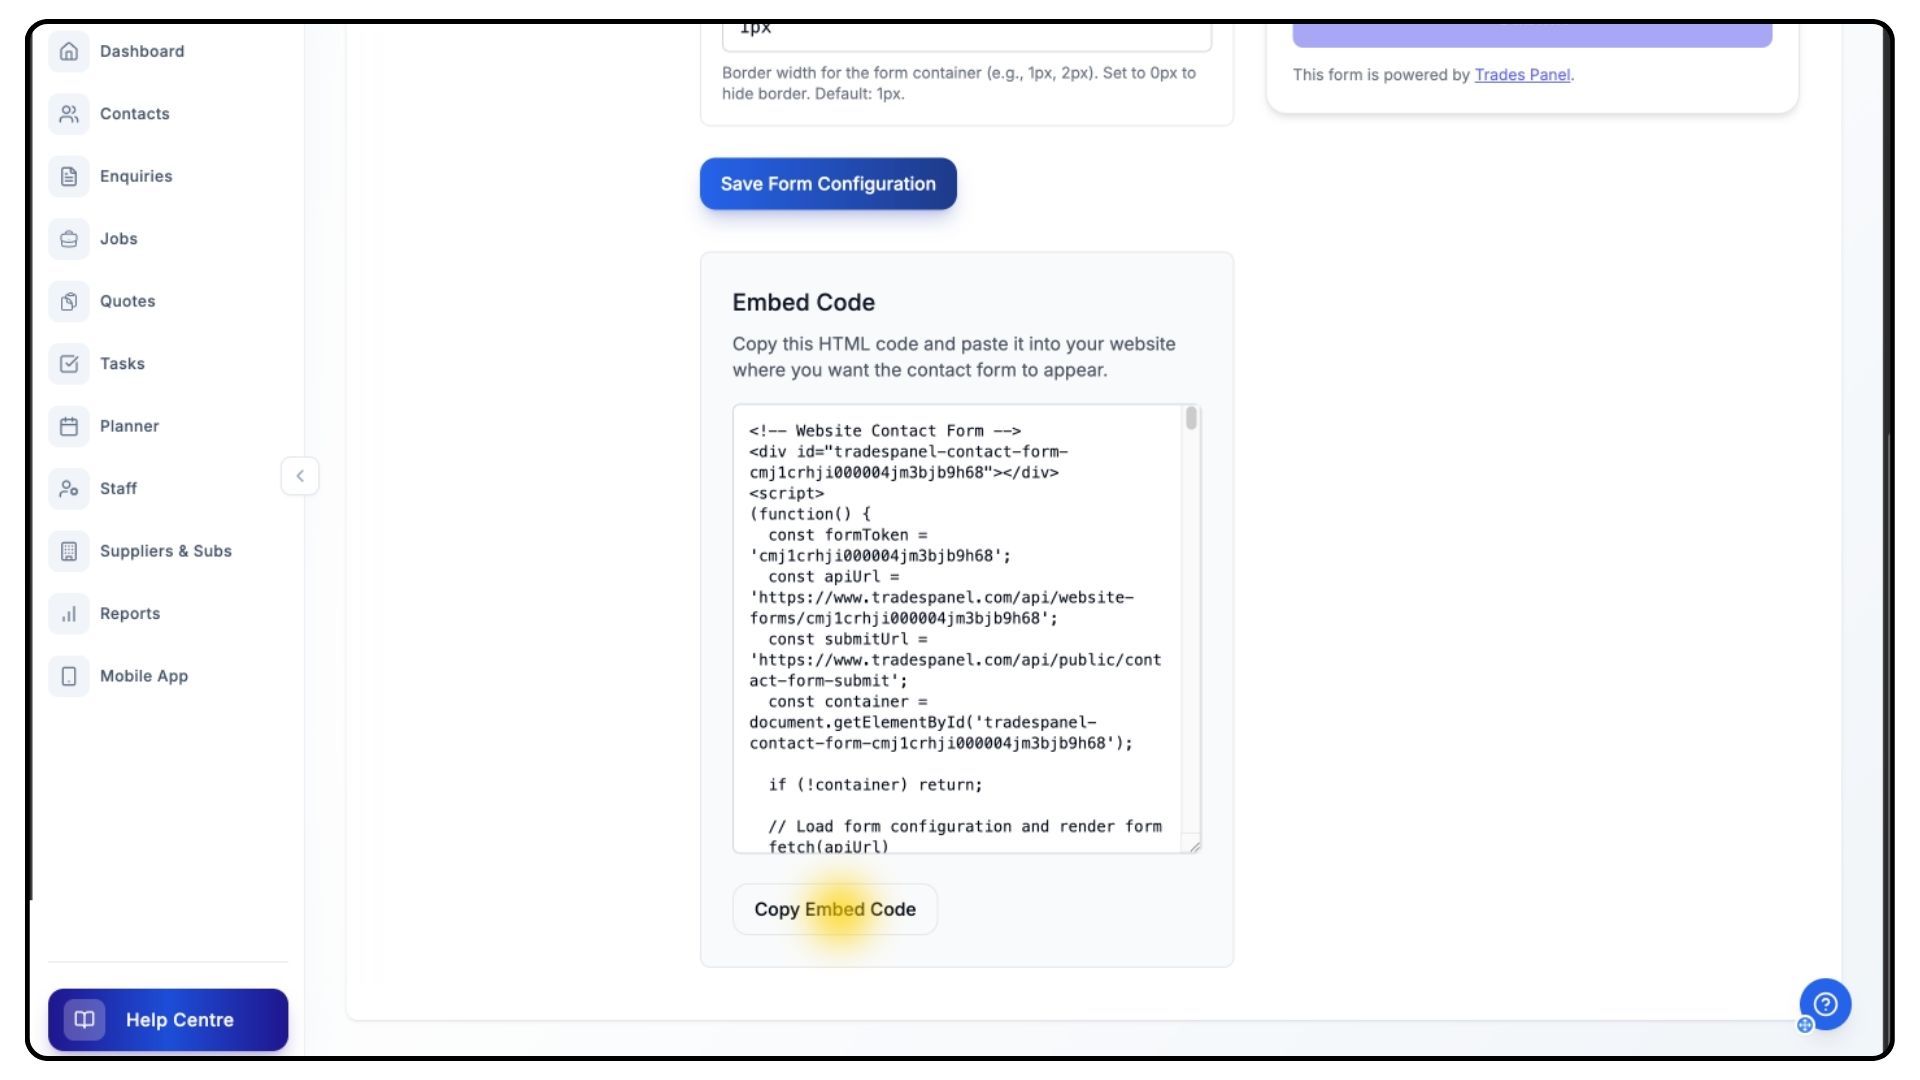
Scroll to the Embed Code section.
Click inside the code box to auto-select everything.
Copy the code using Ctrl+C (Windows) or Cmd+C (Mac).
Or click Copy Embed Code.
Step 2: Paste the Code Into Your Website
The exact process depends on your platform.
WordPress
Edit the page where the form should appear.
Add a Custom HTML block.
Paste the embed code.
Save and publish.
Squarespace
Edit the page.
Add a Code block.
Paste the embed code.
Save.
Wix
Edit the page.
Add an HTML element.
Paste the embed code.
Save.
Other Website Builders
Look for:
Custom HTML
Code Block
HTML Widget
Embed Code
Paste the code wherever you want the form to appear.
Step 3: Test Your Form
Steps
Visit the page where the form was added.
Submit a test enquiry.
Check the following:
Contacts → a new contact should appear.
Enquiries → the enquiry should be in your pipeline.
Company Email → you should receive a notification.
Making Changes to Your Form
You can update your form at any time.
Steps
Go to Settings → Website Integration.
Make your changes.
Click Save Form Configuration.
Note:
You do not need to update or replace the embed code — changes apply automatically.
Troubleshooting
The form doesn’t appear on my website
Ensure you copied the entire embed code.
Confirm your website platform supports HTML/JavaScript.
View your site in another browser.
I’m not receiving submissions
Confirm your company email in Settings → Company Profile.
Check your spam/junk folder.
Ensure your Enquiries Pipeline is set up.
The form looks different than the preview
Clear your website cache.
Ask your web developer if you're unsure how.
I need to move the form
Copy the embed code again.
Remove the old embed.
Paste the code in a new location.
Need Help?
If you need assistance, contact support and include:
Your website platform
The step you’re stuck on
Any error messages
Tips for Best Results
Keep it simple — start with basic settings and refine later.
Check mobile view — ensure the form looks good on phones.
Match your branding — use colours that suit your website.
Clear messaging — explain the purpose of the form clearly.
Add your Privacy Policy URL — recommended for GDPR compliance.