What It Does
The Invoicing tab is where you manage all the financial aspects of a job — from setting up payment schedules to generating invoices and recording transactions.
It provides a full overview of what’s been billed, what’s been paid, and what’s still outstanding, helping you stay in complete control of your project finances.
Accessing the Invoicing Tab
What It Does
Every job in Trades Panel includes an Invoicing tab, where you can view the full financial summary and manage billing directly from the job.
Steps
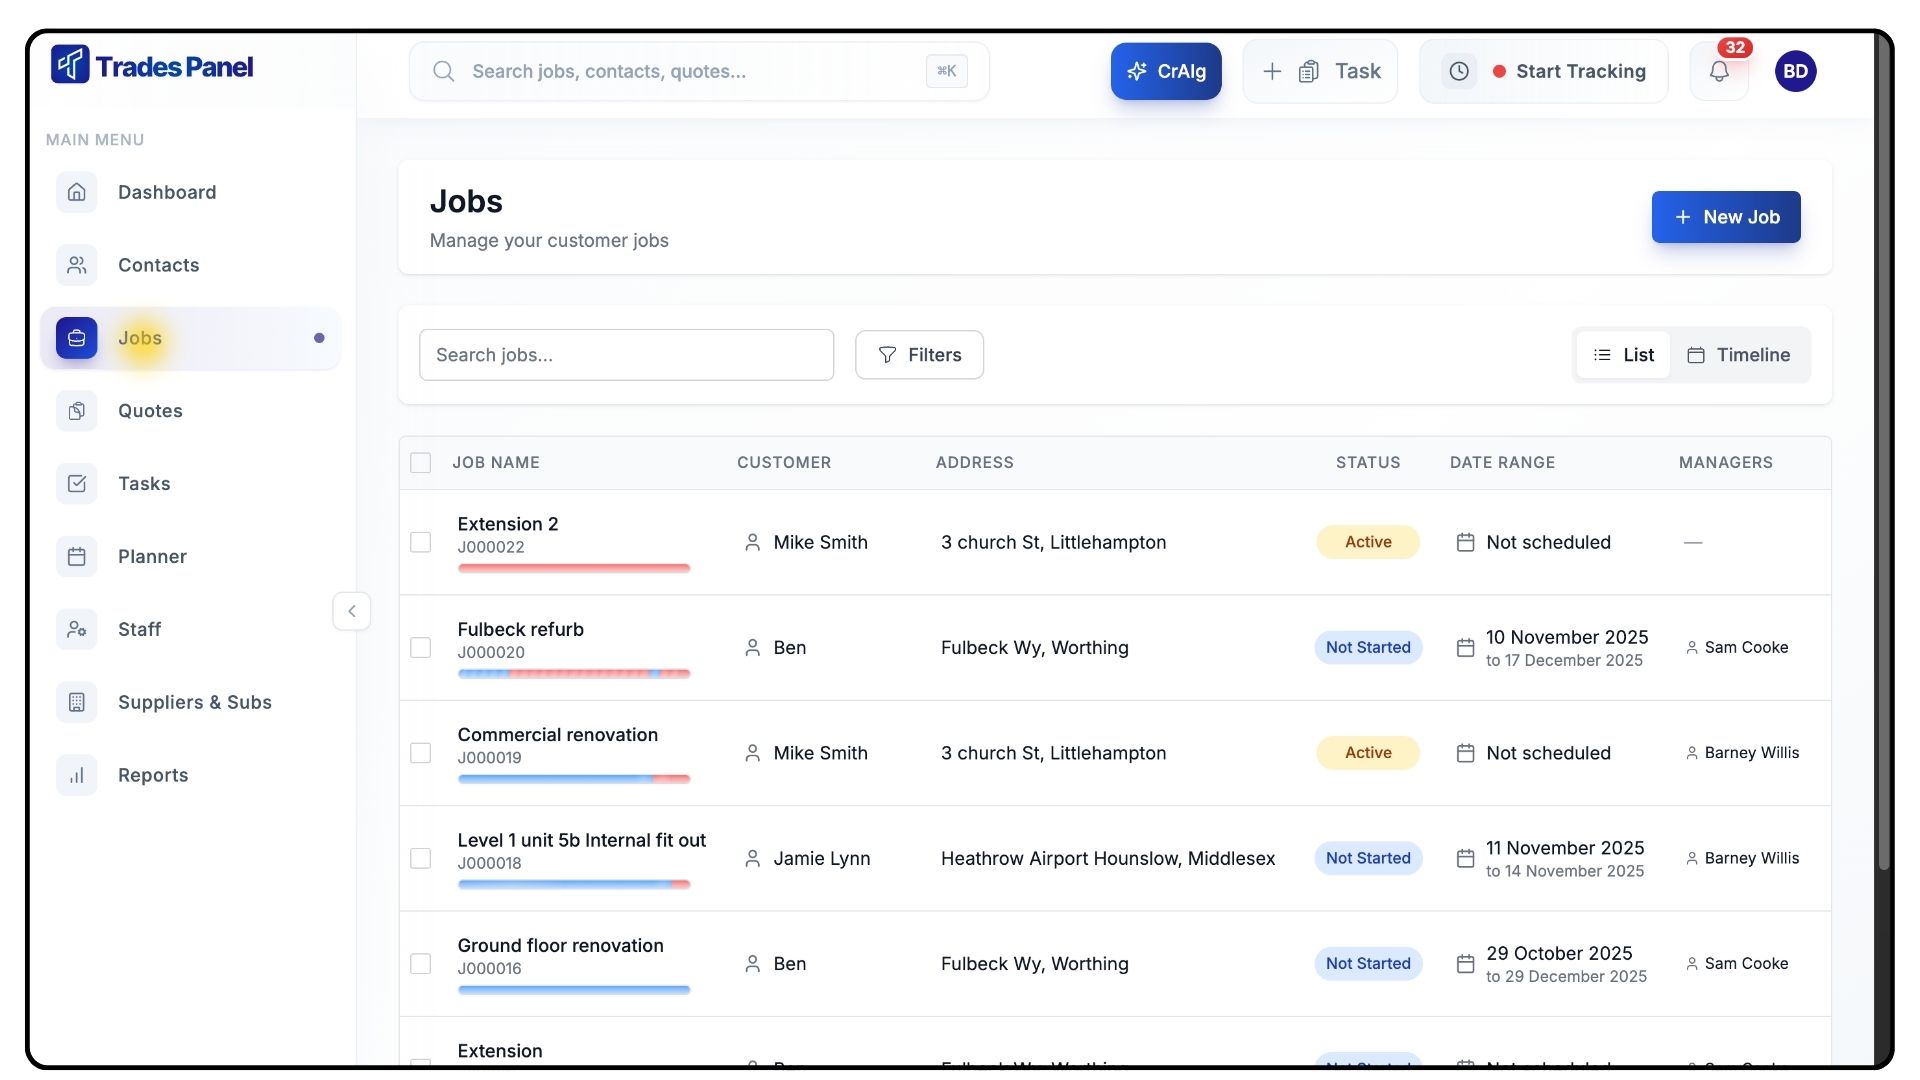
Open the job you’d like to work on.
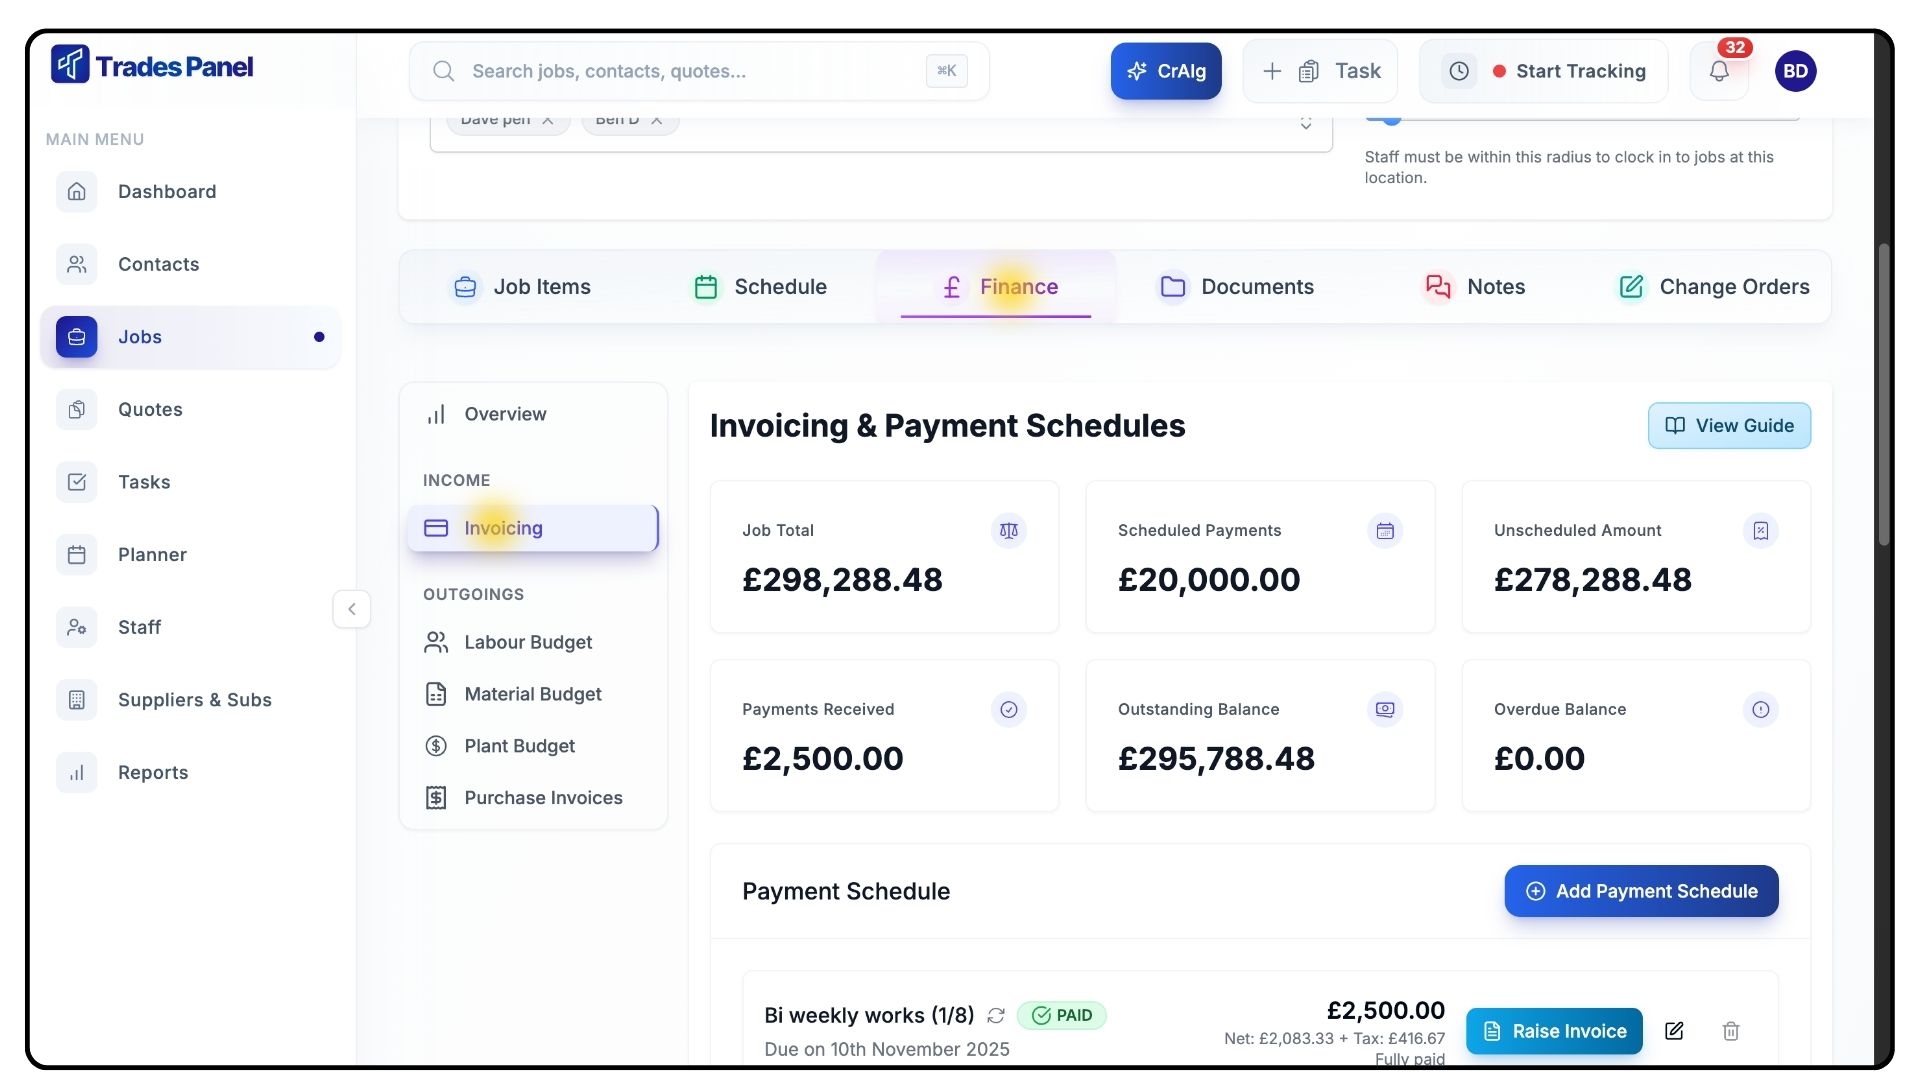
Click on the Finances tab and go to Invoicing.
Here, you’ll see a full financial summary displaying:
Total Job Value
Scheduled Payments
Unscheduled Amount
Payments Received
Remaining Balance
Overdue Balance
Creating a Payment Schedule
What It Does
Payment schedules divide your job into manageable billing stages, allowing you to invoice specific parts of a project or set up recurring payments.
Steps
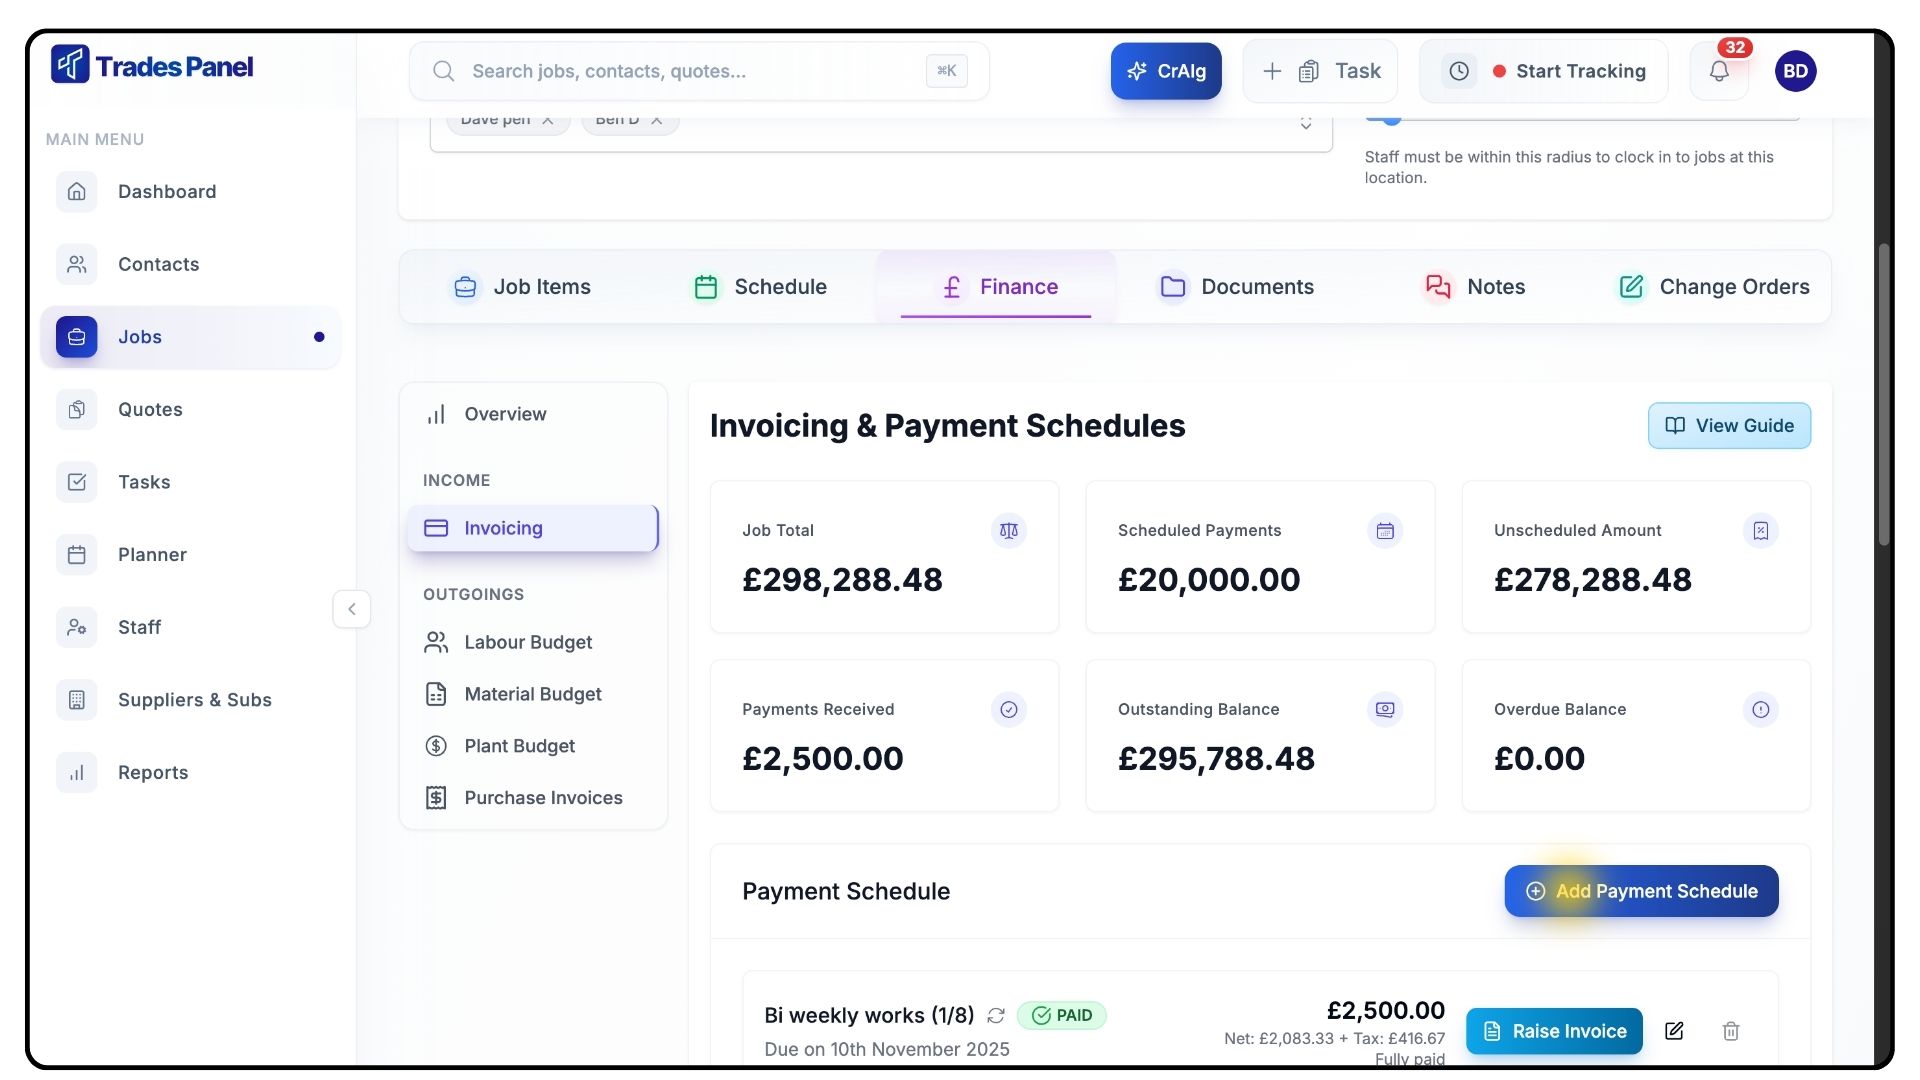
To create a new schedule, click Add Payment Schedule on the right-hand side.
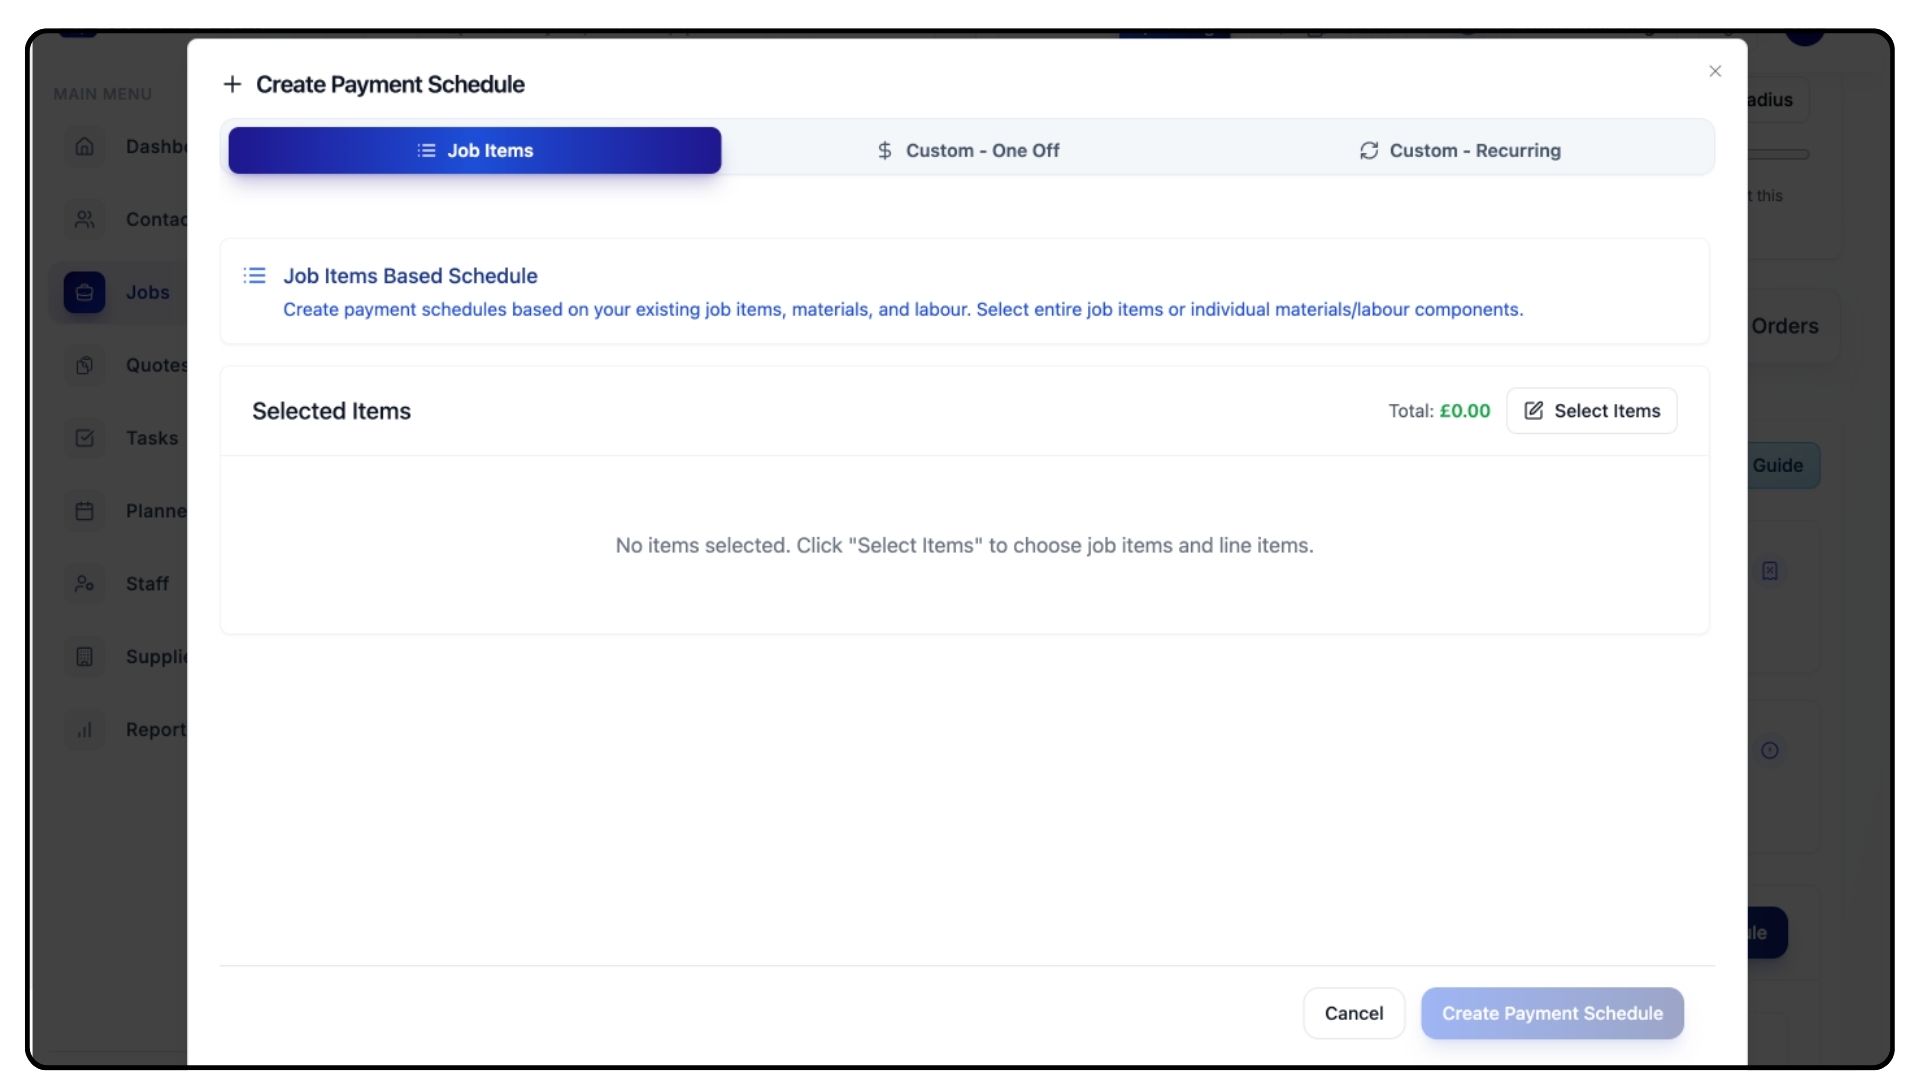
You’ll then see three options for creating a payment schedule:
Job Items – Bill for specific stages of a project.
Custom One-Off Payments – Bill for standalone charges.
Recurring Payments – Set up regular billing for ongoing work.
Creating a Job Item Payment Schedule
What It Does
This option is ideal when you want to bill for specific project stages, such as First Fix or Landscaping.
Steps
Click Job Items and then Select Items to open a list of all job items and their corresponding line items.

Select the job items you want to bill for — for example, Management and Site Costs or Demolition.
Selecting a job item automatically includes all its line items.
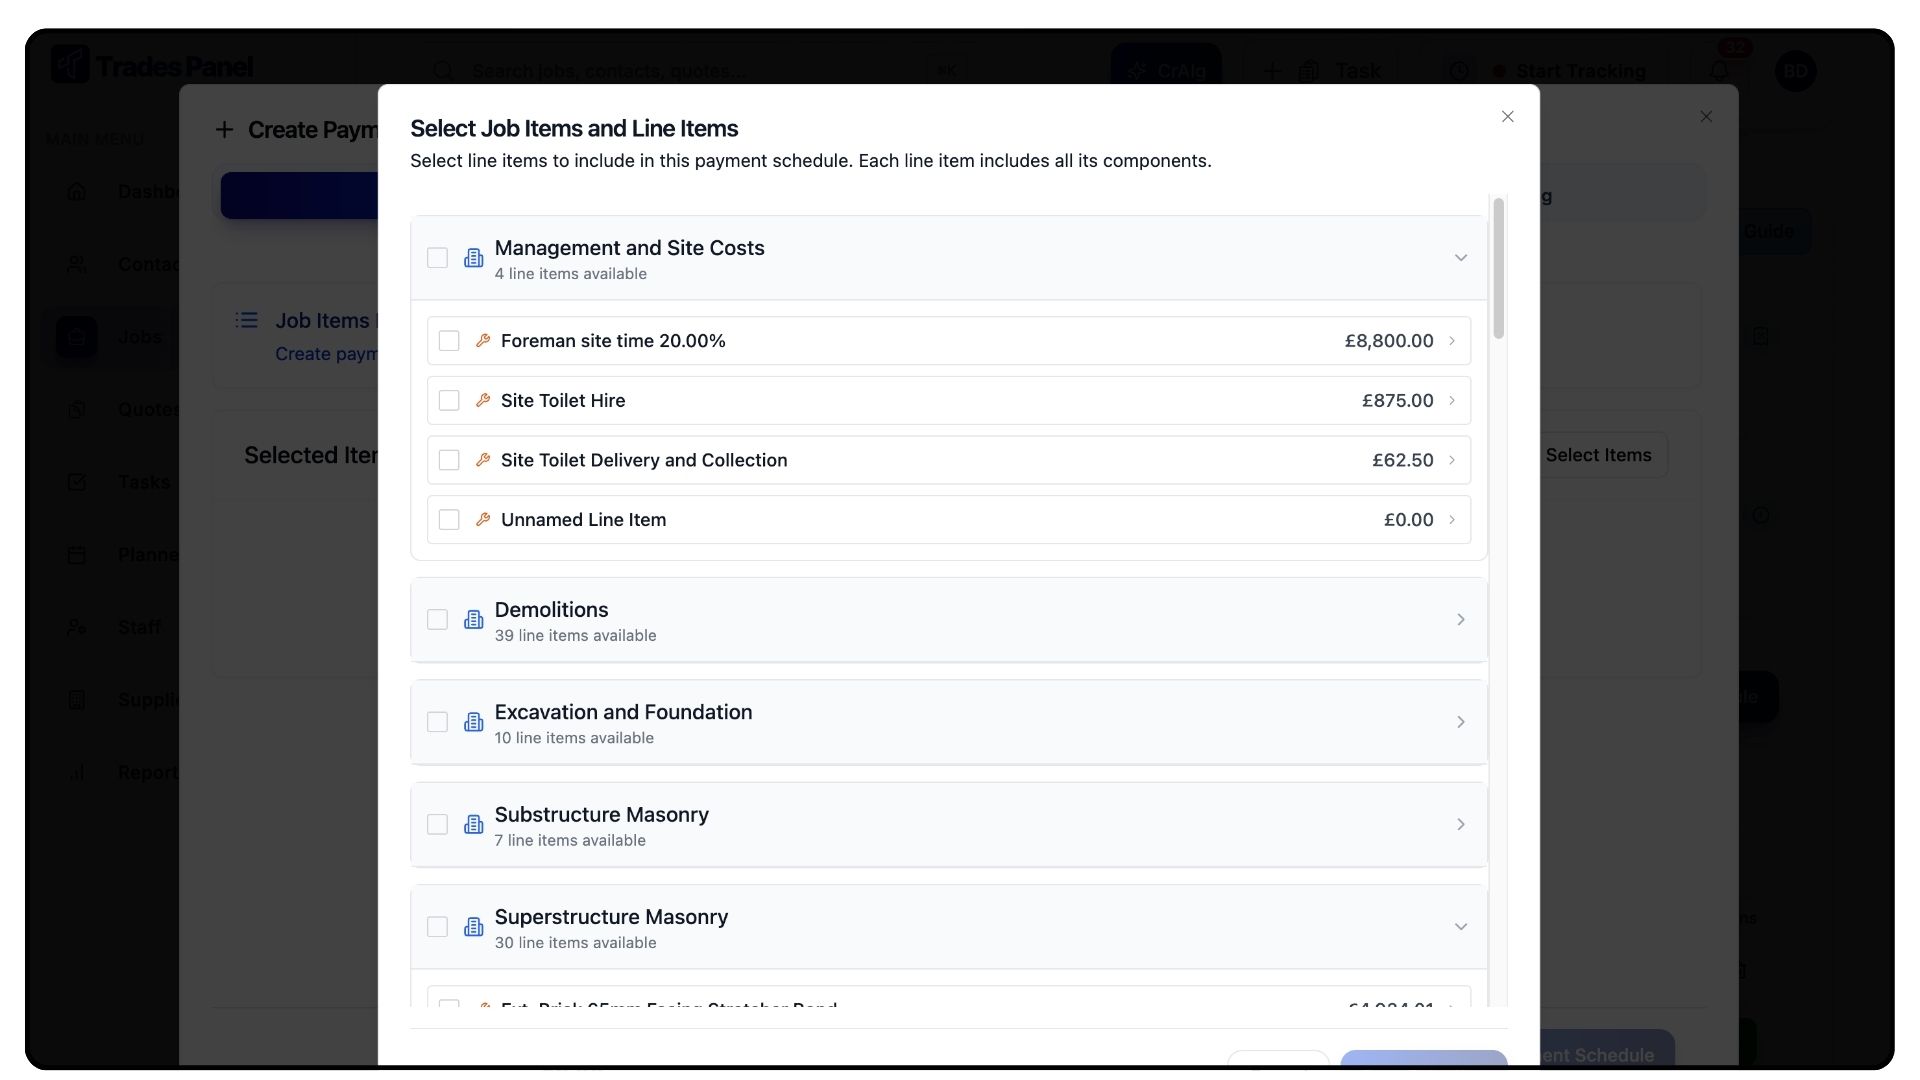
If you would rather bill for individual line items rather than the entire job item, you can use the arrow alongside the job item and select the required line items underneath.
Once you’re happy with your choices, click Save Selection.
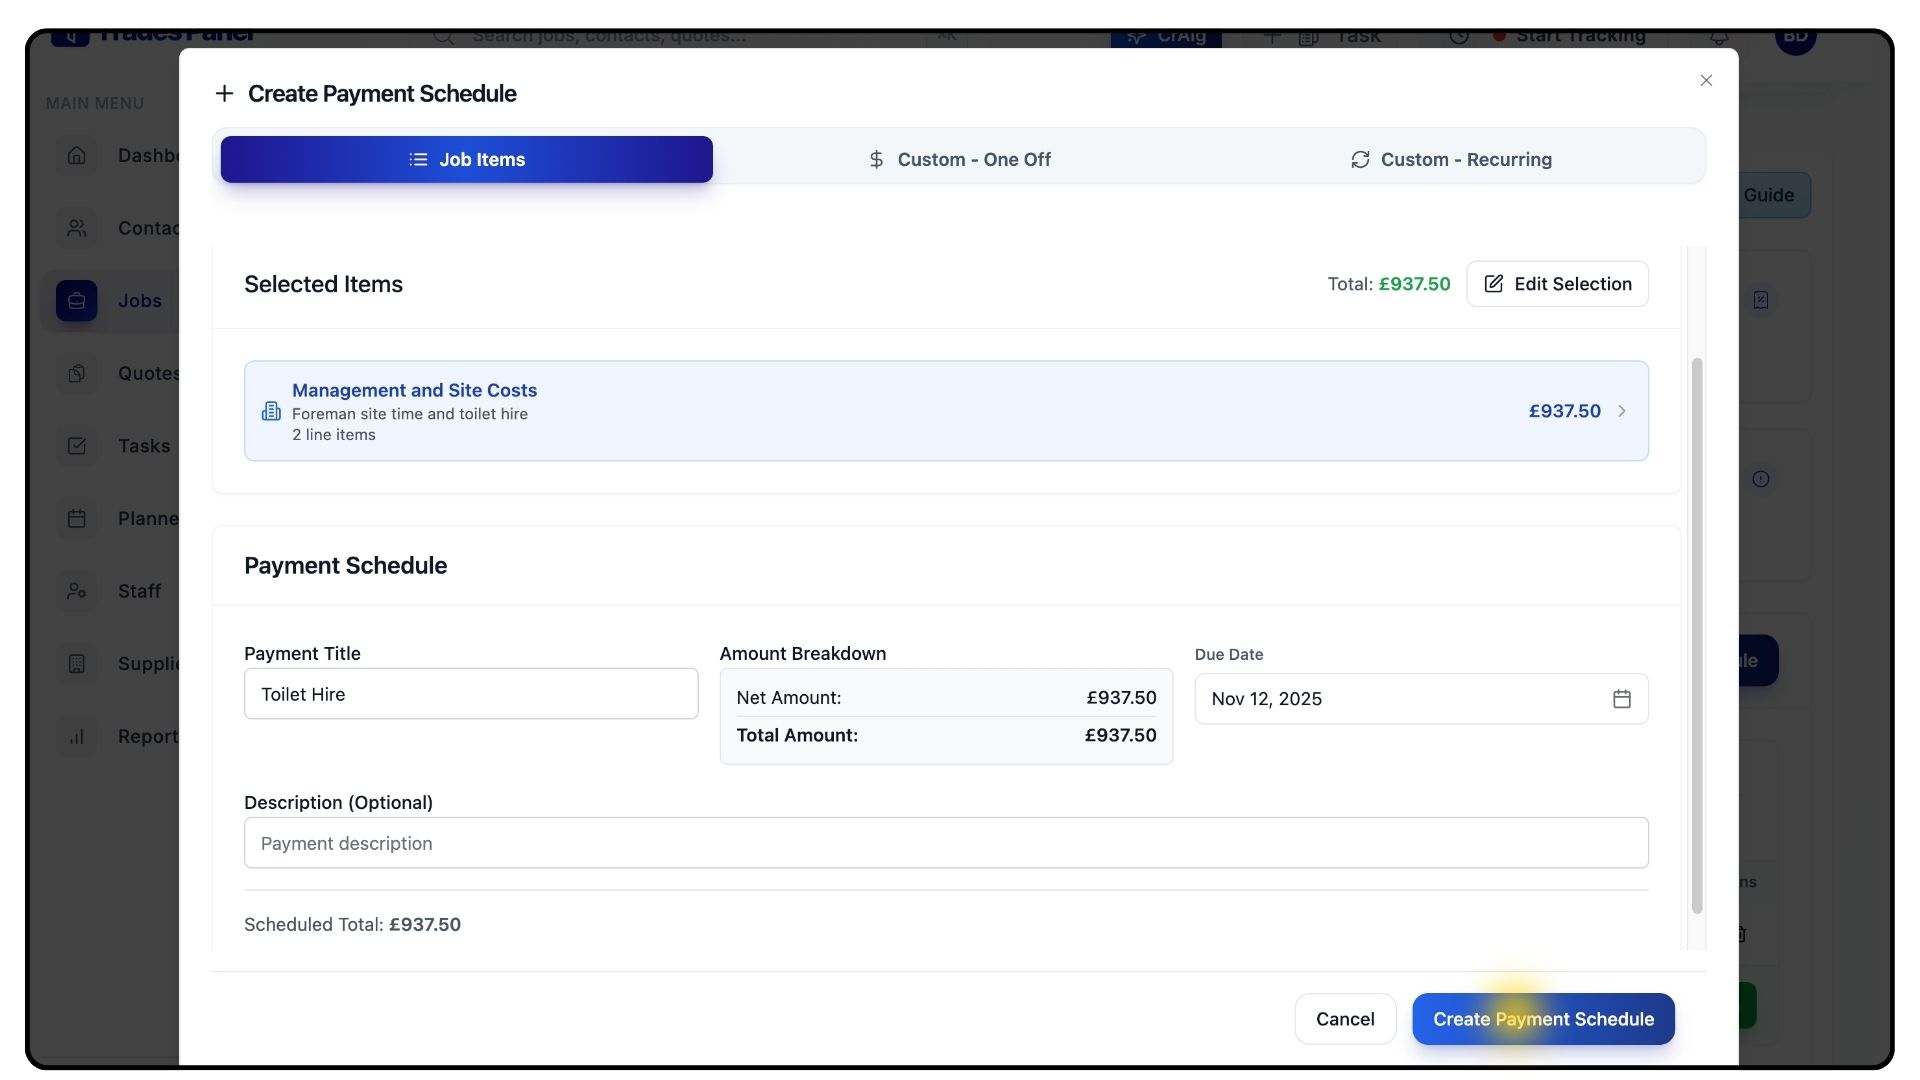
Review the summary of your selected job items and their associated costs.
Add a Title, Description, and Due Date.
When everything looks correct, click Create Payment Schedule.

Your new schedule will now appear within the Invoicing tab.
Use the Edit or Delete buttons beside each entry to make any changes later.
Generating an Invoice
What It Does
Once a payment schedule is created, you can instantly convert it into an invoice, ready to send to your client.
Steps
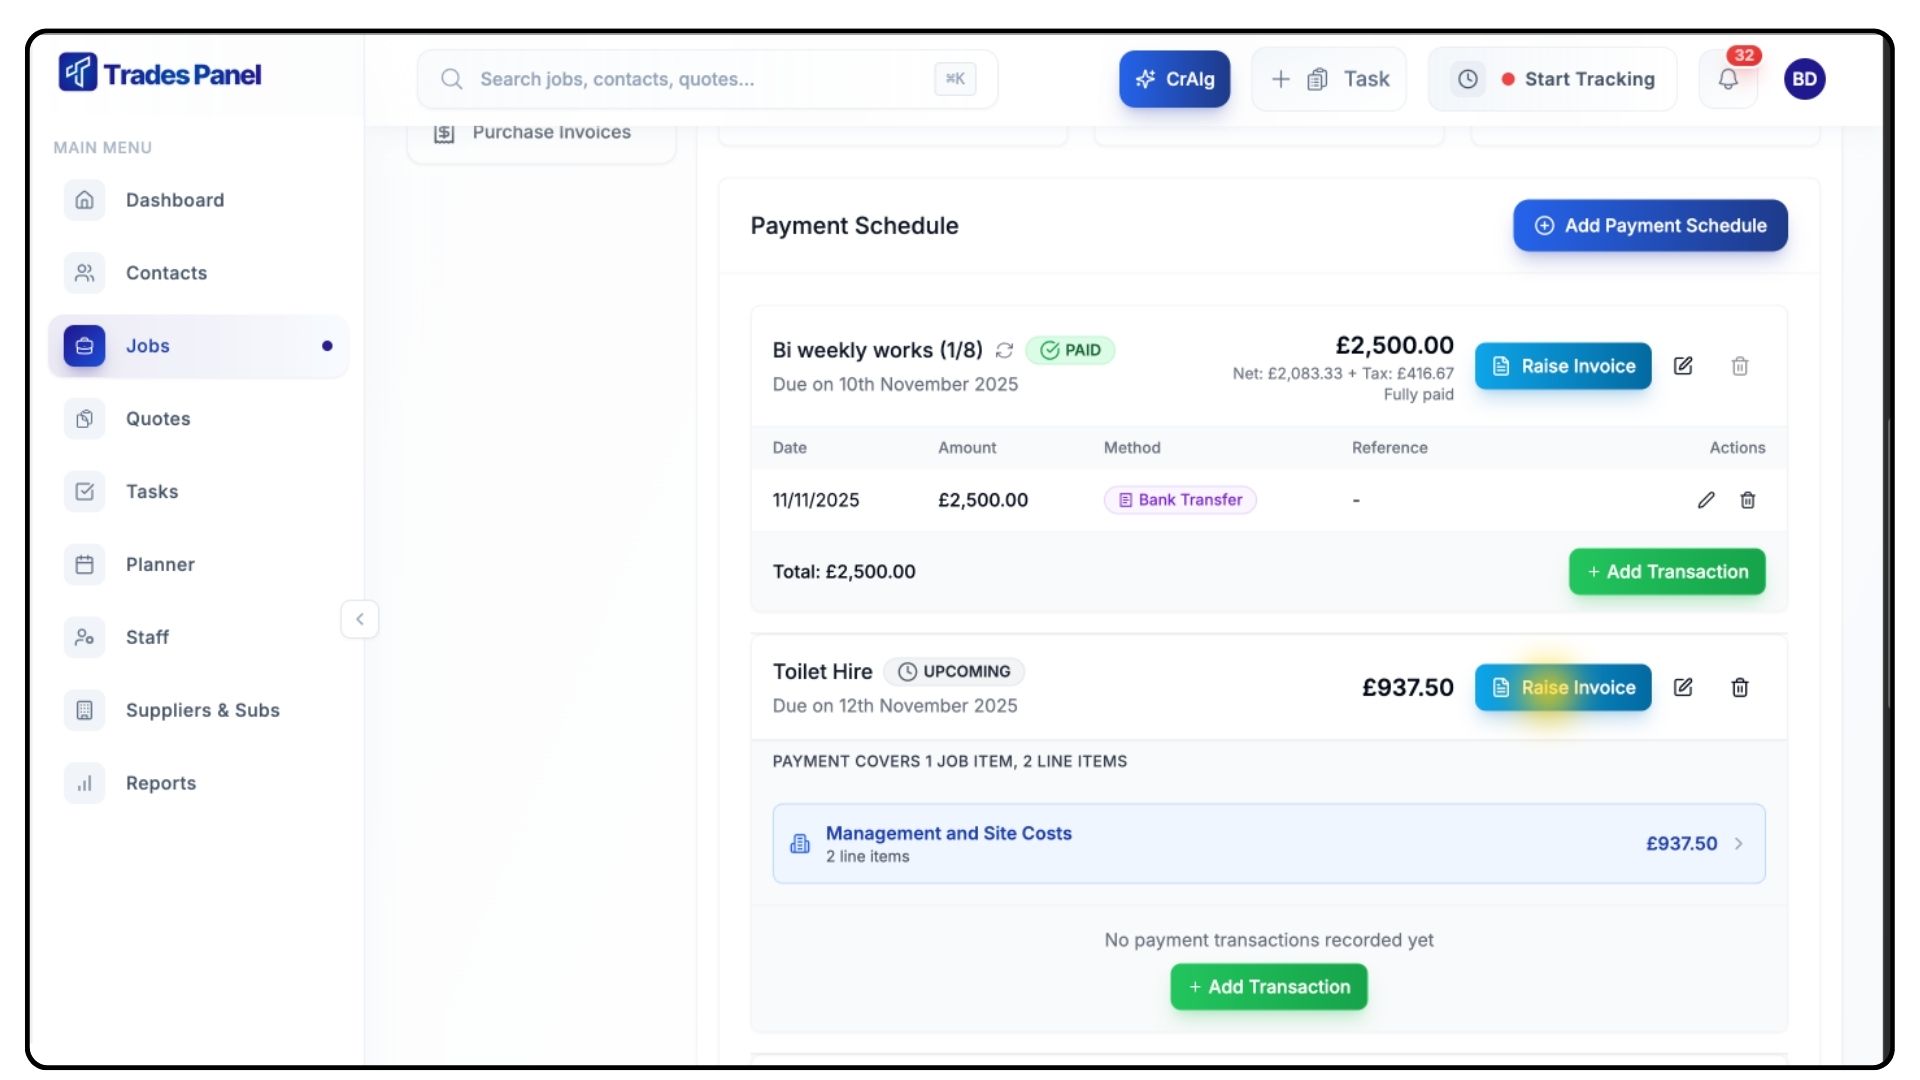
Click the Raise Invoice Button next to your payment schedule.
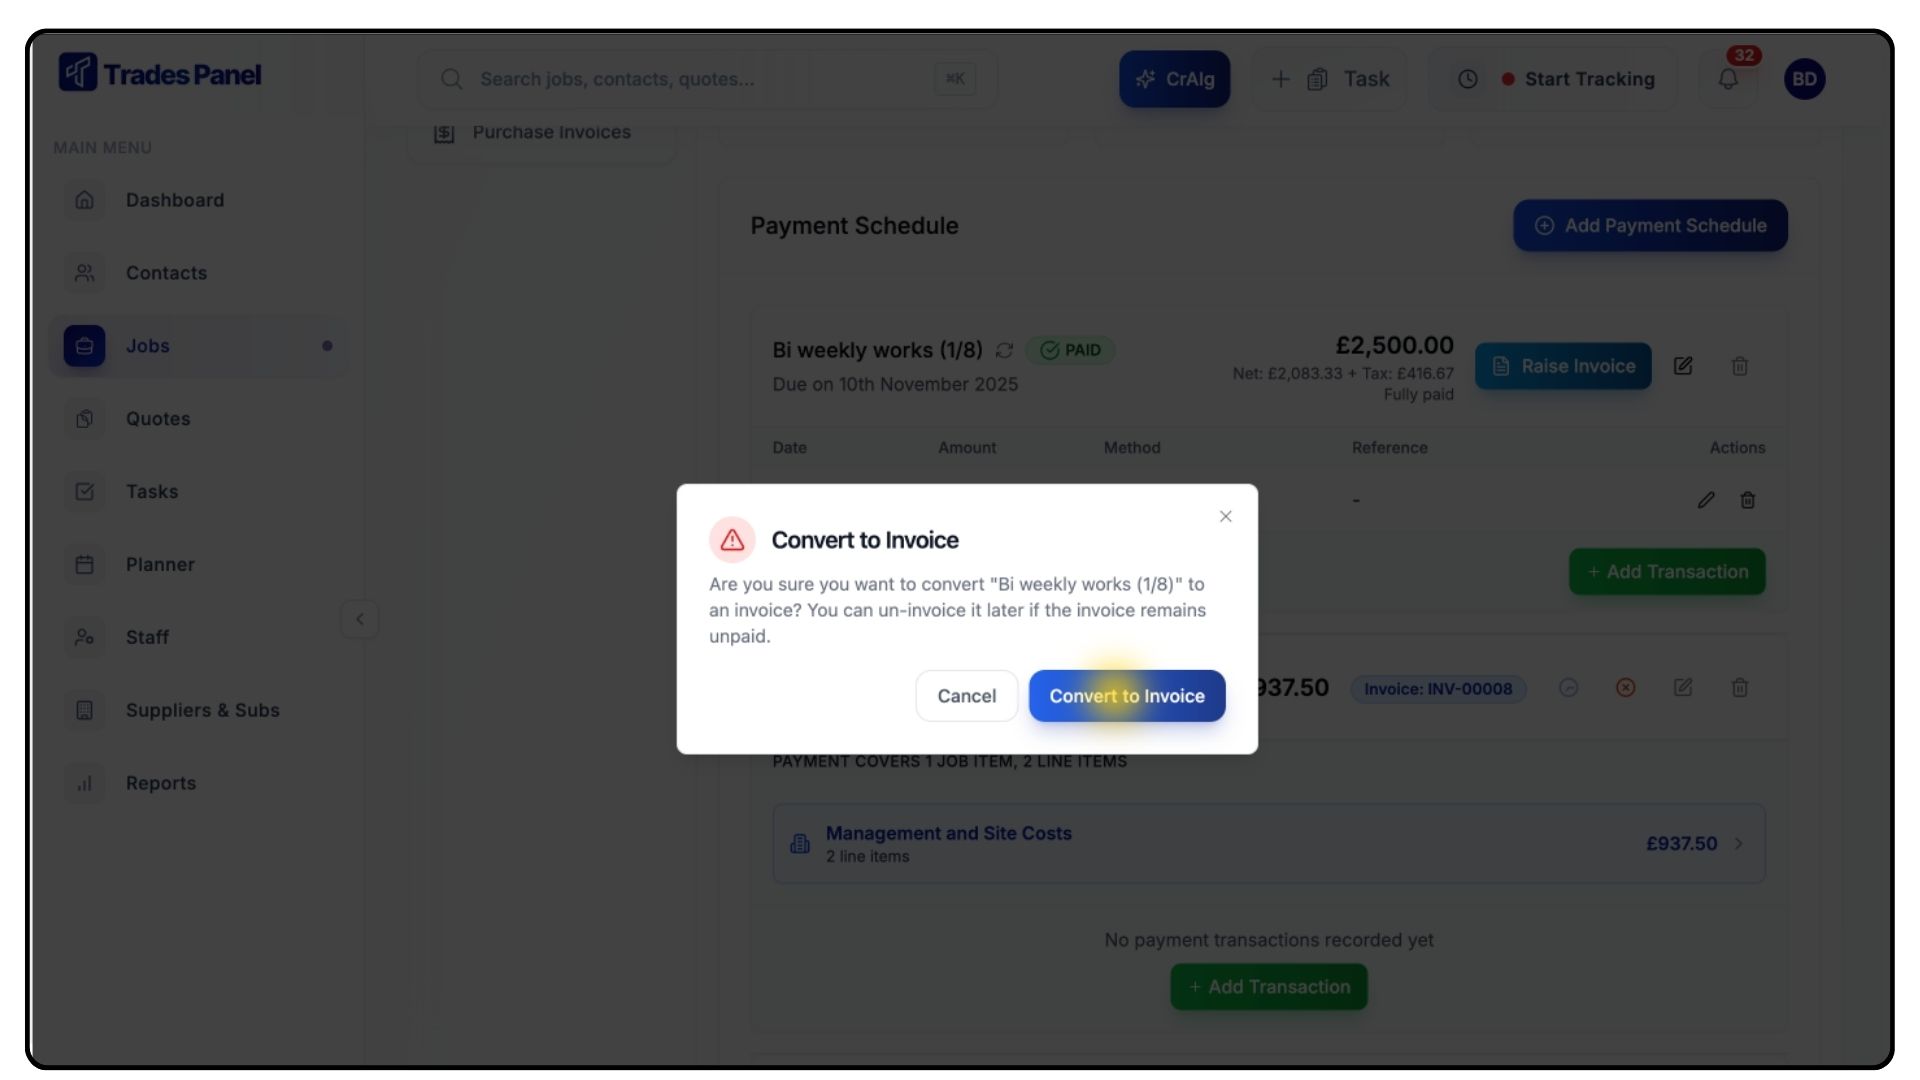
This converts it into an invoice and saves it to the Invoice section at the bottom of the page.
You can now download or send the invoice to your client.
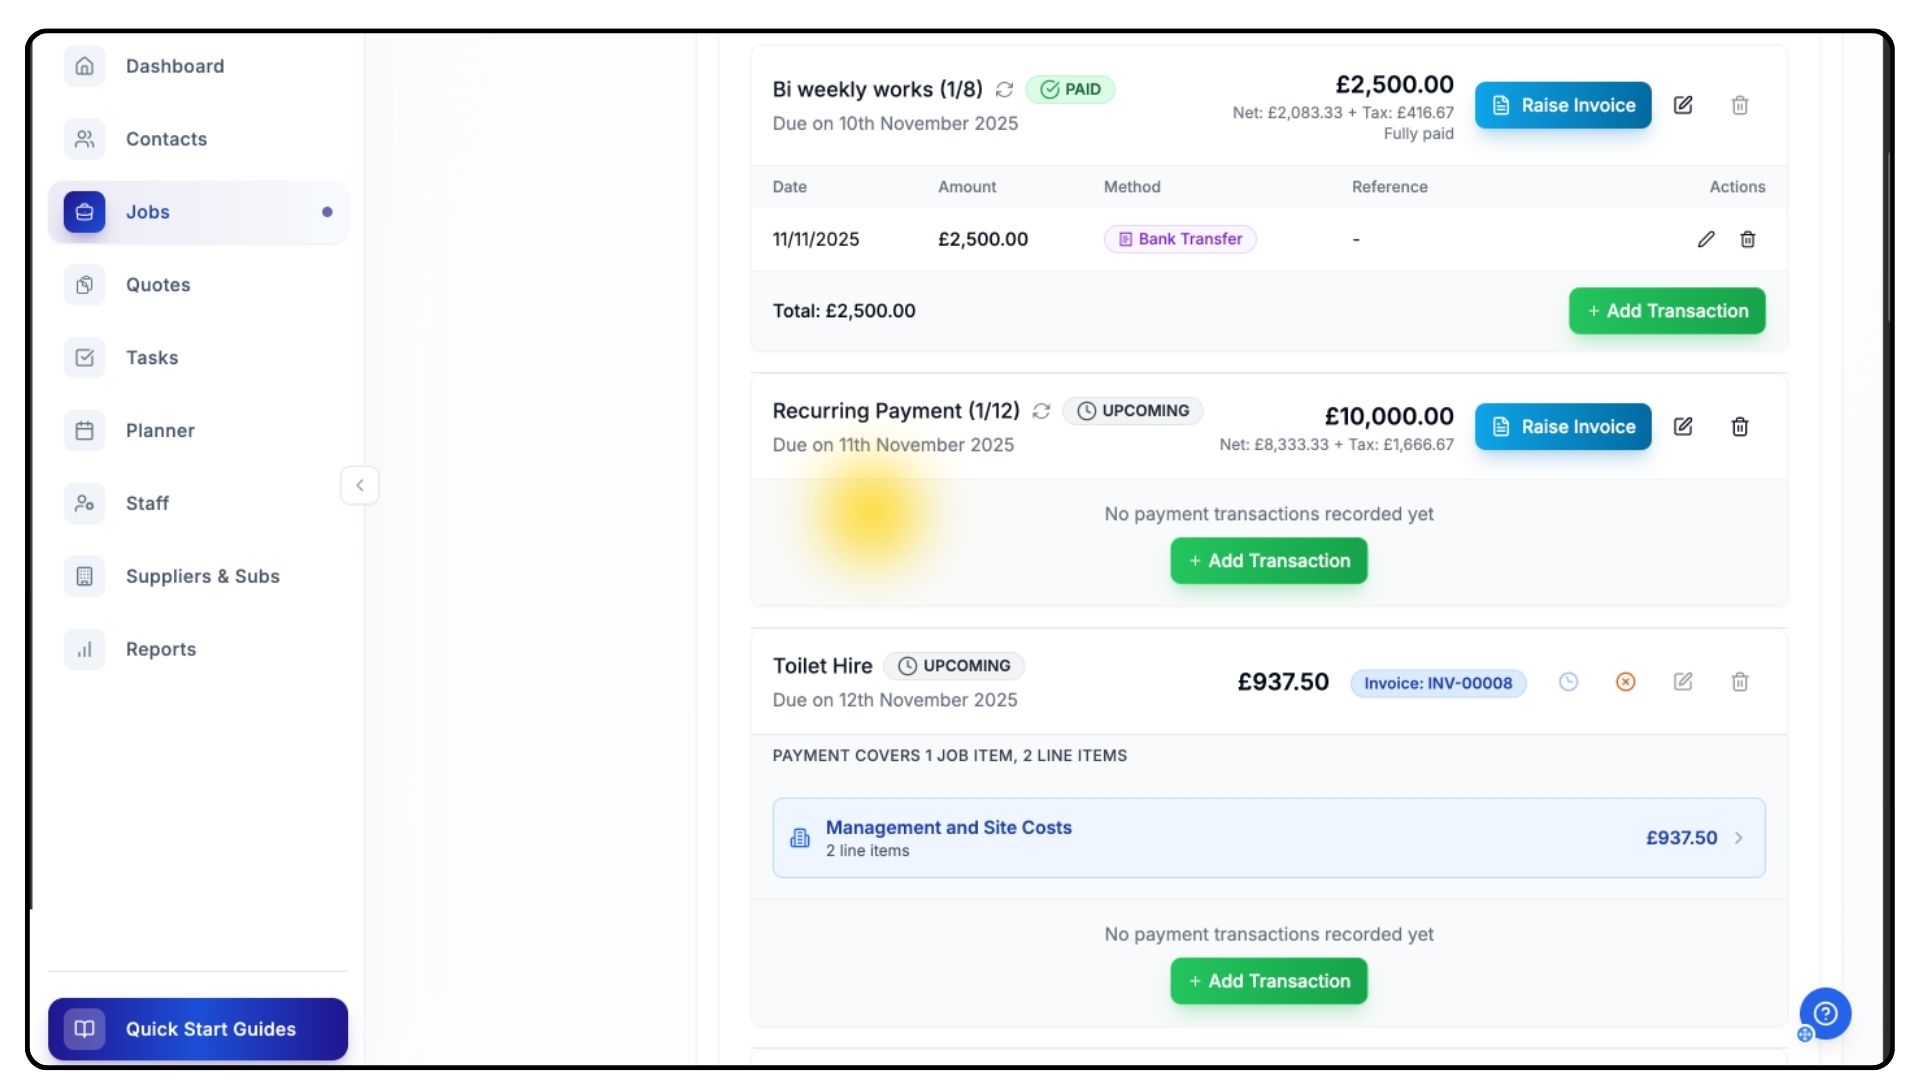
Recording Payments
What It Does
When payments are received, you can record them directly in Trades Panel to keep your job finances up to date.
Steps
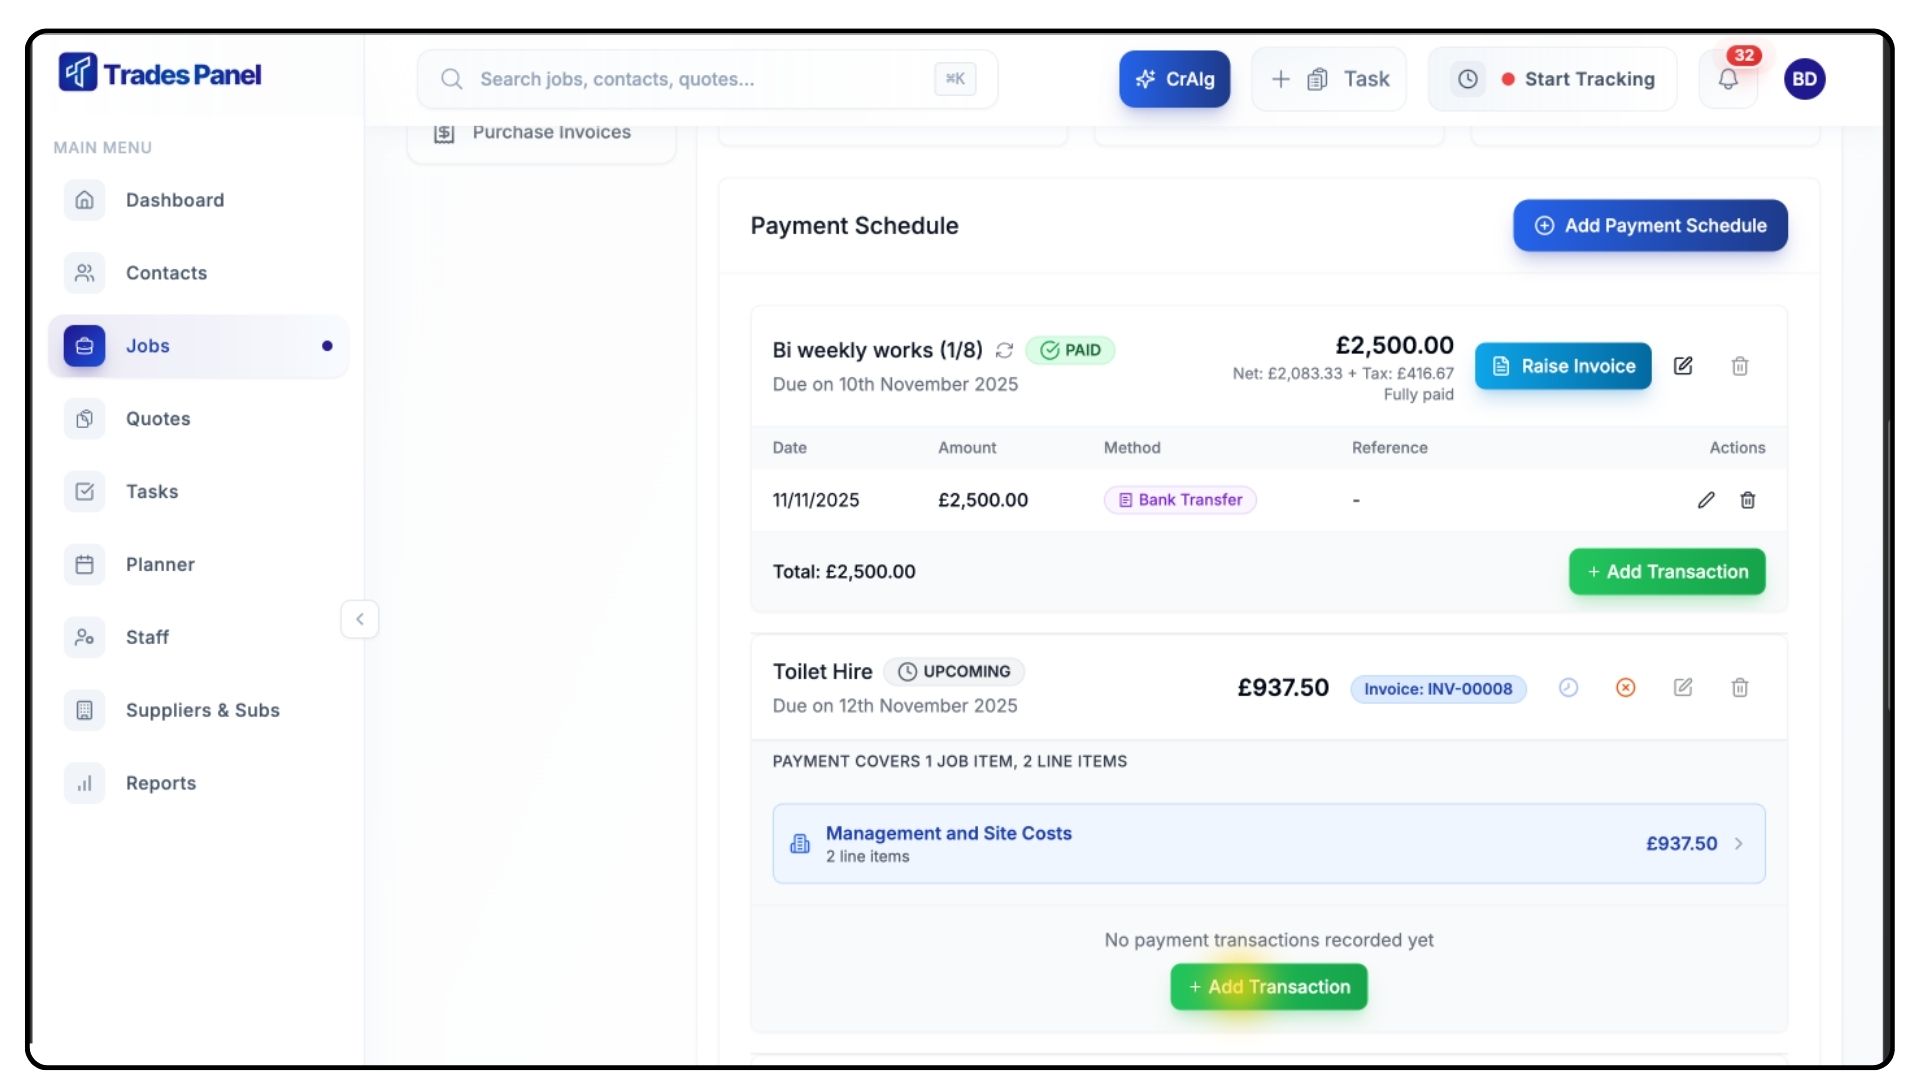
Click the Plus Icon or Add Transaction button beside the relevant invoice.
The add transaction button will only be visible if the invoice has been raised.
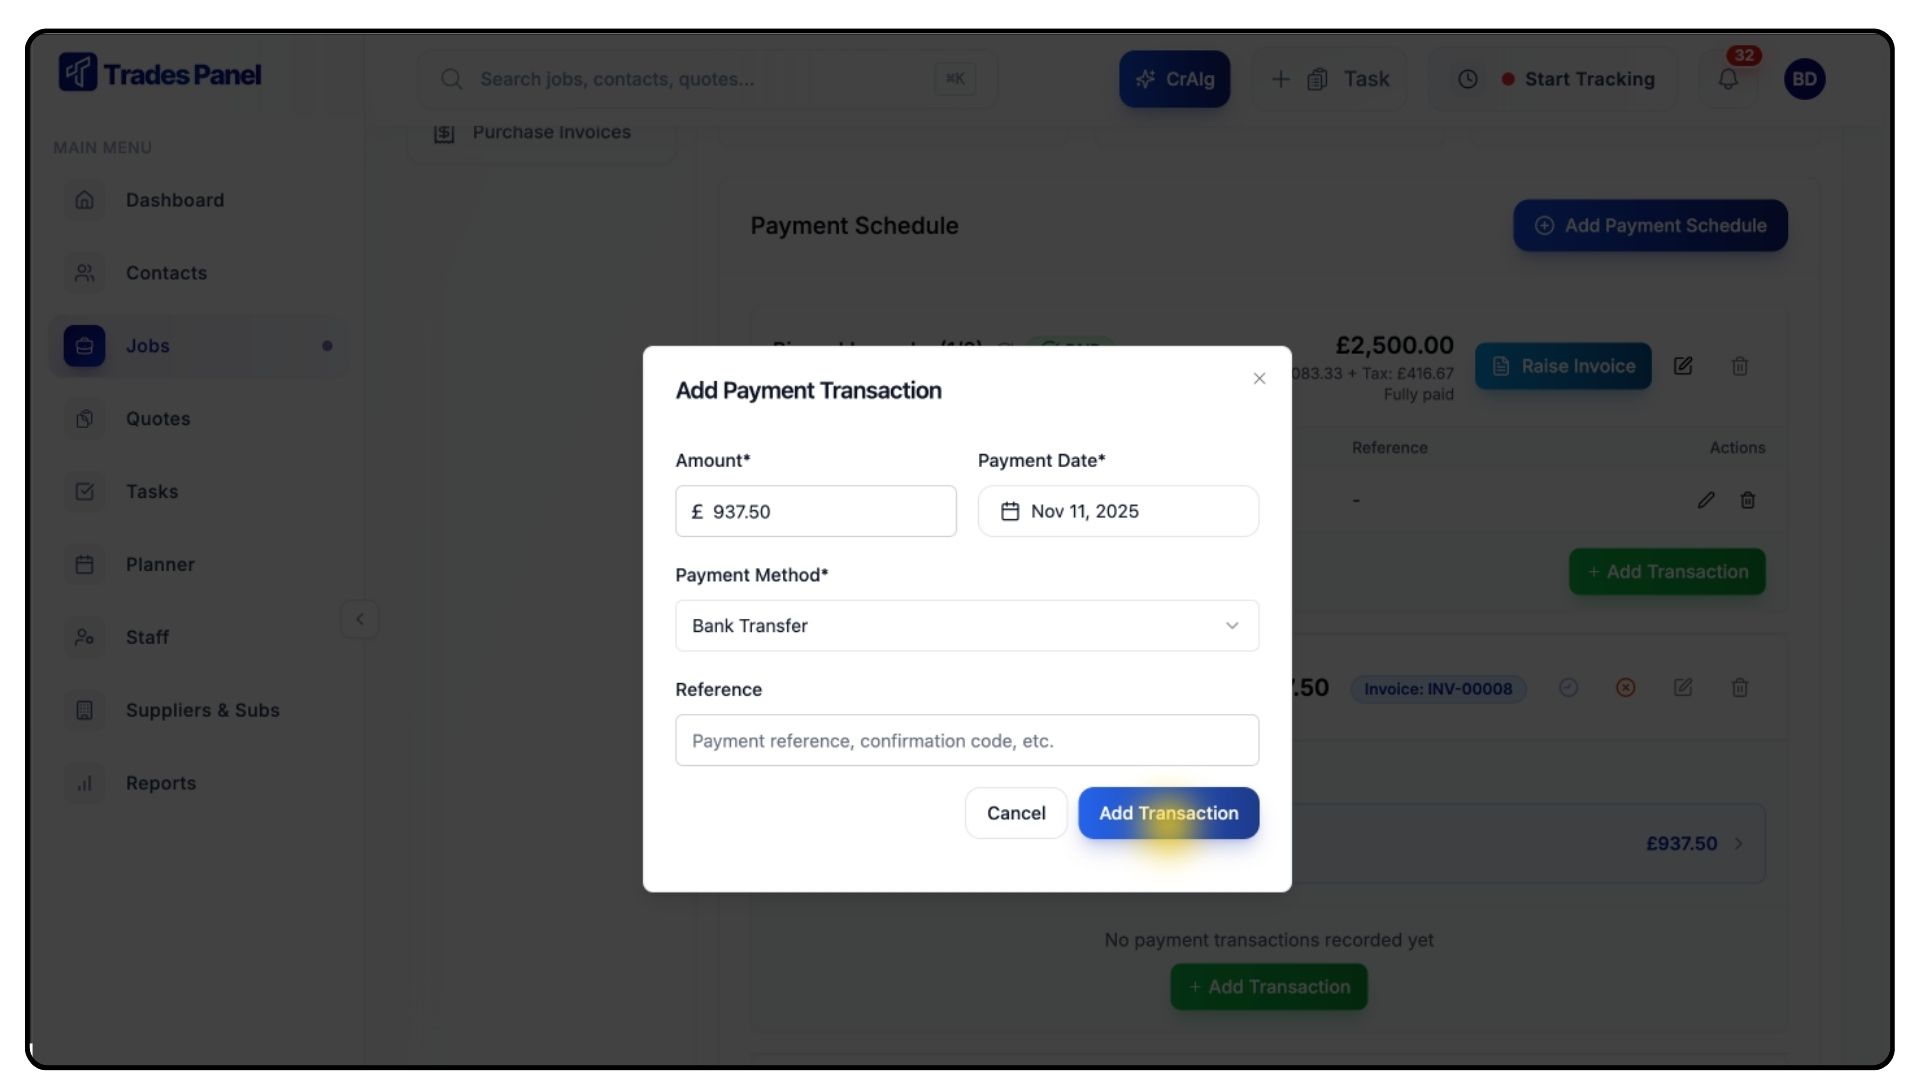
Enter the payment details to mark the invoice as paid.
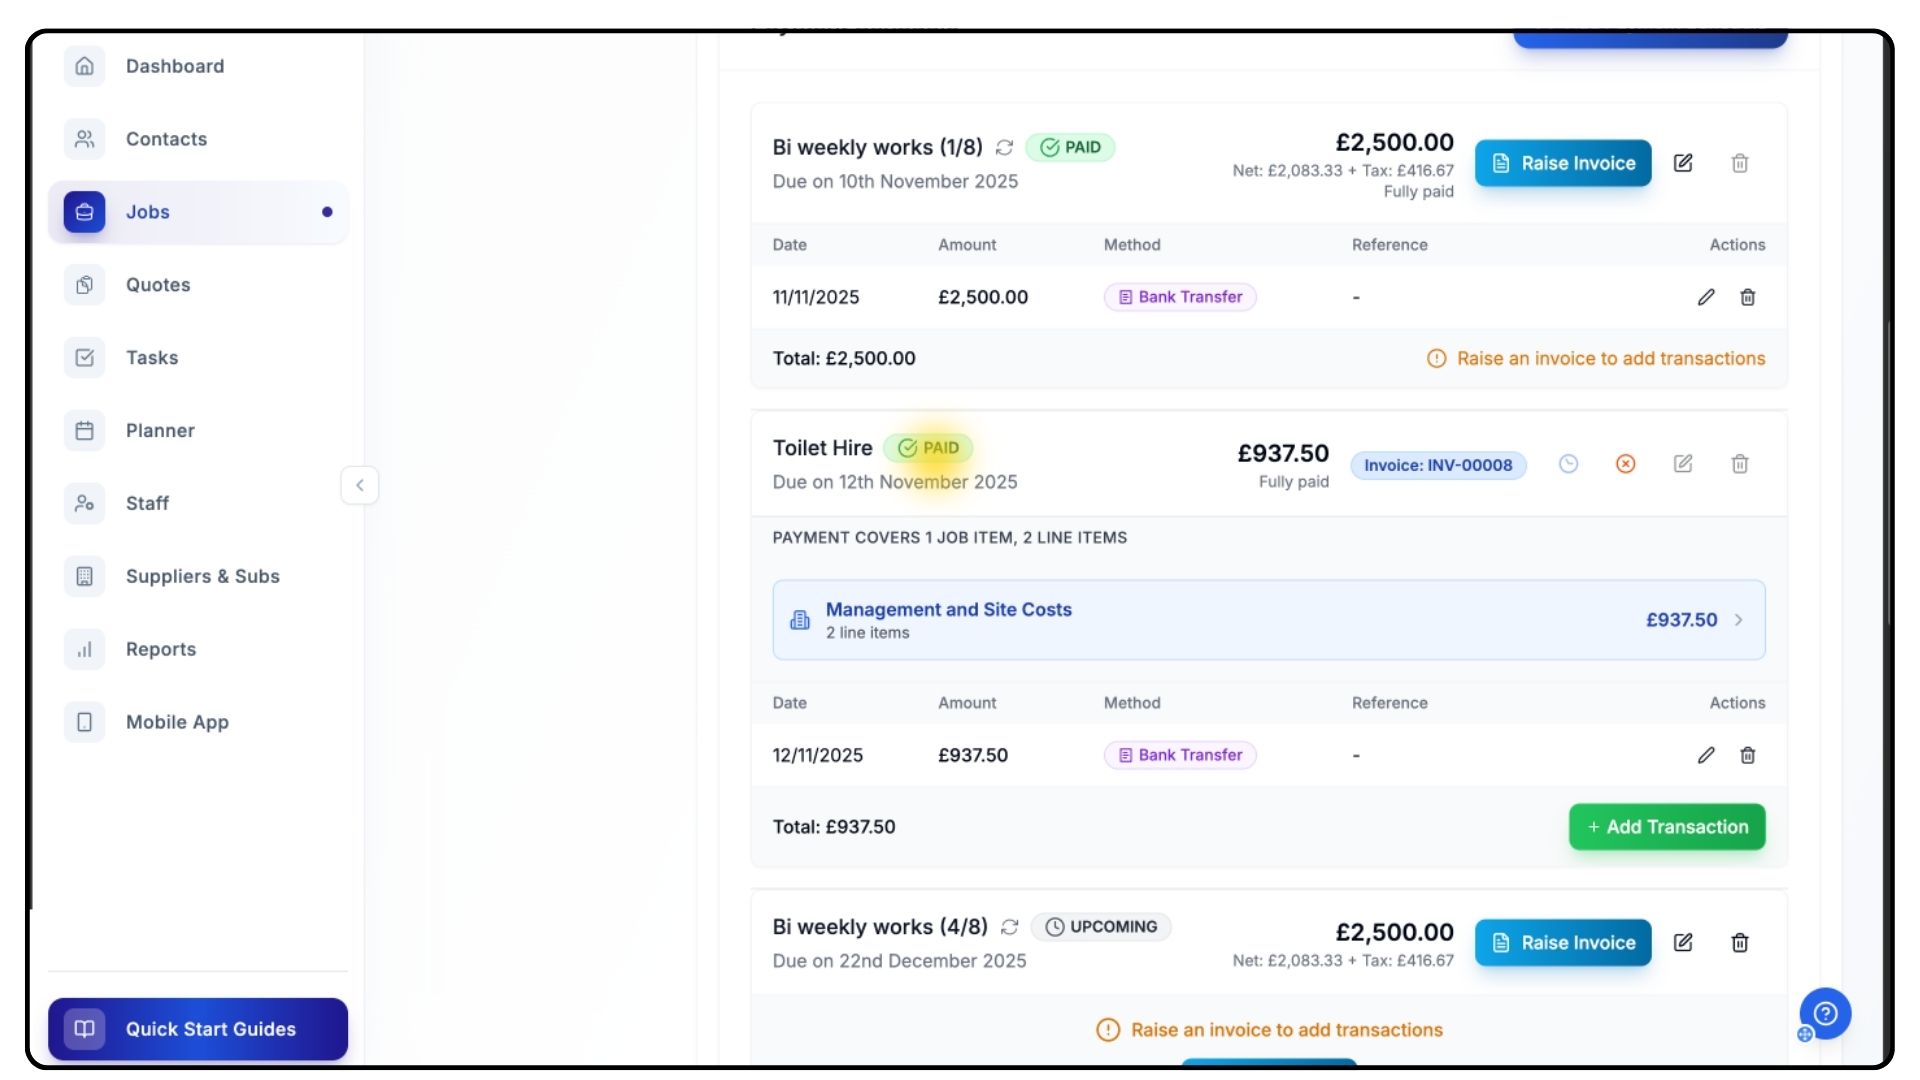
If a transaction is deleted, the payment status will automatically revert to Unpaid.
Creating Custom or Recurring Payments
What It Does
Both custom and recurring payments are created similarly to job item payments, but with key differences in how they’re billed.
Steps
Custom One-Off Payments are for single, standalone charges.
Recurring Payments automatically repeat on a schedule — ideal for maintenance contracts or retainer work.
Setting Up a Recurring Payment Schedule
What It Does
Recurring payments automatically generate invoices at regular intervals, helping you manage ongoing services or subscription-style billing.
Steps
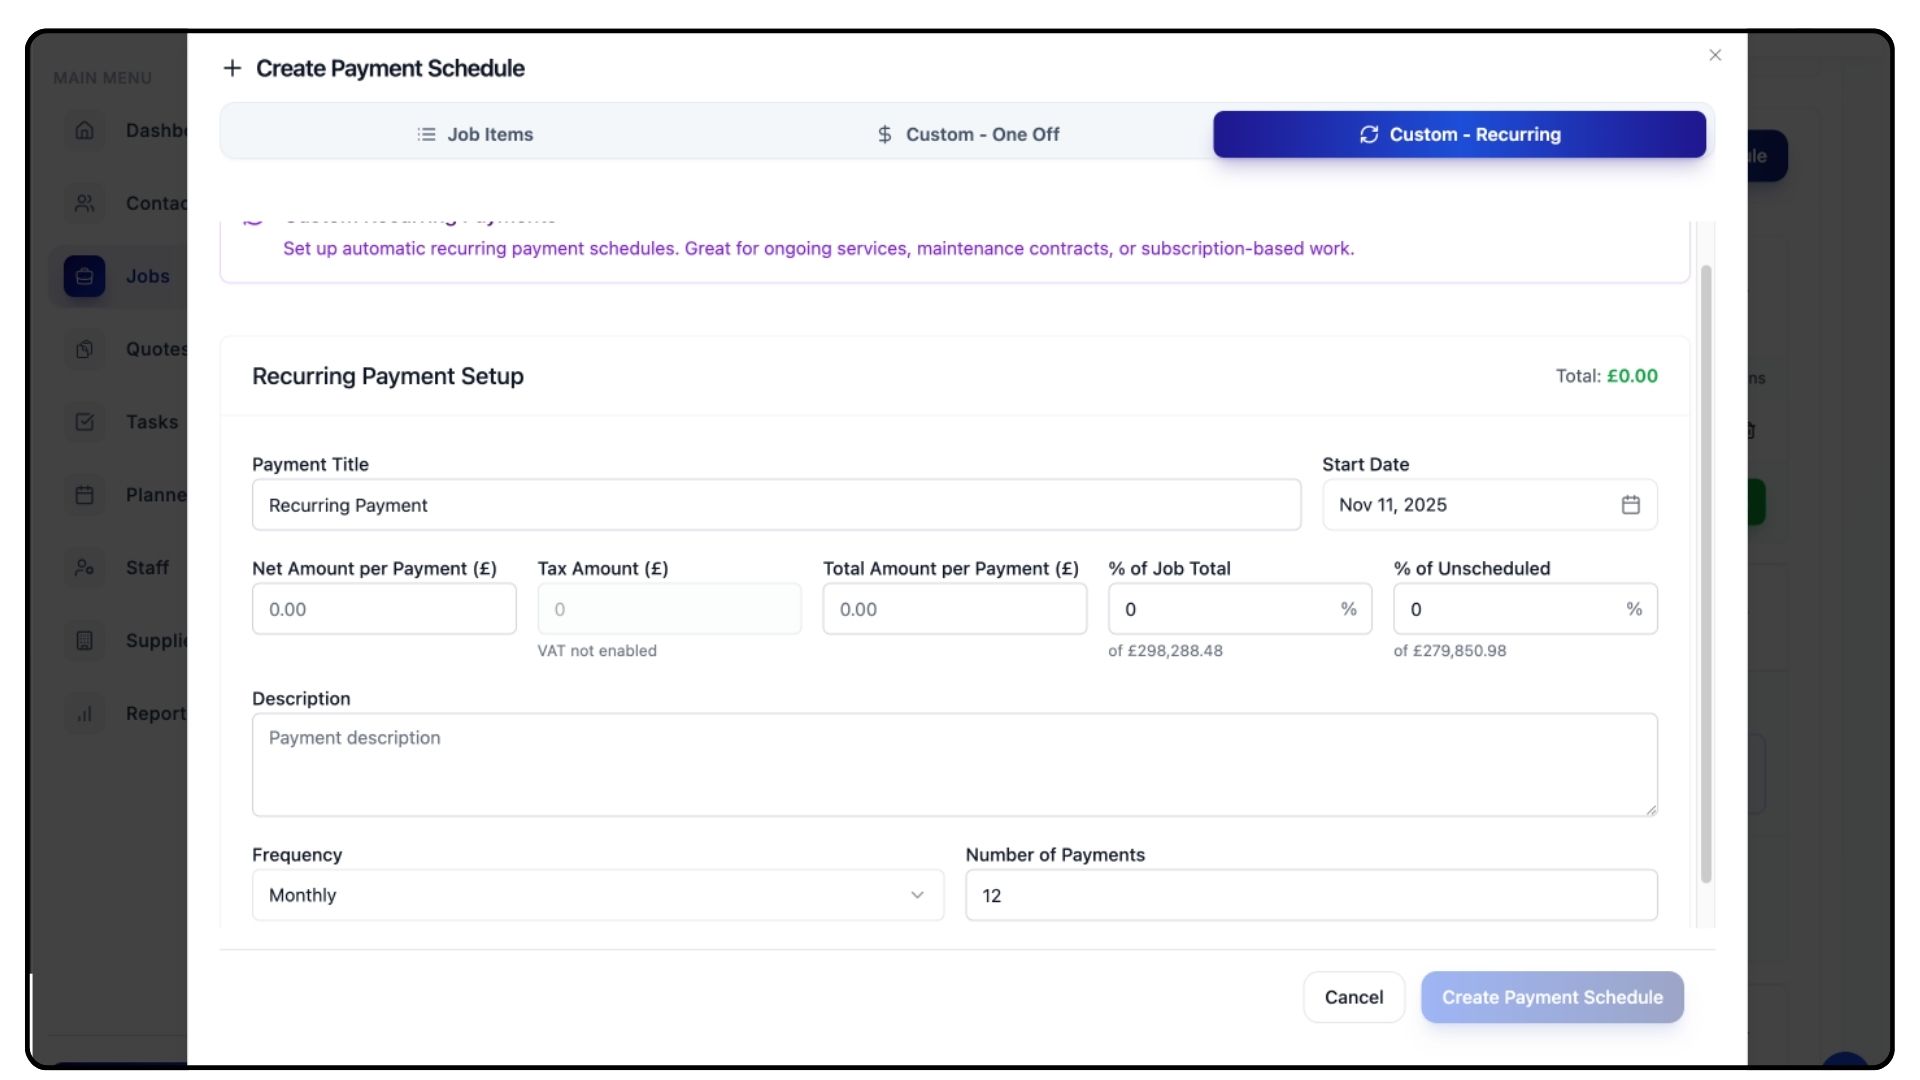
Once again click Add Payment Schedule & from there, Click Recurring Payment from the Add Payment Schedule menu.
A form will appear — begin entering the details for your schedule:
Enter a Title (e.g., Monthly Maintenance or Bi-Weekly Instalments).
Set a Due Date for the first payment.
Enter the Amount for each instalment.
As you type, remaining fields will automatically calculate based on the job total.
Add a Description if you want to specify what the recurring charge covers.
Click the Frequency dropdown and choose how often you’d like the payment to repeat:
Weekly
Bi-Weekly
Monthly
Quarterly
Yearly
Set the Number of Payments, determining how many instalments the schedule will include.
Once all details are entered, click Create Payment Schedule.
Your new recurring plan will now appear under the Invoicing tab.
It will automatically generate invoices as each payment becomes due.
Double-check the details once created, and if adjustments are needed, click Edit to make changes.
Tip
Recurring payment schedules are perfect for ongoing maintenance, service contracts, or retainer agreements where consistent instalments are required.
Final Steps
What It Does
Once your payment schedules and invoices are created, the Invoicing tab becomes your central hub for managing all project billing.
Steps
Regularly review payment statuses to stay on top of cash flow.
Record new payments promptly to maintain accurate financial data.
Use recurring schedules for ongoing projects to reduce manual work.
Common Questions
Q: Can I edit a payment schedule after it’s created?
Yes. Use the Edit button beside the schedule to update dates, descriptions, or amounts.
Q: What happens if I delete a payment schedule?
Deleting a schedule removes it from the job but does not delete any associated invoices already generated.
Q: Can I generate multiple invoices from one payment schedule?
Yes. Recurring schedules automatically create new invoices based on the frequency you set.
Q: What if my client pays in partial instalments?
You can record multiple payments against the same invoice using the Add Transaction feature.
Q: Do deleted transactions affect totals?
Yes. If a payment is deleted, the invoice status will revert to Unpaid, and totals will update automatically.