What It Does
Presets in Trades Panel are reusable templates for commonly used items - such as Labour, Materials, Plant, or complete Line Items. They’re designed to save time and maintain consistency by automatically filling in cost rates, charge rates, and descriptions, so you don’t have to re-enter the same details every time.
Accessing Presets
What It Does
All presets are managed in your account’s Settings area. From here, you can view, edit, and create new presets across multiple categories.
Steps
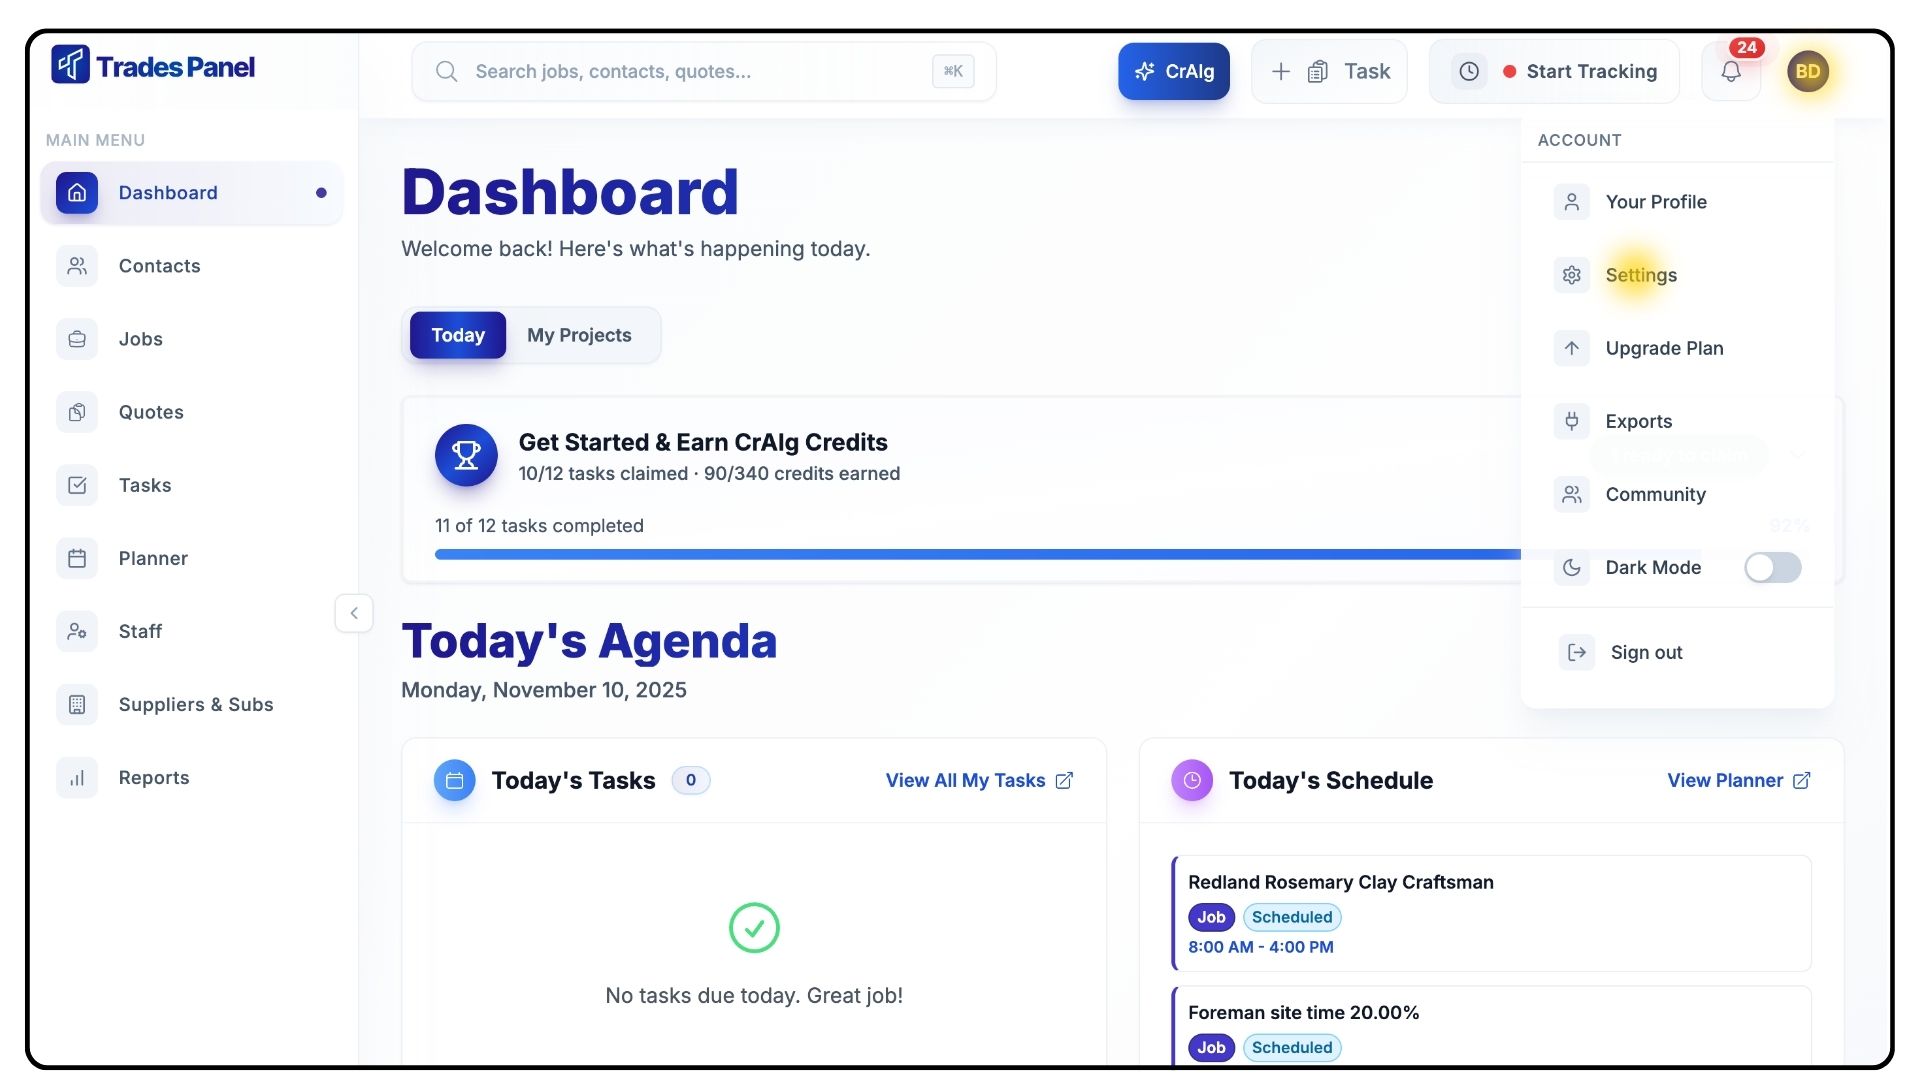
Click your Profile Icon in the top-right corner and select Settings from the dropdown menu.
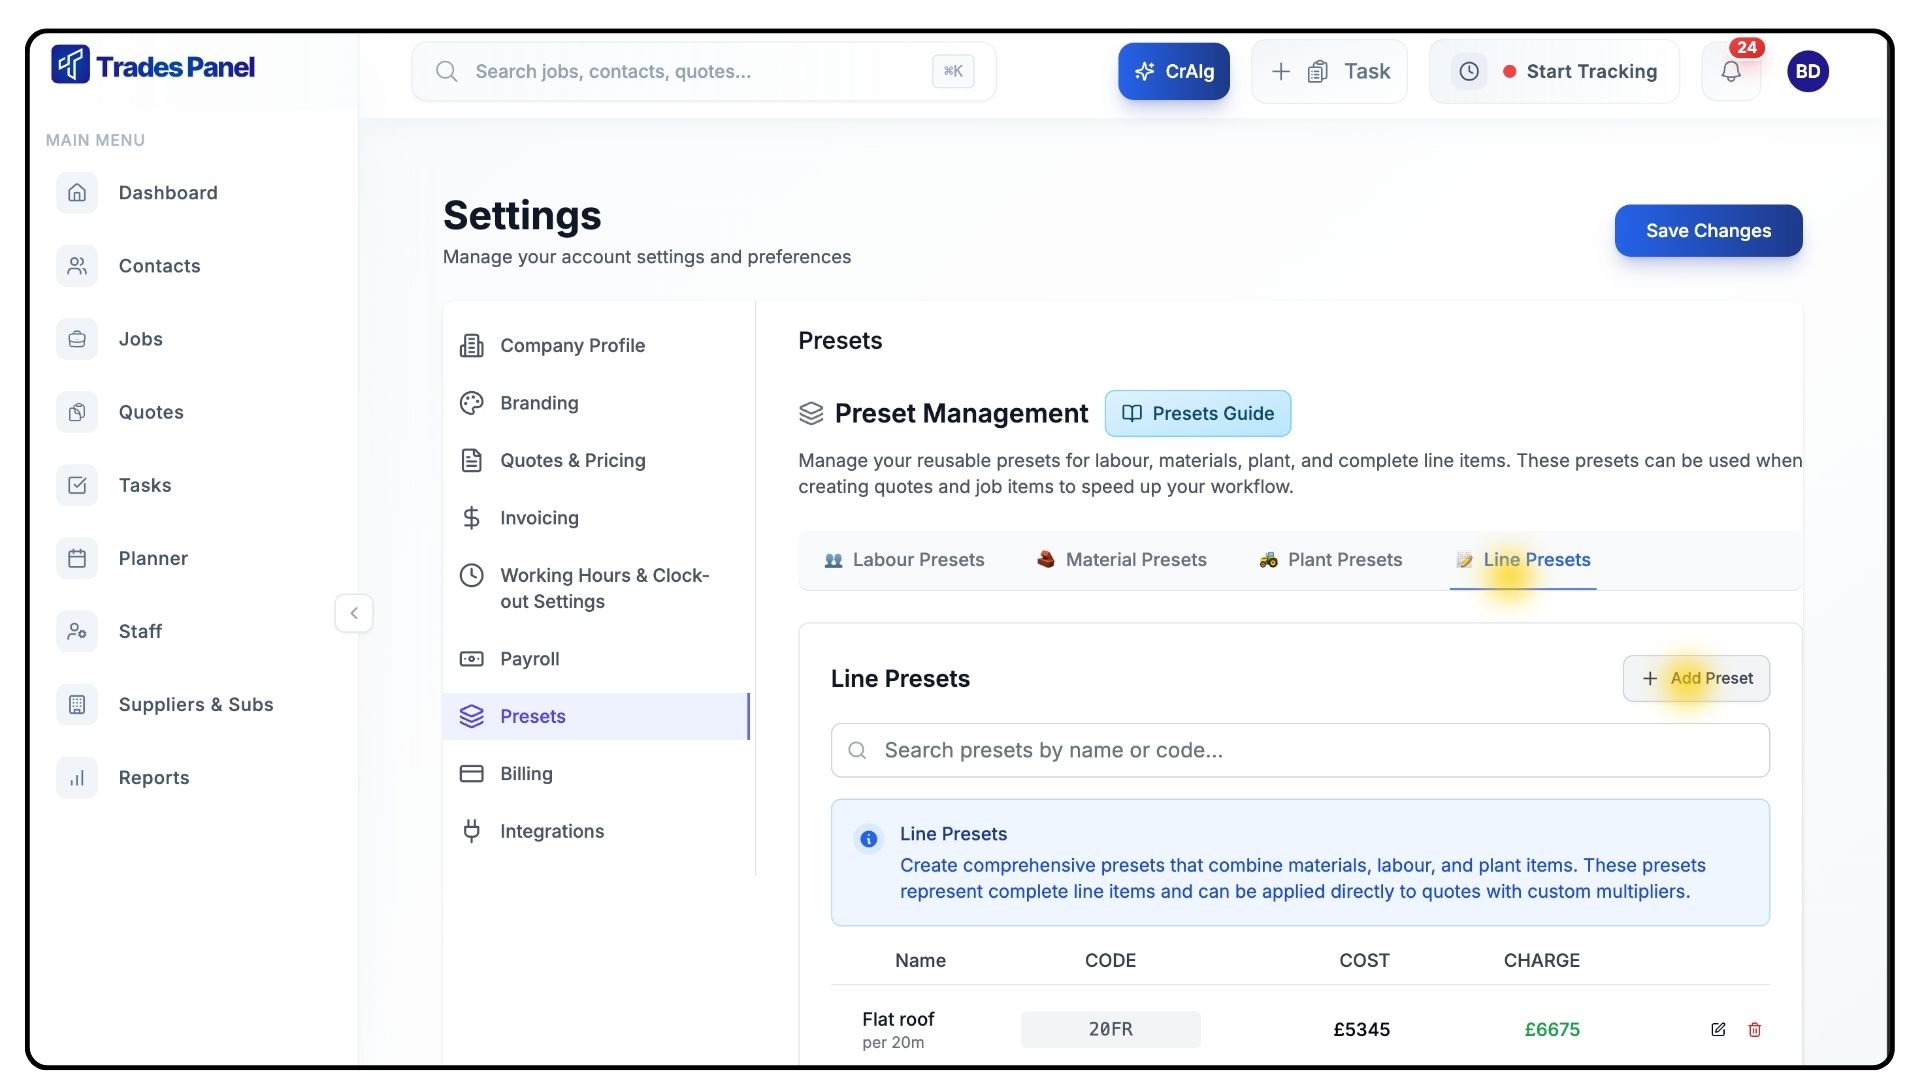
From the Settings page, click Presets on the left-hand side.
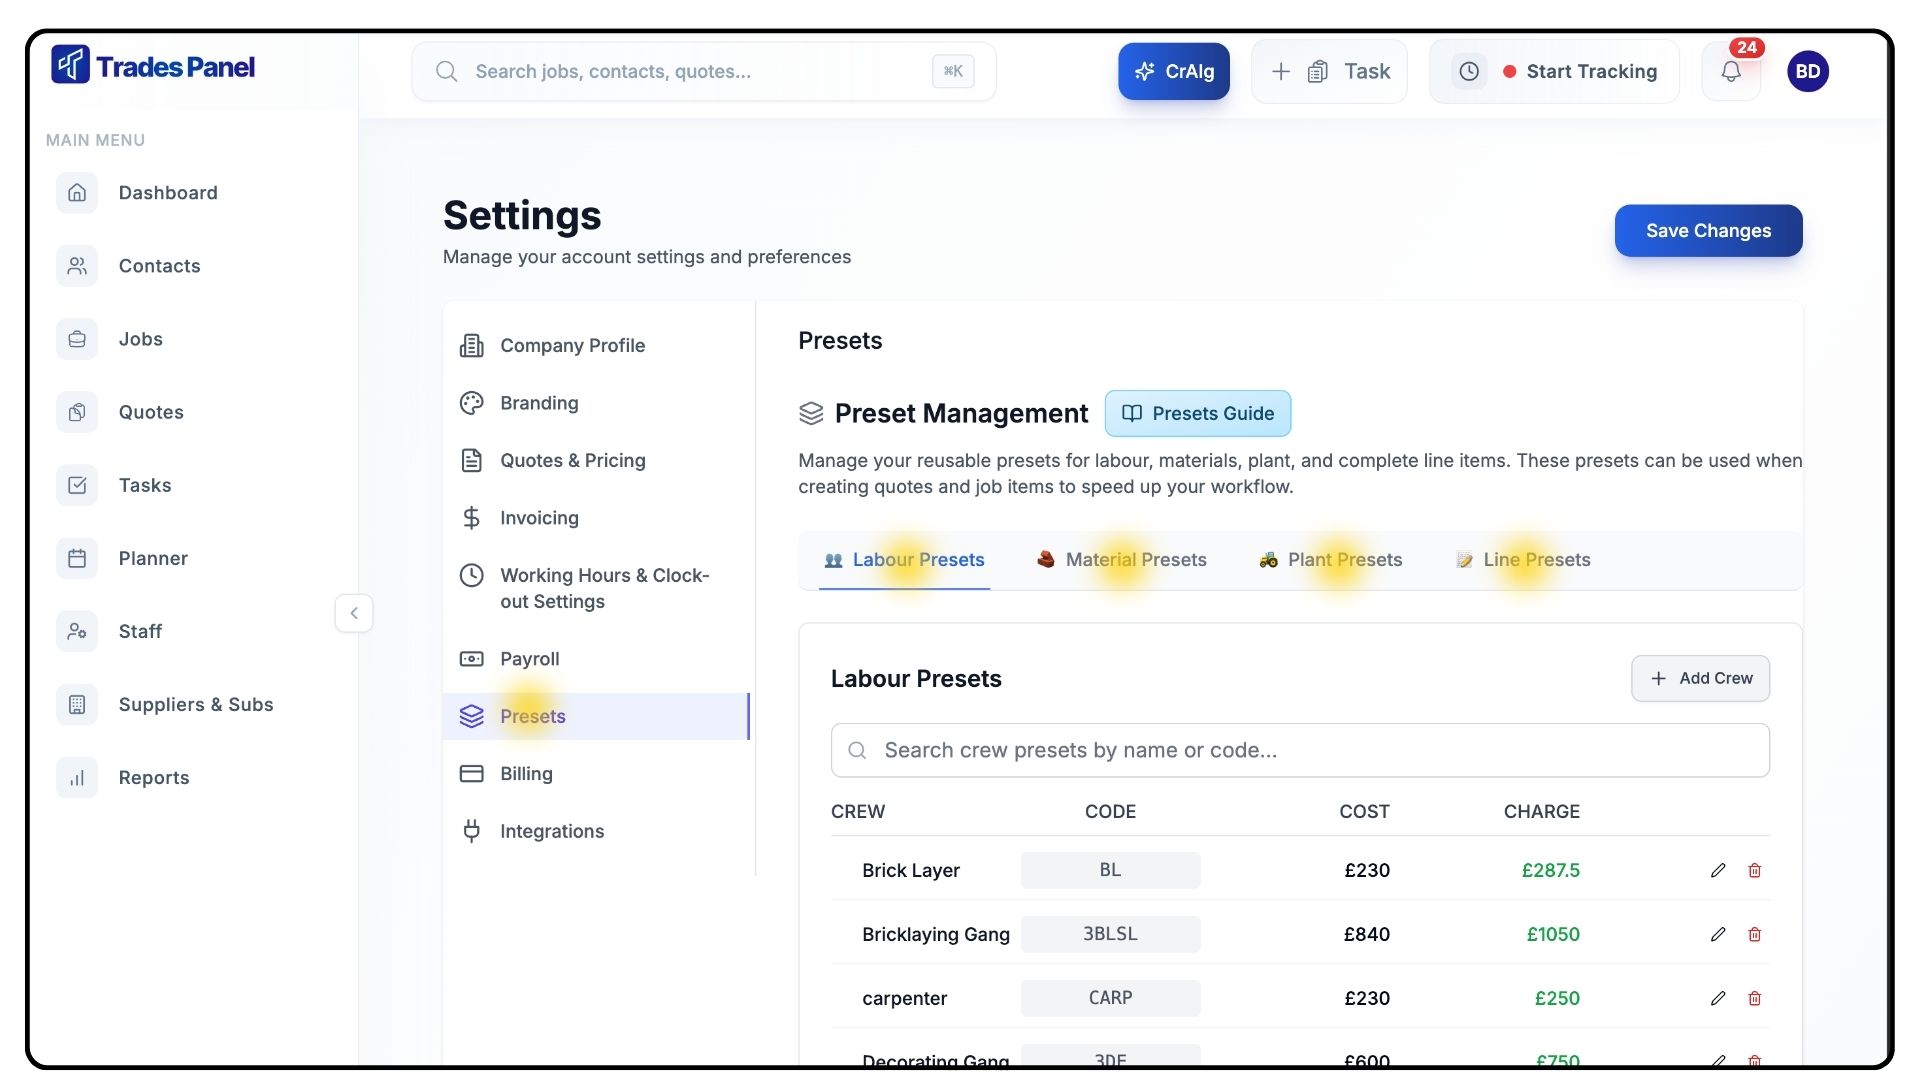
You’ll see all existing presets stored here, with categories across the top - Labour, Materials, Plant, and Line Presets.
Creating a Preset
What It Does
We’ll demonstrate this using a Material Preset, since Labour and Plant Presets follow the exact same steps. Material Presets store your standard materials with pre-defined codes, costs, and charge rates for fast and accurate quoting or job setup.
Steps
Click the Material Presets tab at the top of the page.
Click Add Material in the top-right corner.
In the form that appears:
Enter the Name of your material (e.g., “Brick”).
Assign a short, memorable Code (e.g., “BRK”).
Add the Cost of the material and your Charge Rate.
(Tip: Prices can fluctuate, so it’s best to set an average and update as needed.)
Once complete, click Save.
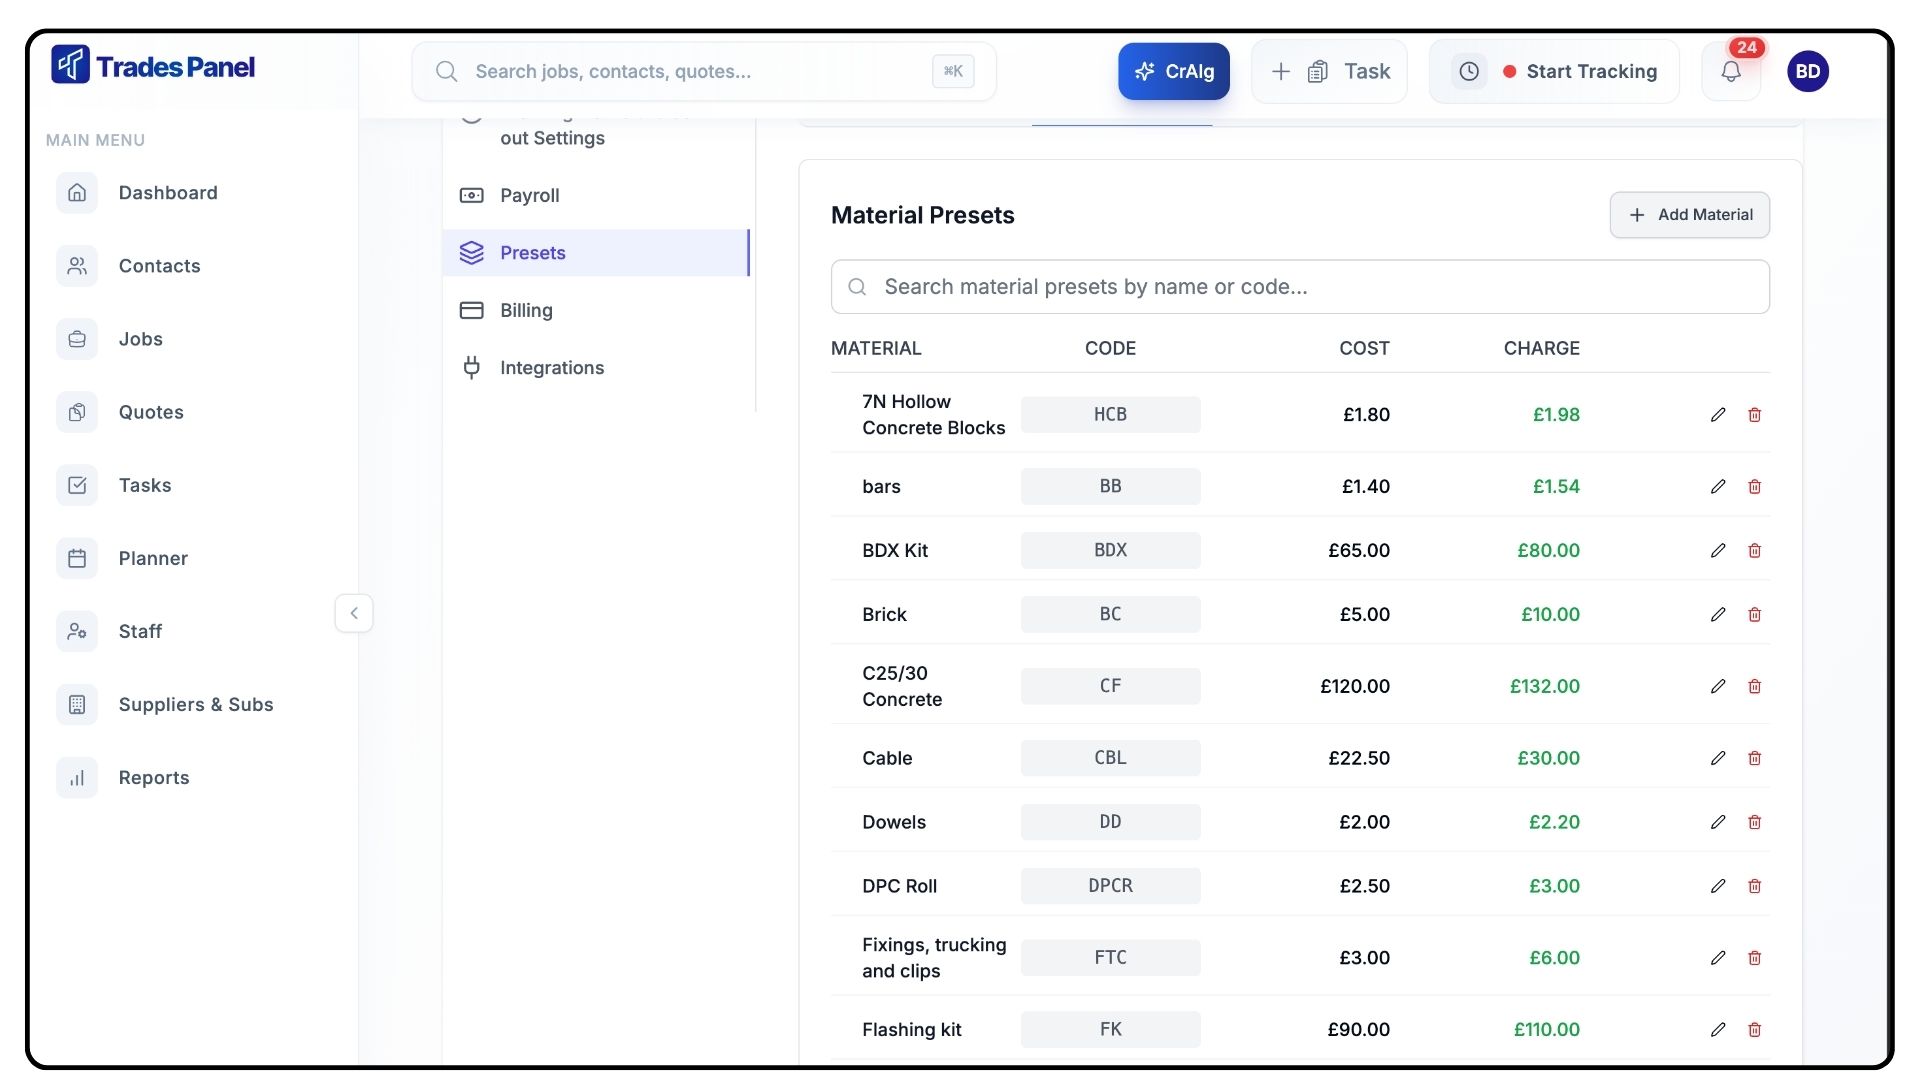
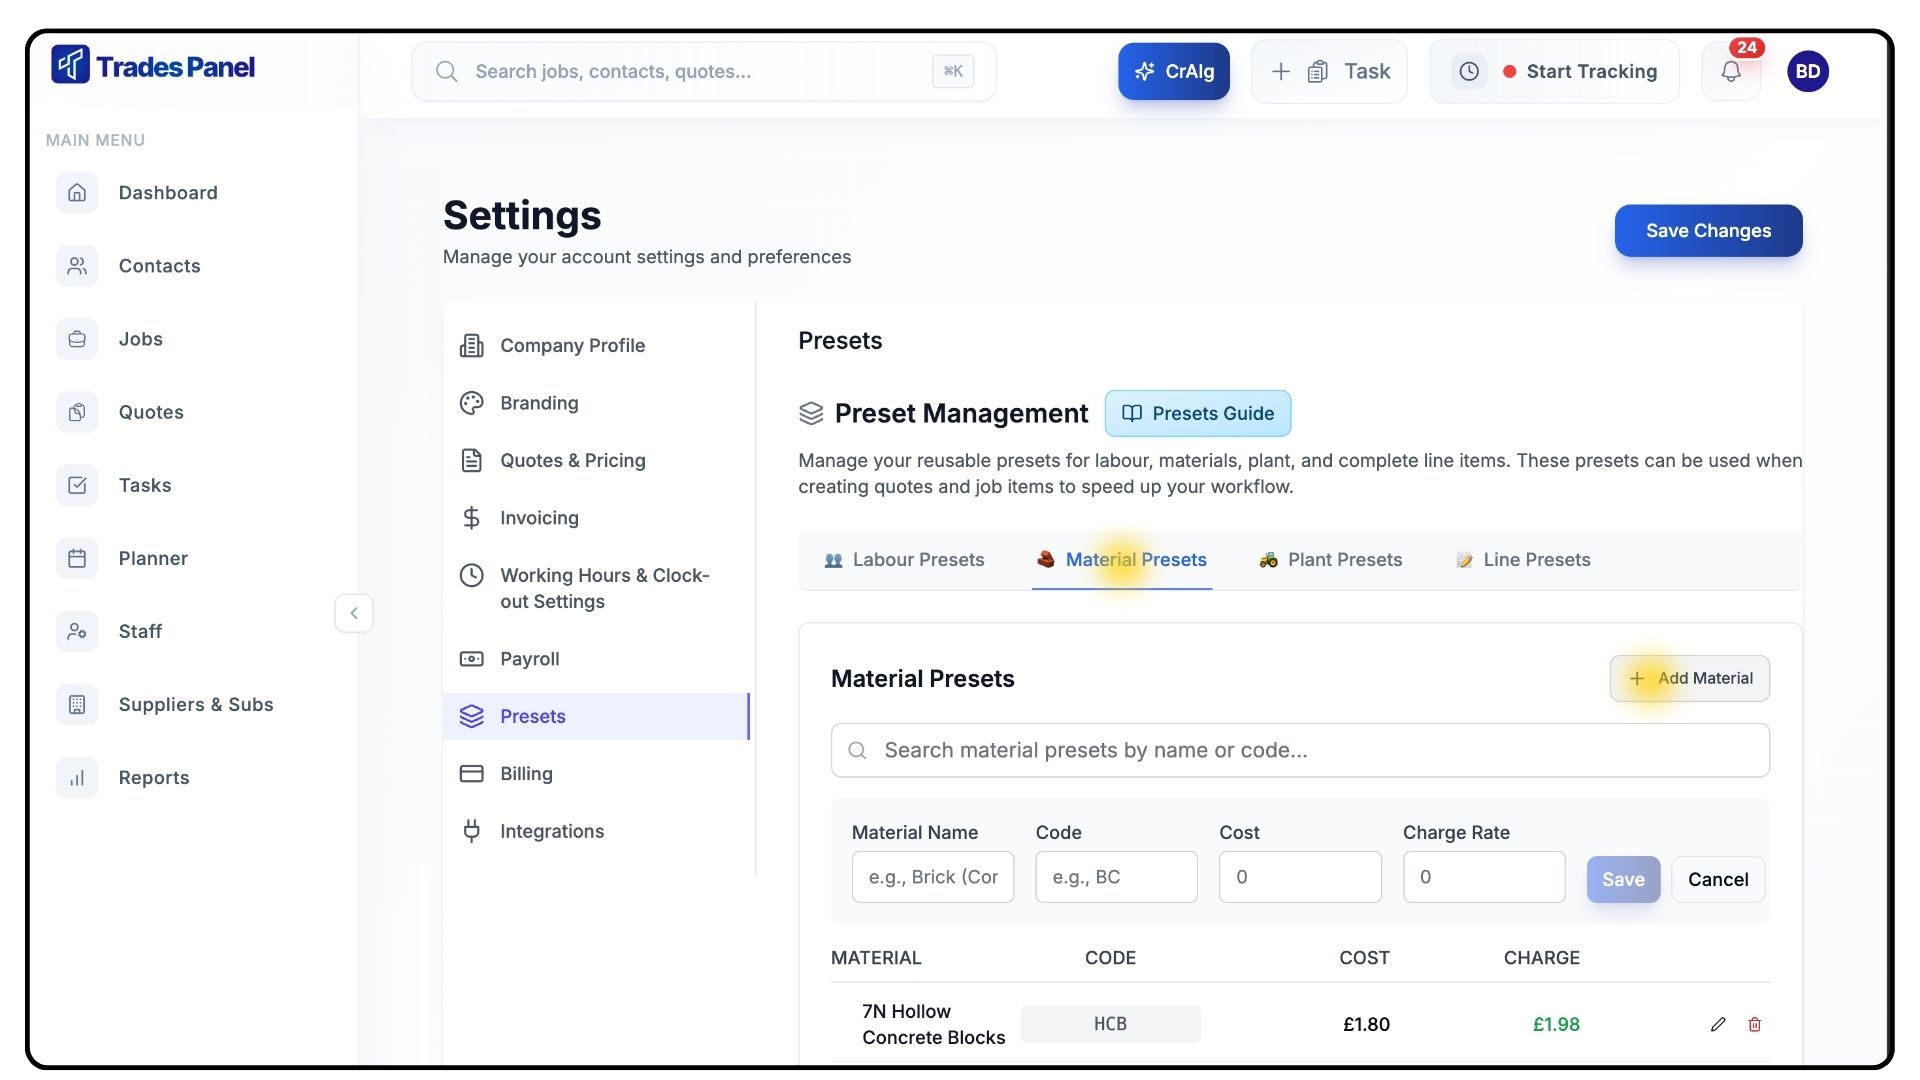
Your new Material Preset will now appear in the list.
You can return here anytime to review, edit, or delete existing presets.
Note:
For Labour Presets, Cost Rate and Charge Rate represent the daily rates for that role or trade.
Creating a Line Preset
What It Does
Line Presets are used to create full task templates that combine labour, materials, and plant into one reusable line item — ideal for repetitive work like flat roof installations.
Steps
Click the Line Presets tab at the top of the page.
Click Add Preset in the top-right corner.
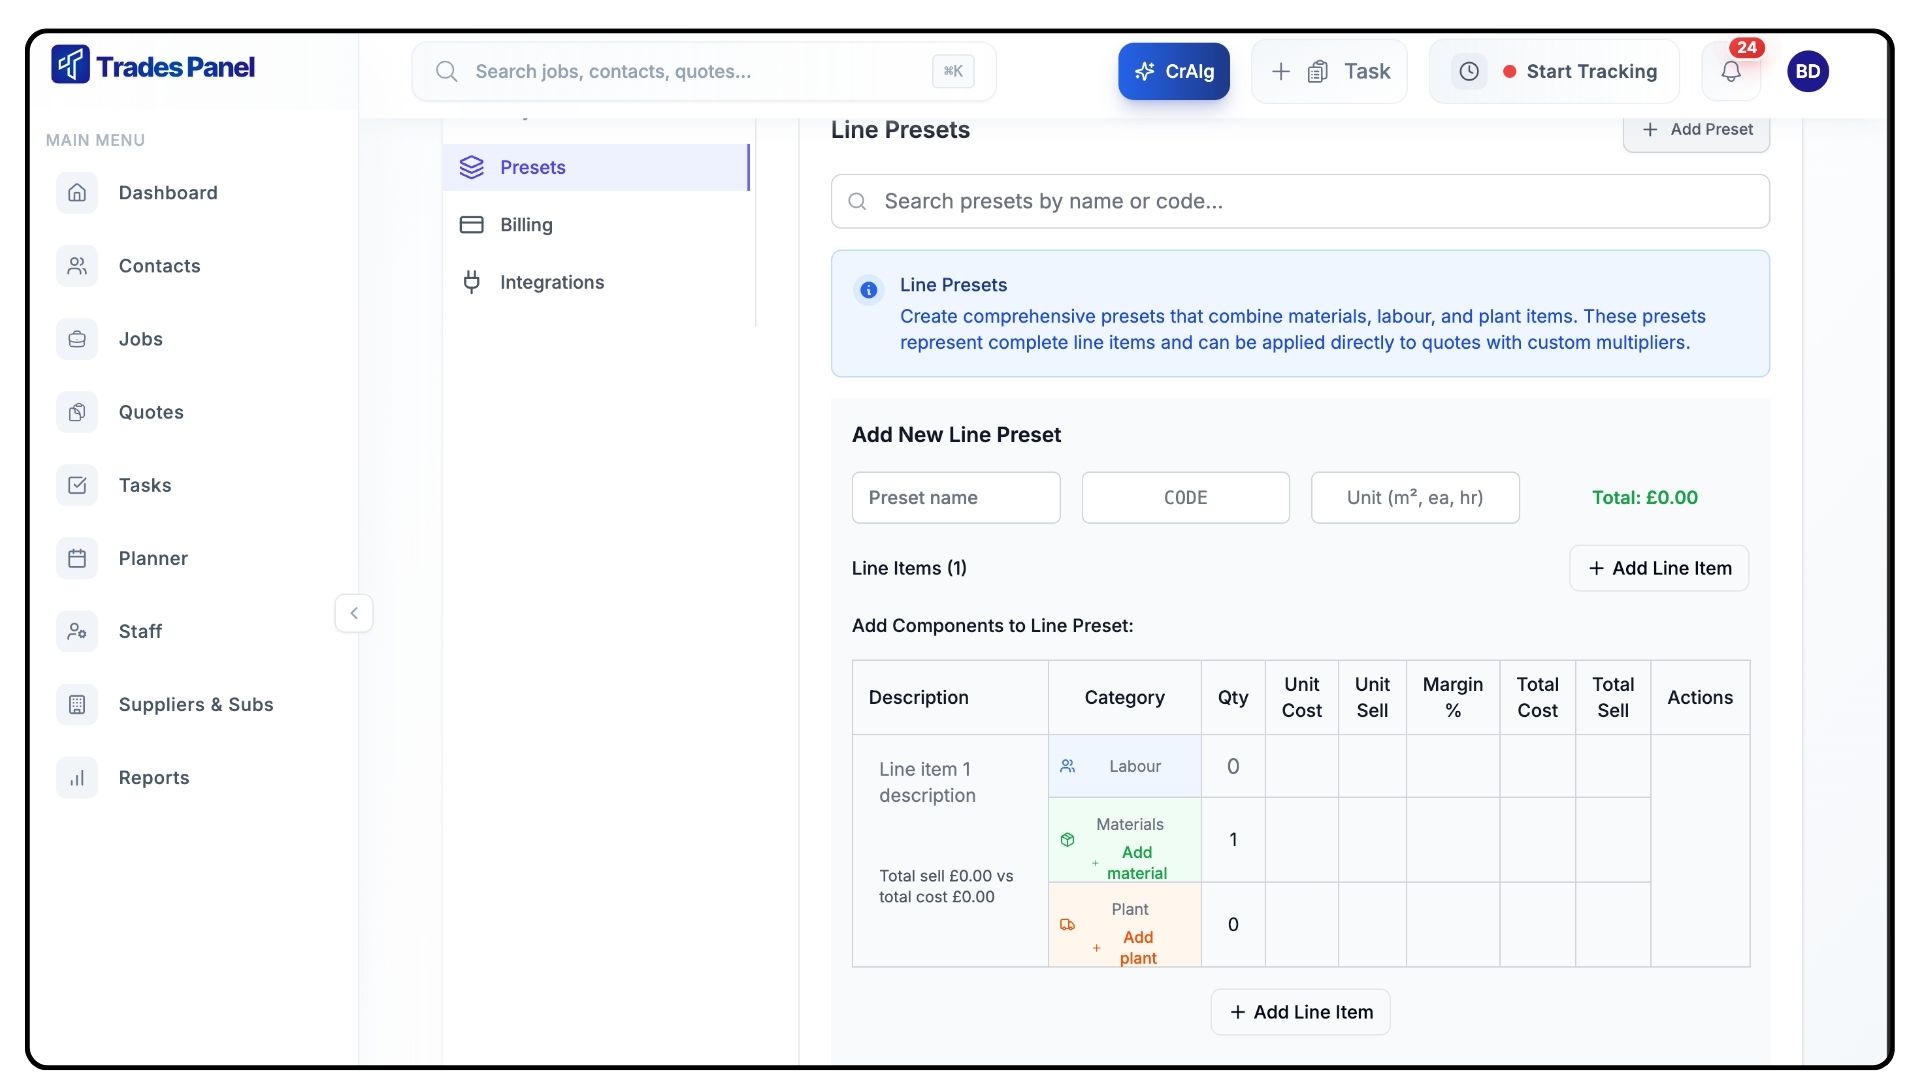
In the template that appears, enter:
Preset Name (e.g., “Flat Roof”).
Code (e.g., “FR”).
Unit of Measurement (e.g., “m²”).
(Tip: If creating variations for different sizes, include the measurement in the code — e.g., “20FR” for 20m² flat roof.)
Add a Description in the first box to summarise the preset.
Begin filling in your Labour, Materials, and Plant details within the table.
If you’ve already created presets in those categories, search and select them from the dropdown menus.
If you haven’t, type the item name (e.g., “Tiles”) and click Create Preset to make one instantly.
You’ll be asked to enter a Code, Unit Cost, and Charge Rate.
Once saved, it will appear both in your preset library and this line item.
Set a Quantity for each entry to reflect how much labour, material, or plant will be used.
Click Add Line Item at the bottom to add more sections as needed.
When complete, click Save Line Preset.
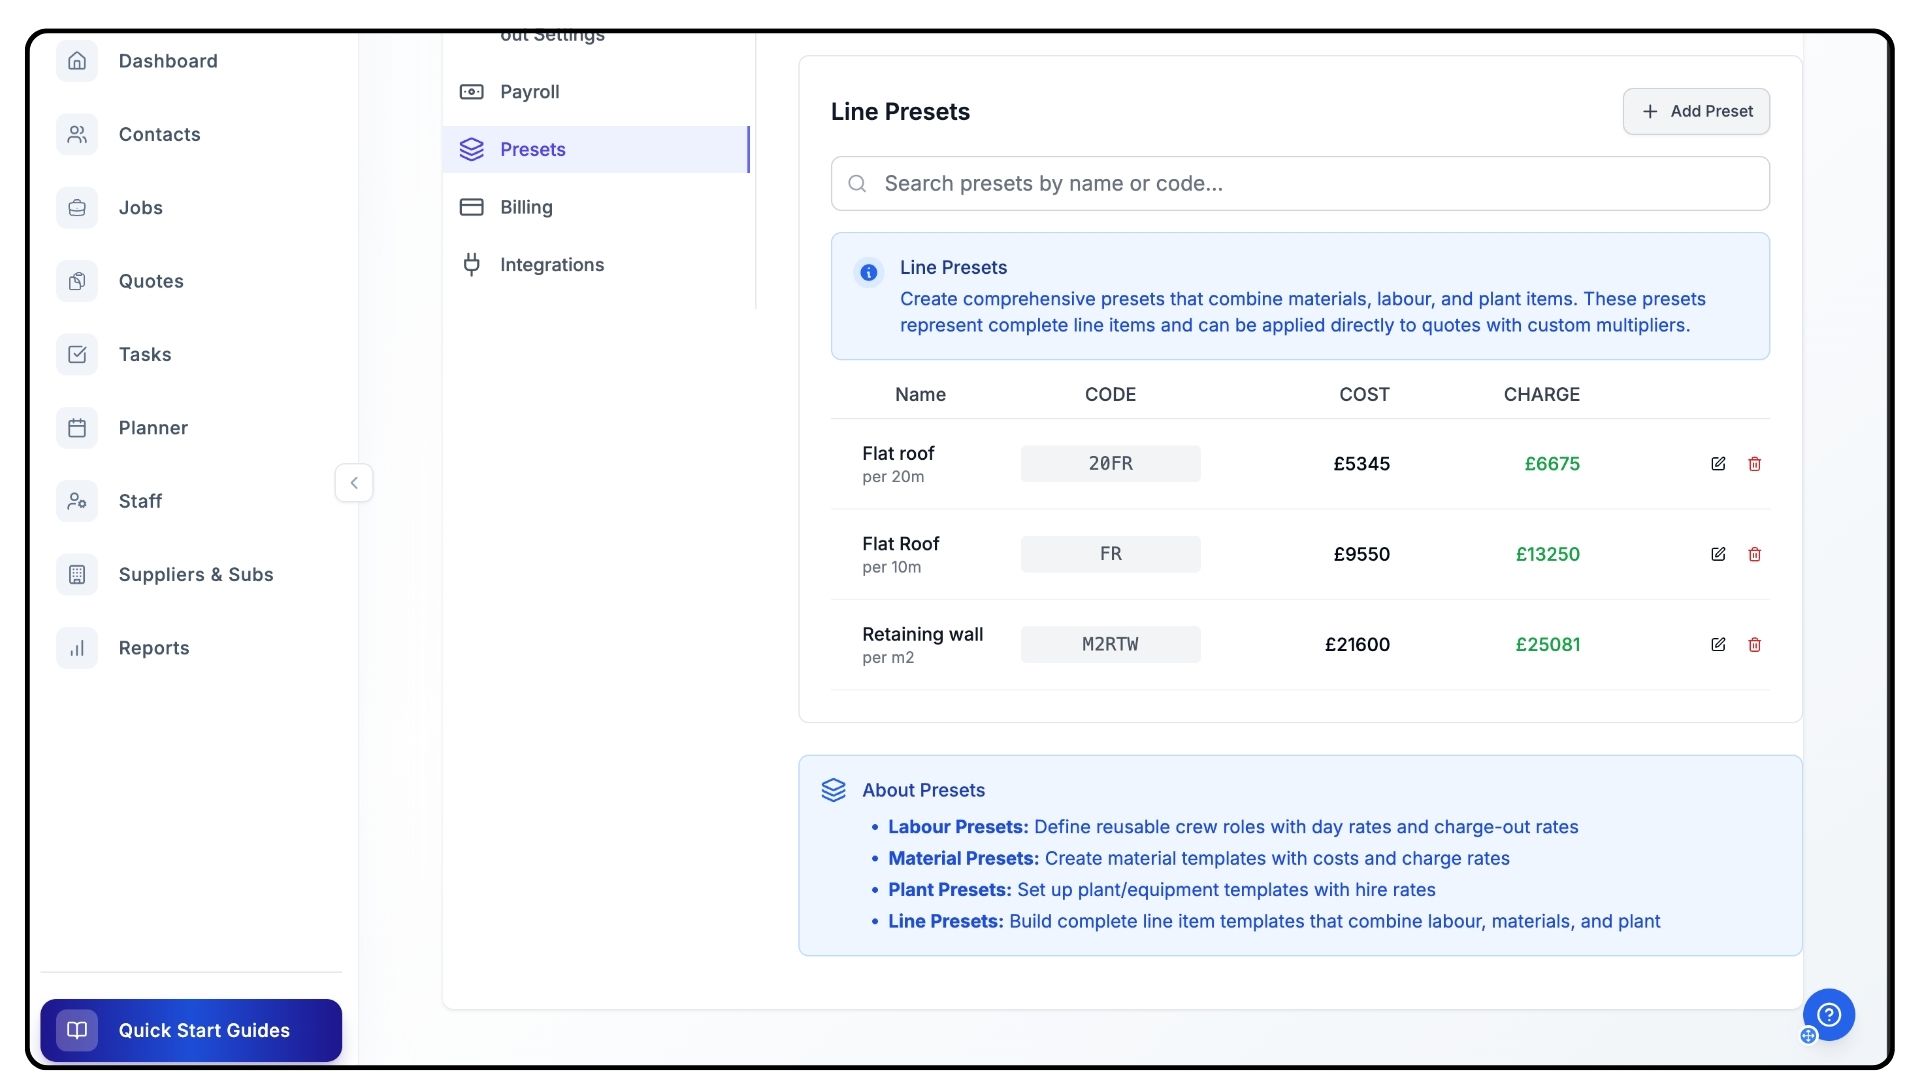
Your new Line Preset will now appear in the Line Preset List, ready to use in future jobs.
Using Presets Inside a Job
What It Does
Once presets are created, you can quickly apply them to jobs to save time and ensure standardised data entry.
Steps

Go to the Jobs section from the main menu.
Open the job you’d like to add presets to.
(Tip: If you haven’t watched our Job walkthrough video yet, we recommend doing so before continuing.)
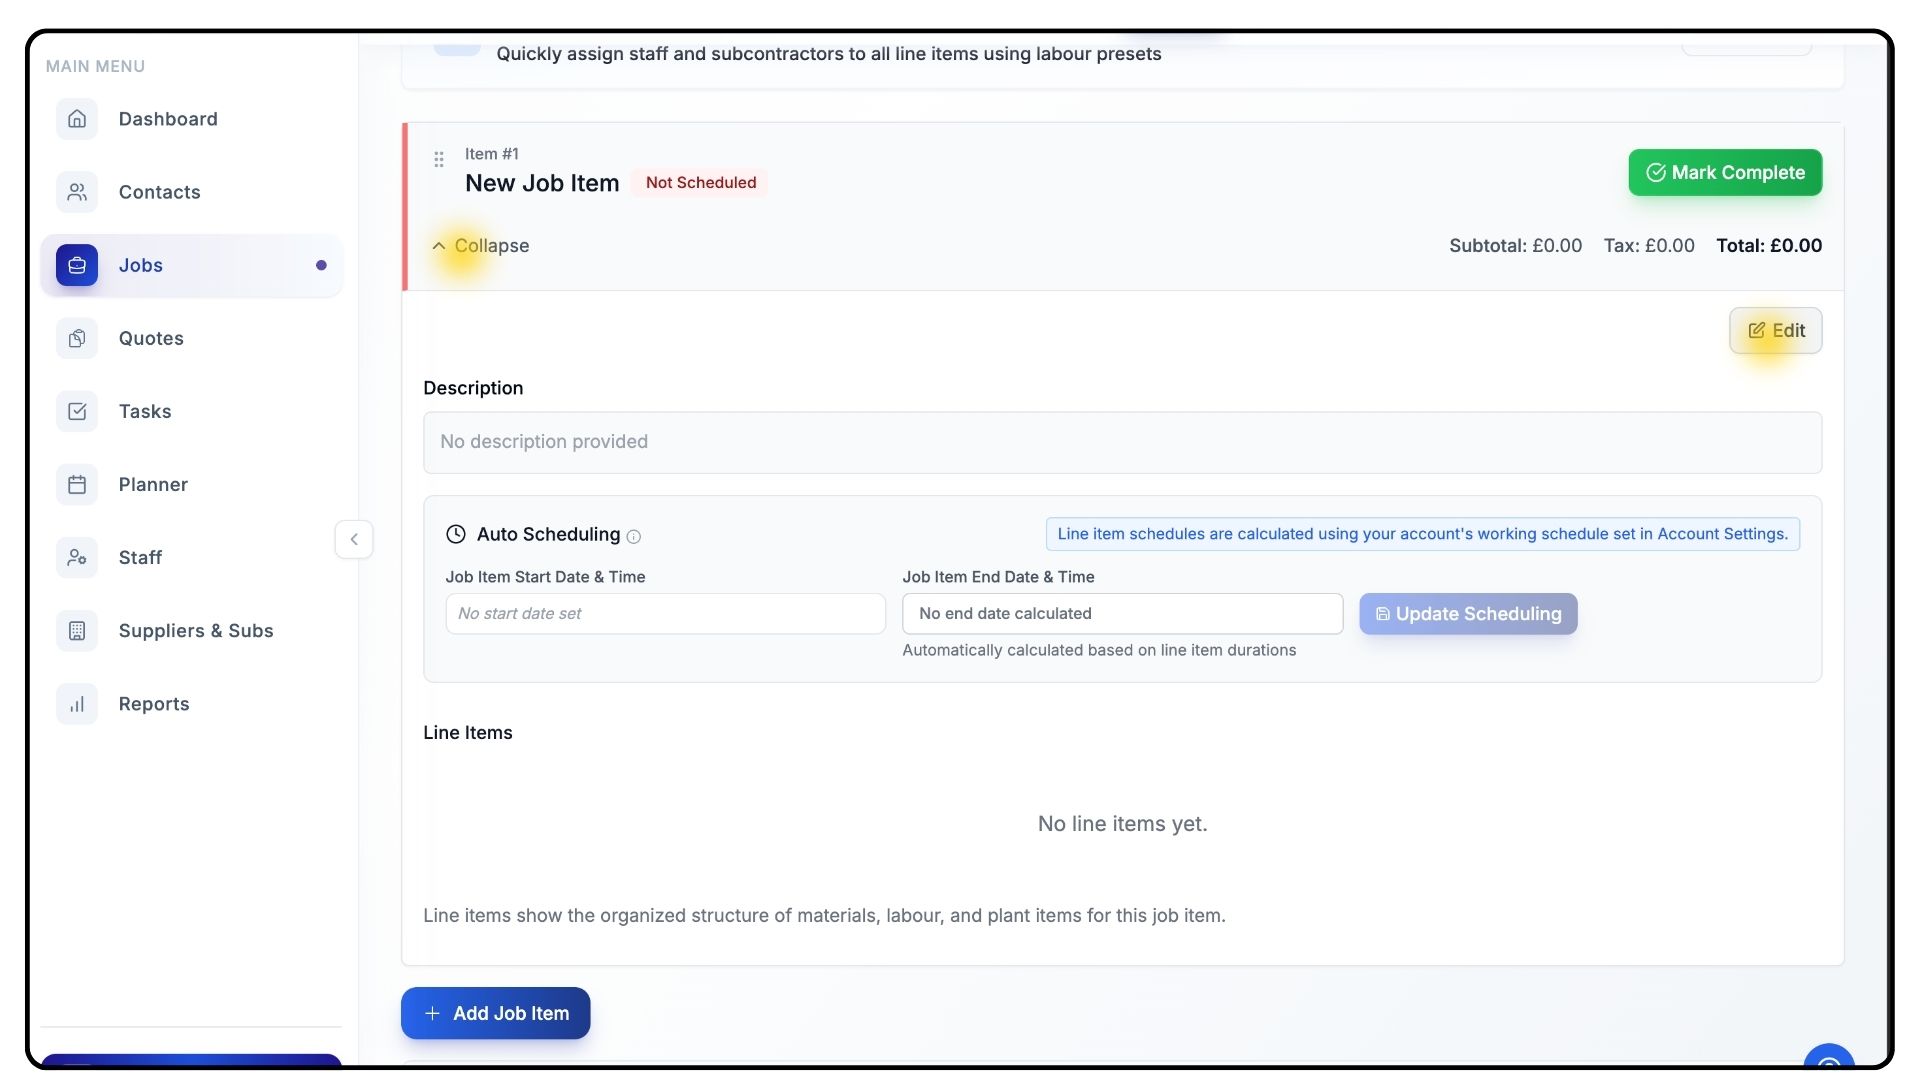
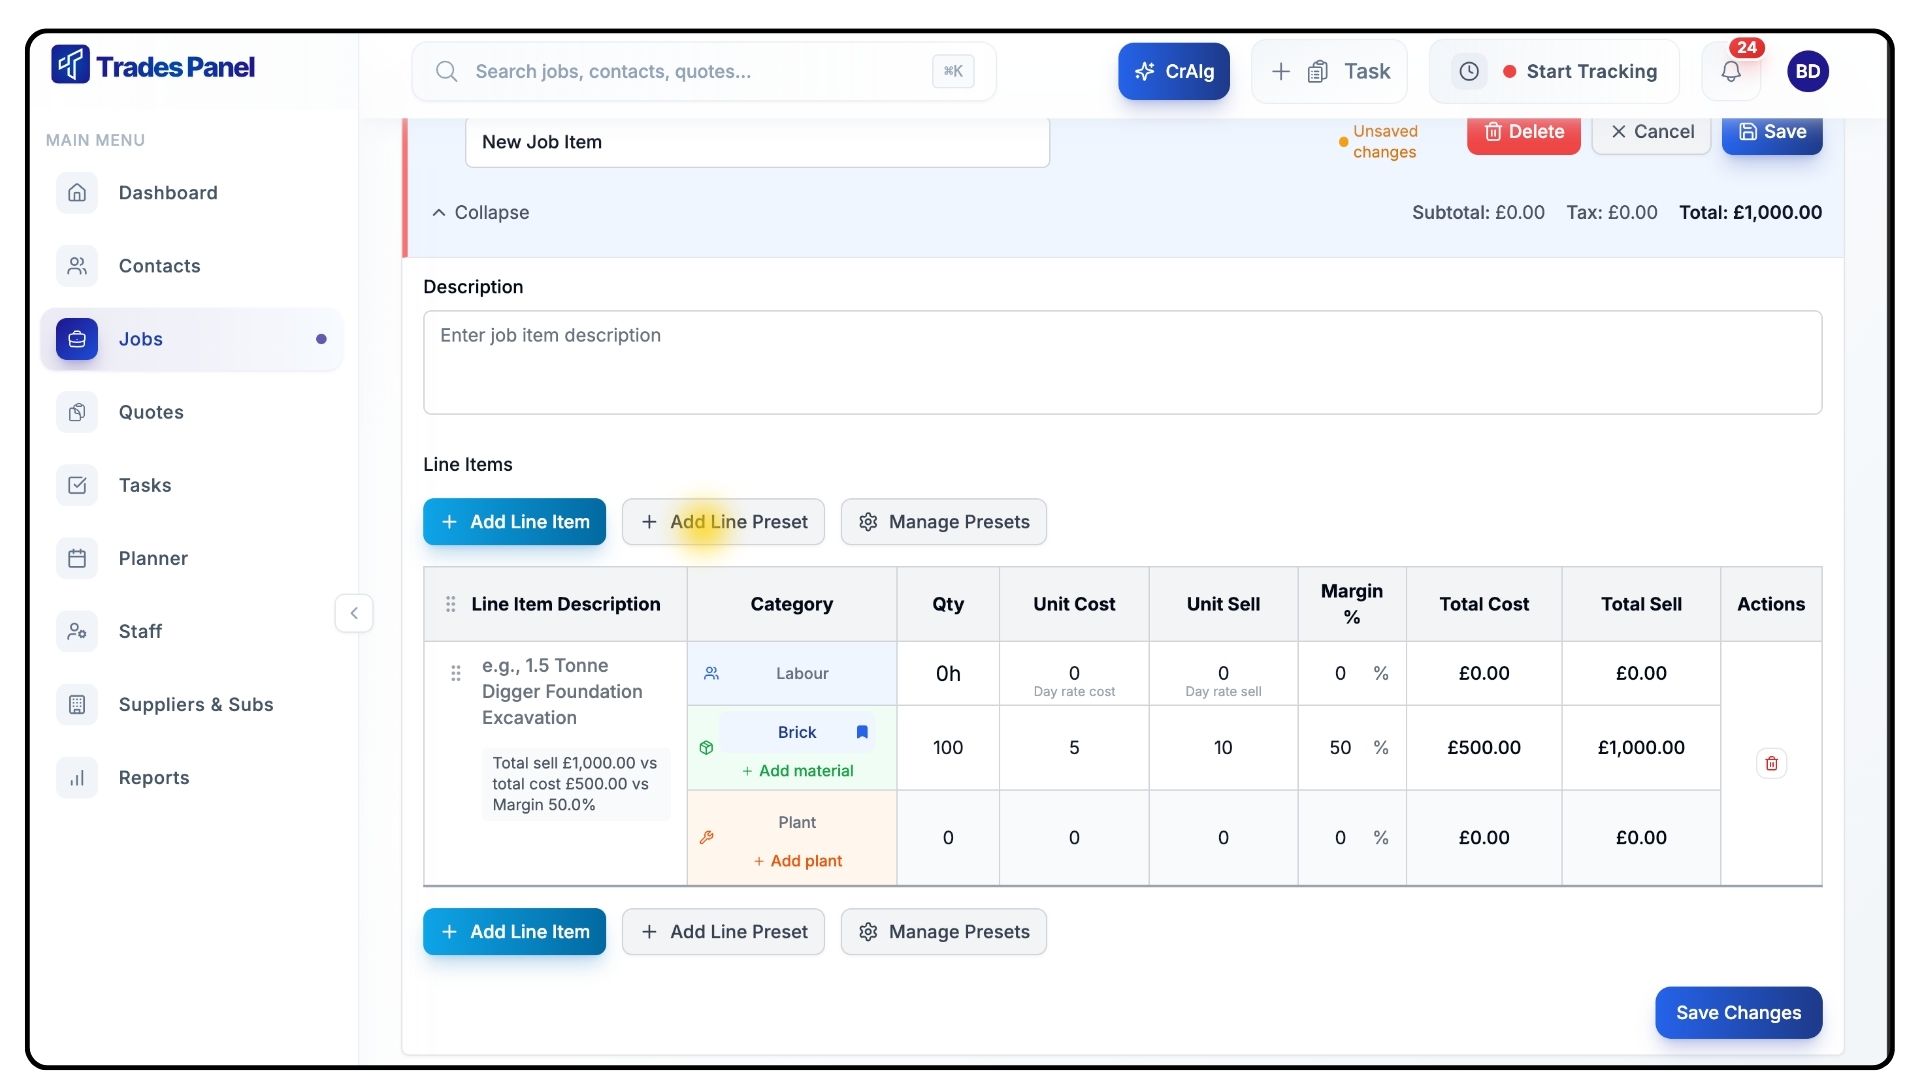
Expand the Job Item you want to edit, then click Edit.
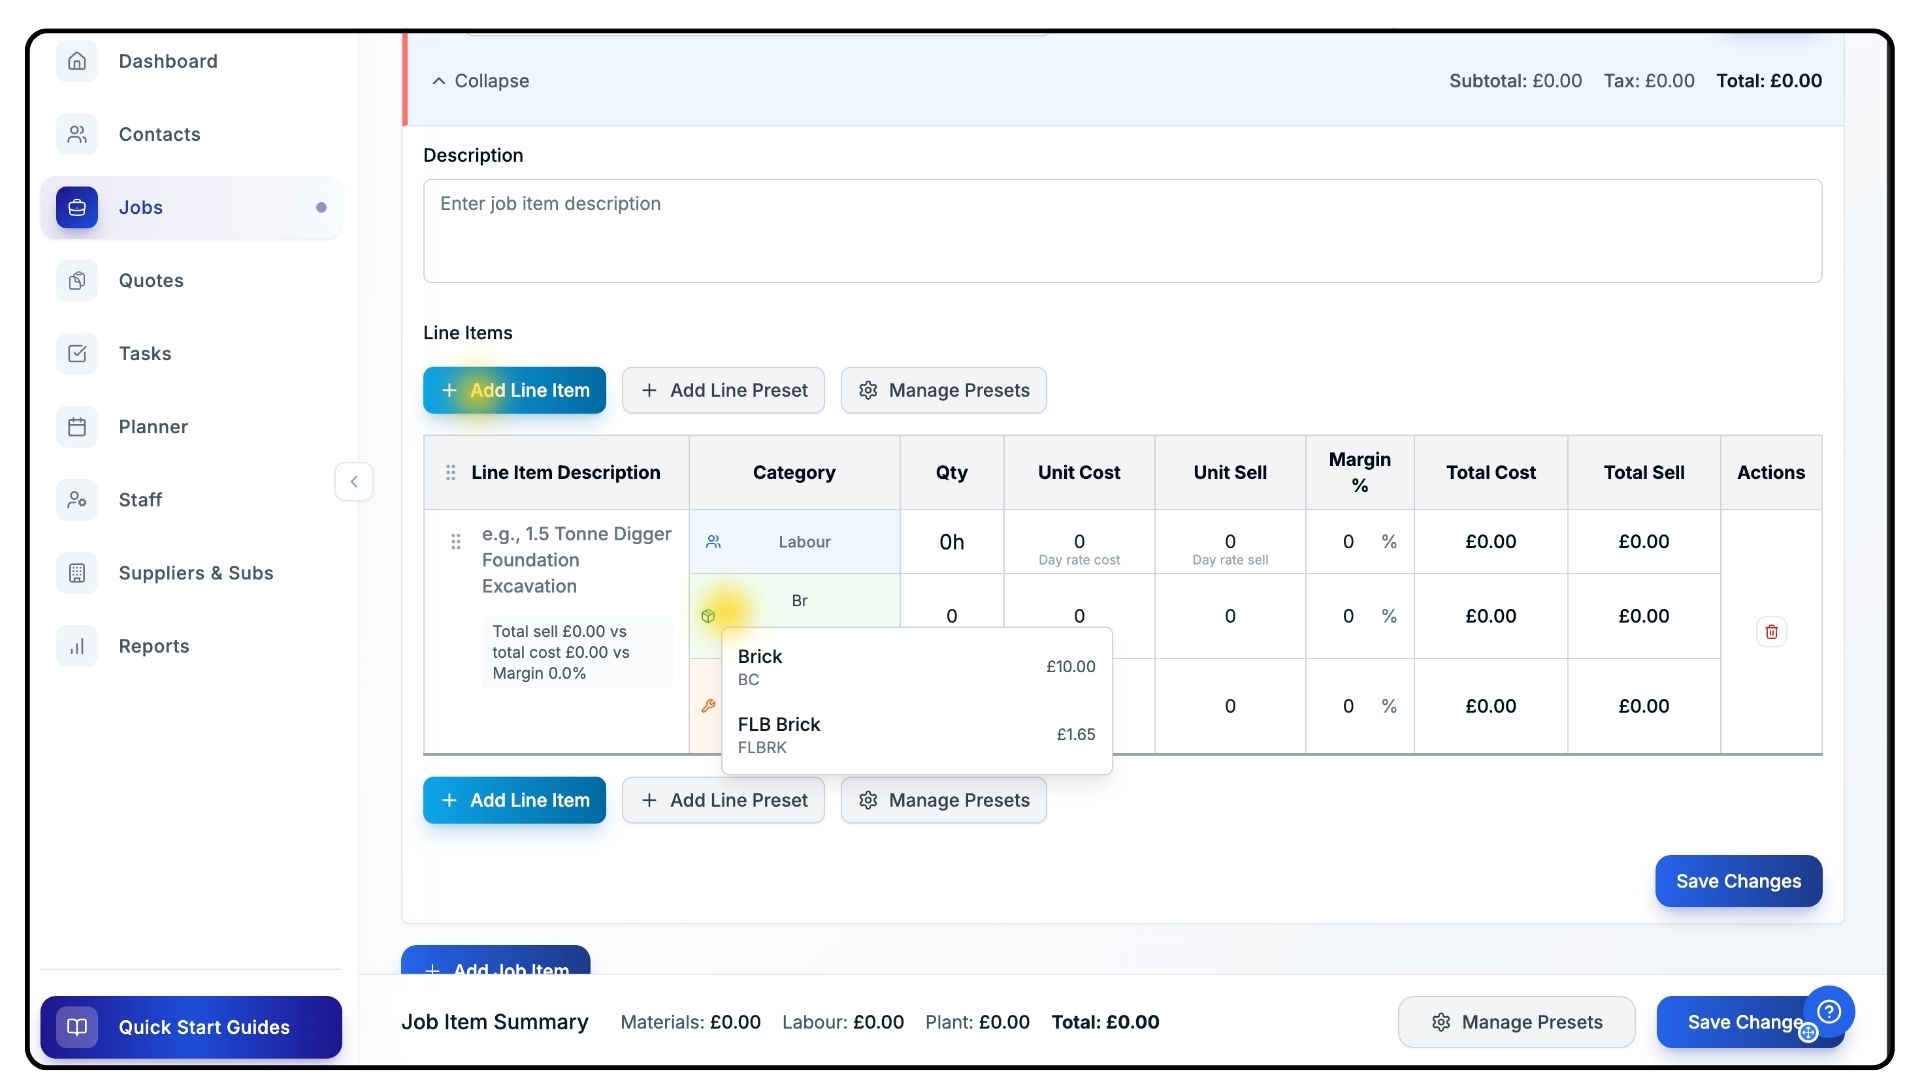
Click Add Line Item, then scroll down to the new entry that appears.
To add a Material Preset, click inside the Material box and type either the Name or Code of your preset.Select it from the dropdown. The fields - including Cost, Charge Rate, and Unit - will auto-fill with your preset data.
Use the Quantity box to set the required amount.
Repeat this process for Labour and Plant Presets as needed.
Adding a Complete Line Preset
What It Does
Line Presets let you insert full task templates - including all associated labour, materials, and plant - directly into a job.
Steps
Click Add Line Preset underneath your current Job Item.
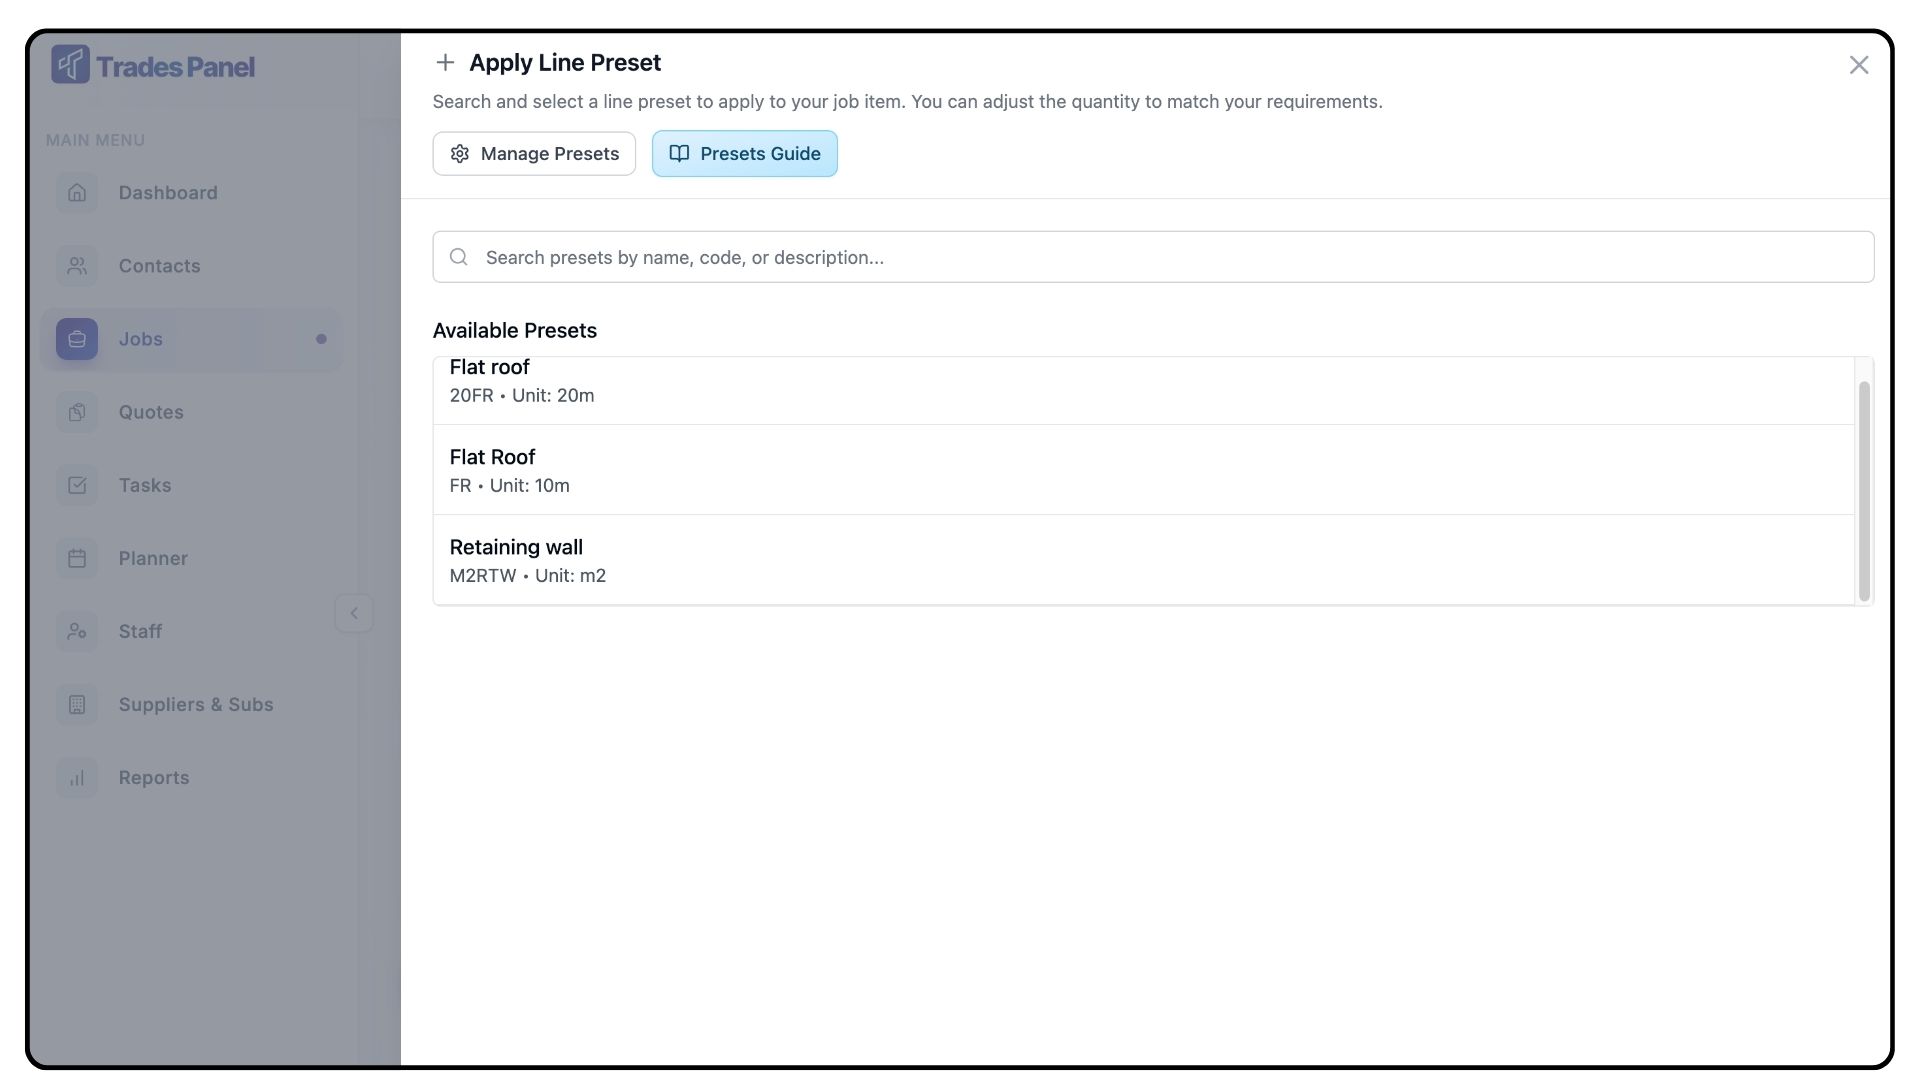
Browse or search your saved Line Presets.
Select the one you’d like to use.
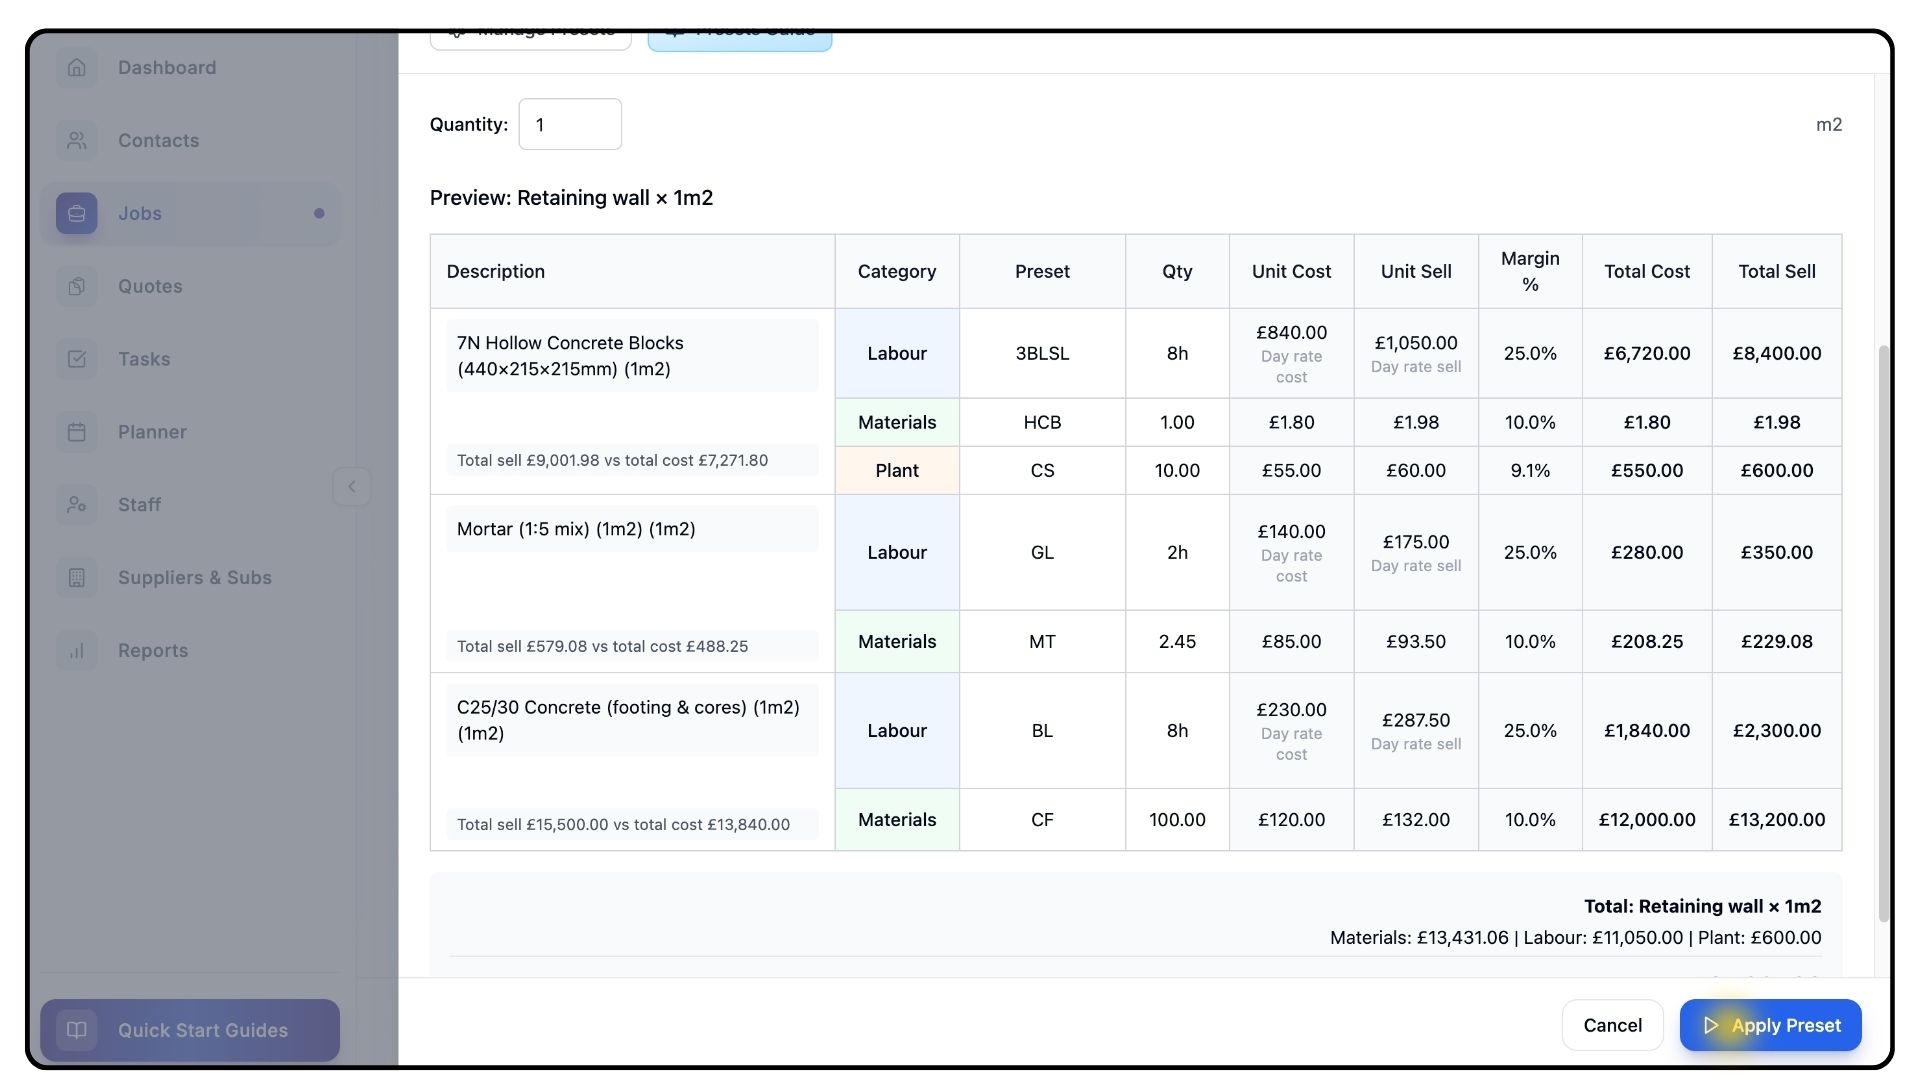
Review the preset details to ensure accuracy.
Set a Quantity based on the job’s scope.
Click Apply Preset at the bottom.
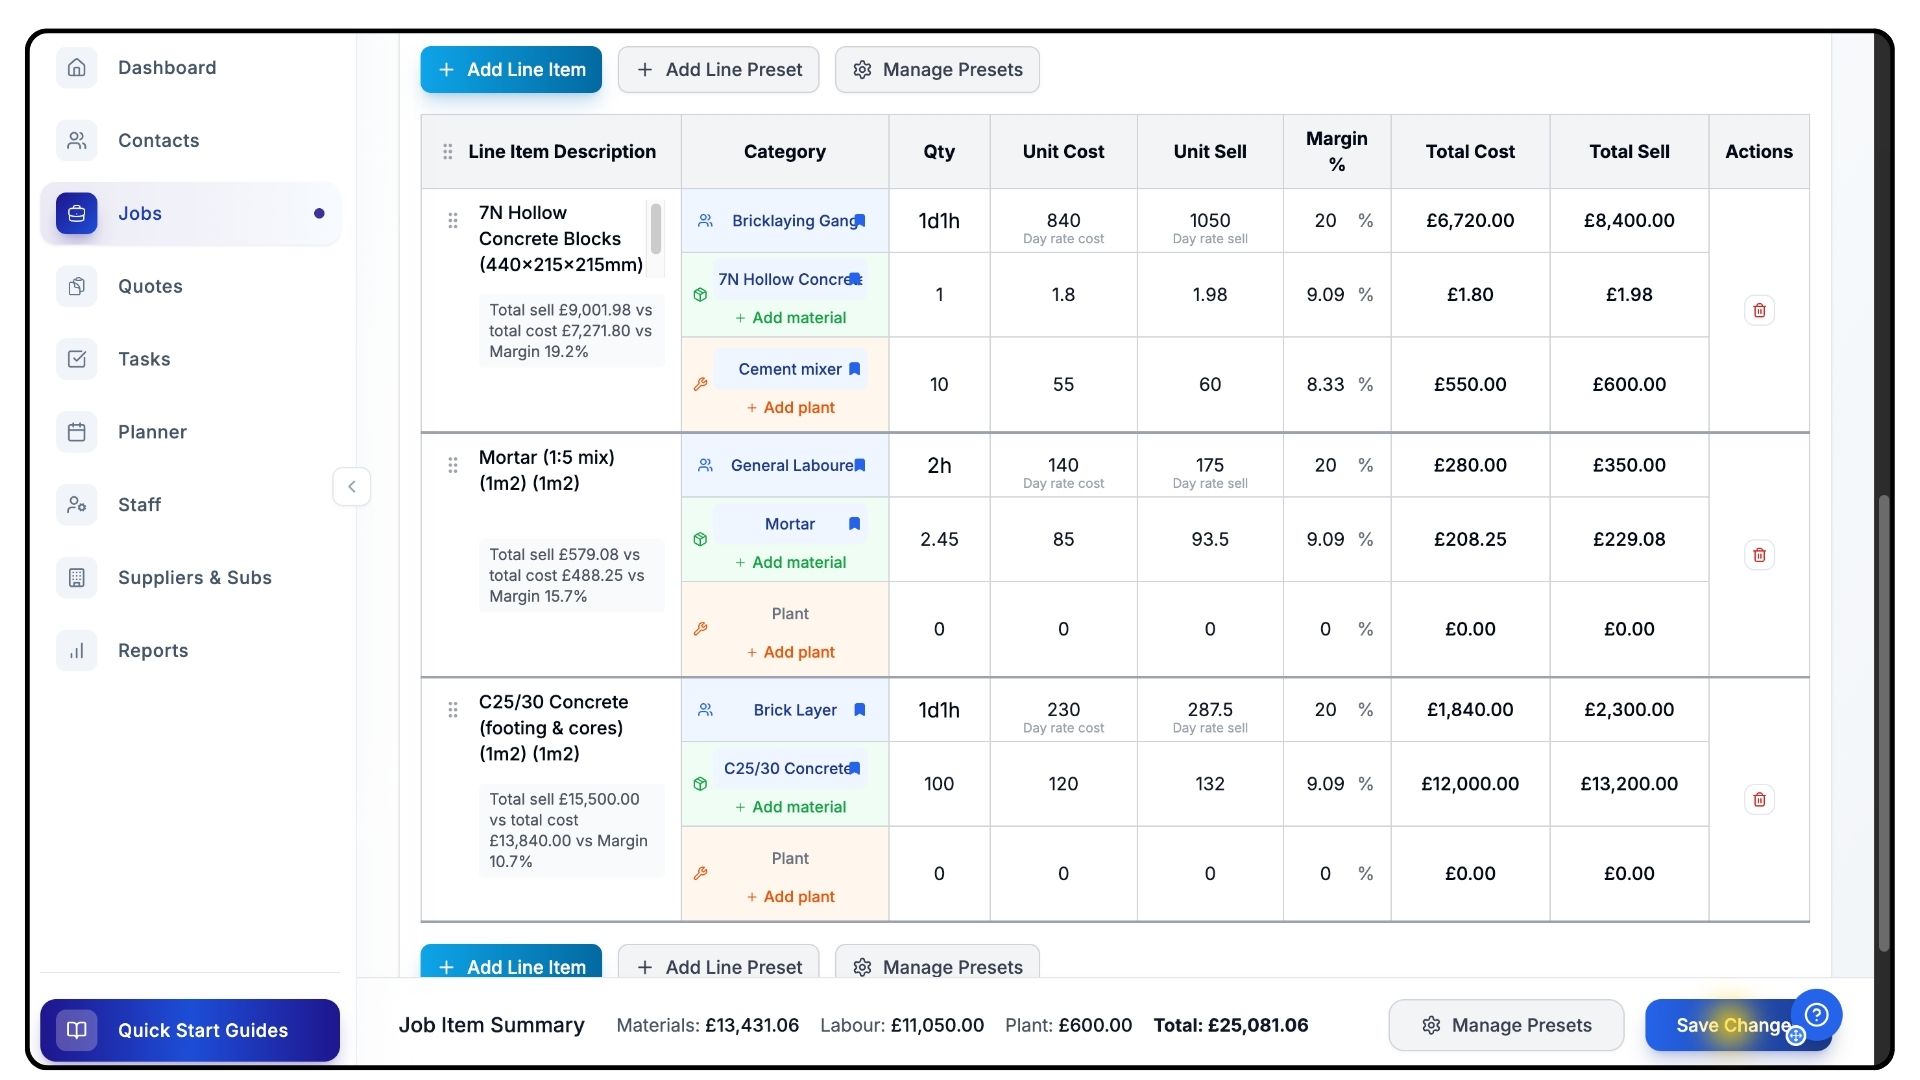
The full preset - with all labour, materials, and plant - is now added to your job in one step.
After adding your presets, click Save Changes.
The job will update with all your new presets applied.
Your workflow is now streamlined, with accurate, reusable data across all jobs.
Common Questions
Q: Can I edit presets after creating them?
Yes. You can edit or delete any preset at any time from the Presets page. Updated rates apply to future jobs, not existing ones.
Q: What’s the difference between a Material Preset and a Line Preset?
A Material Preset is a single item, while a Line Preset combines multiple components — including labour, materials, and plant — into one reusable work package.
Q: Can I create presets directly while working on a job?
Yes. If you type a new item name in the preset field, Trades Panel allows you to create it on the spot. It’s then saved to your main Preset library automatically.
Q: Do preset updates affect existing jobs or quotes?
No. Changes to presets only apply to new jobs or quotes created after the update.
Q: Can I have different presets for different teams or locations?
Yes. You can create as many presets as you like and name them according to team, region, or specific project requirements.