Bulk Upload adds up to 50 contacts at a time. You can type them in or paste them from Excel or Google Sheets.
Who can do this: owners, admins and office staff.
Before you start: if you are pasting, put your spreadsheet columns in this order: Name, Email, Phone, Street, City, County, Postcode.
Add contacts in bulk
- Go to Contacts and click Bulk Upload.
- Click Add Contact to add a row, or click into the grid and paste rows copied from your spreadsheet.
- Check each row. Name is required. Email, phone and address are optional.
- Click Create (the button shows how many contacts will be created).
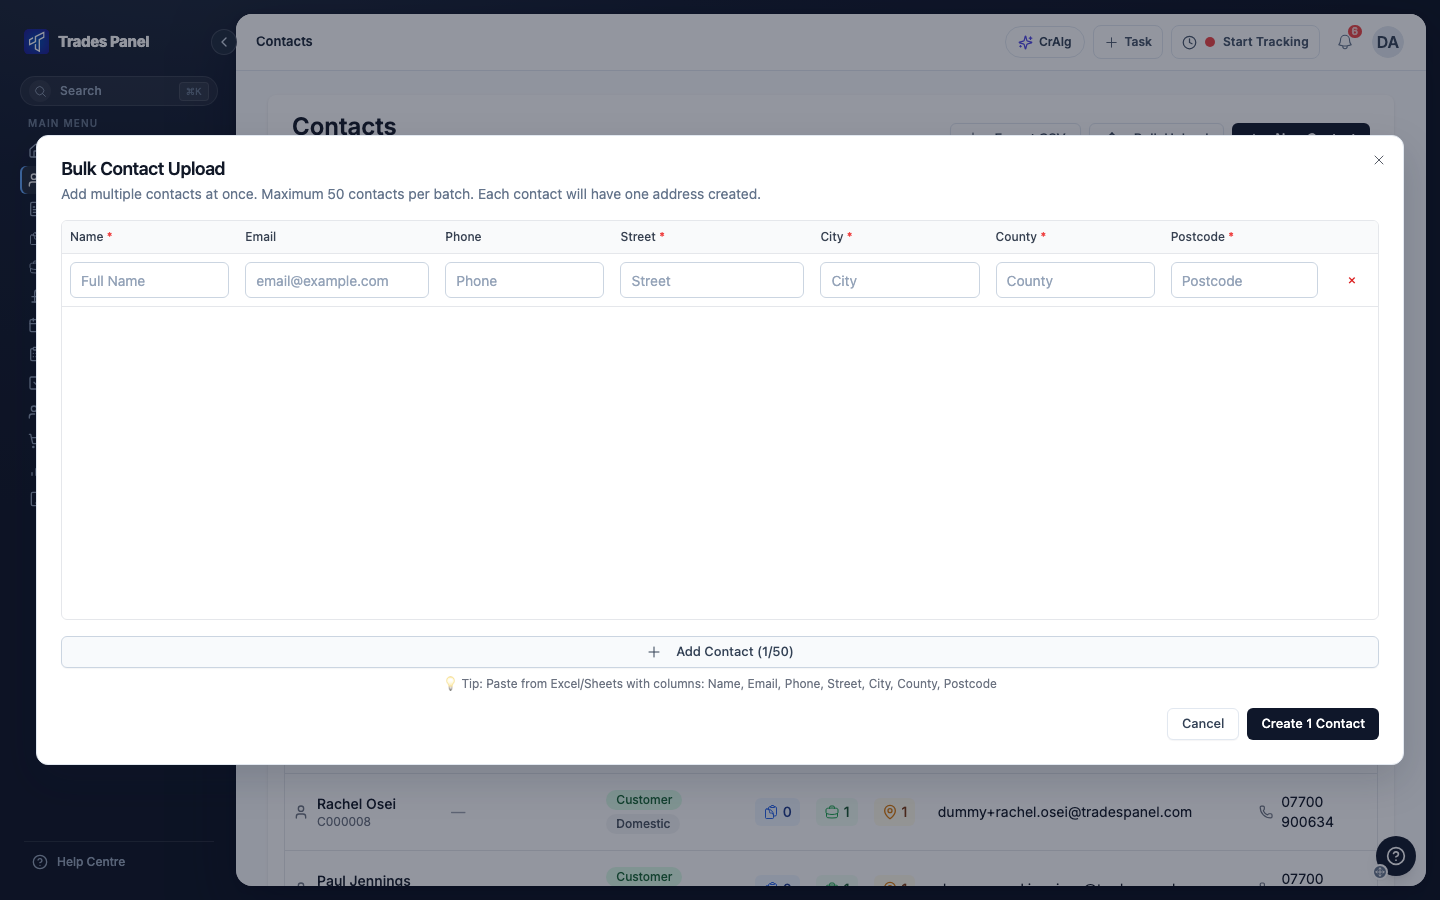
The address columns are optional, even though they are marked with an asterisk.
The contacts are added to your Contacts list as leads. If some rows could not be created, the dialog lists them so you can correct them and try again.
What each row creates
- One contact, with the name, email and phone from the row.
- One address, if any of Street, City, County or Postcode is filled in. A row with no address creates the contact on its own. You can add addresses later from the contact's record.
Each email address must be valid, must appear only once in the batch, and must not already belong to another contact.
Contacts added in bulk are not marked as businesses. To make one a business customer, open it afterwards and turn on Business Customer under Edit Contact Details.
For more than 50 contacts, run a second batch.
Related articles
- Add and manage contacts - adding one contact, and editing it
- Add and manage a contact's addresses - adding addresses afterwards
- Leads and customers - why new contacts show as Lead